Tunk dynamo routing guide
Applies to many other bicycles with internal dynamo routing.
A nice clean installation of dynamo lights and their electric cables is not necessary for a bicycle to work well, but it gives great satisfaction and reliability. This is an area of bicycle assembly where care and patience is needed, but once done well the system should last for years to come. A hasty, messy installation will work, but is often more exposed to rain and corrosion and also runs the risk of getting snagged when tunking through thick underbrush.
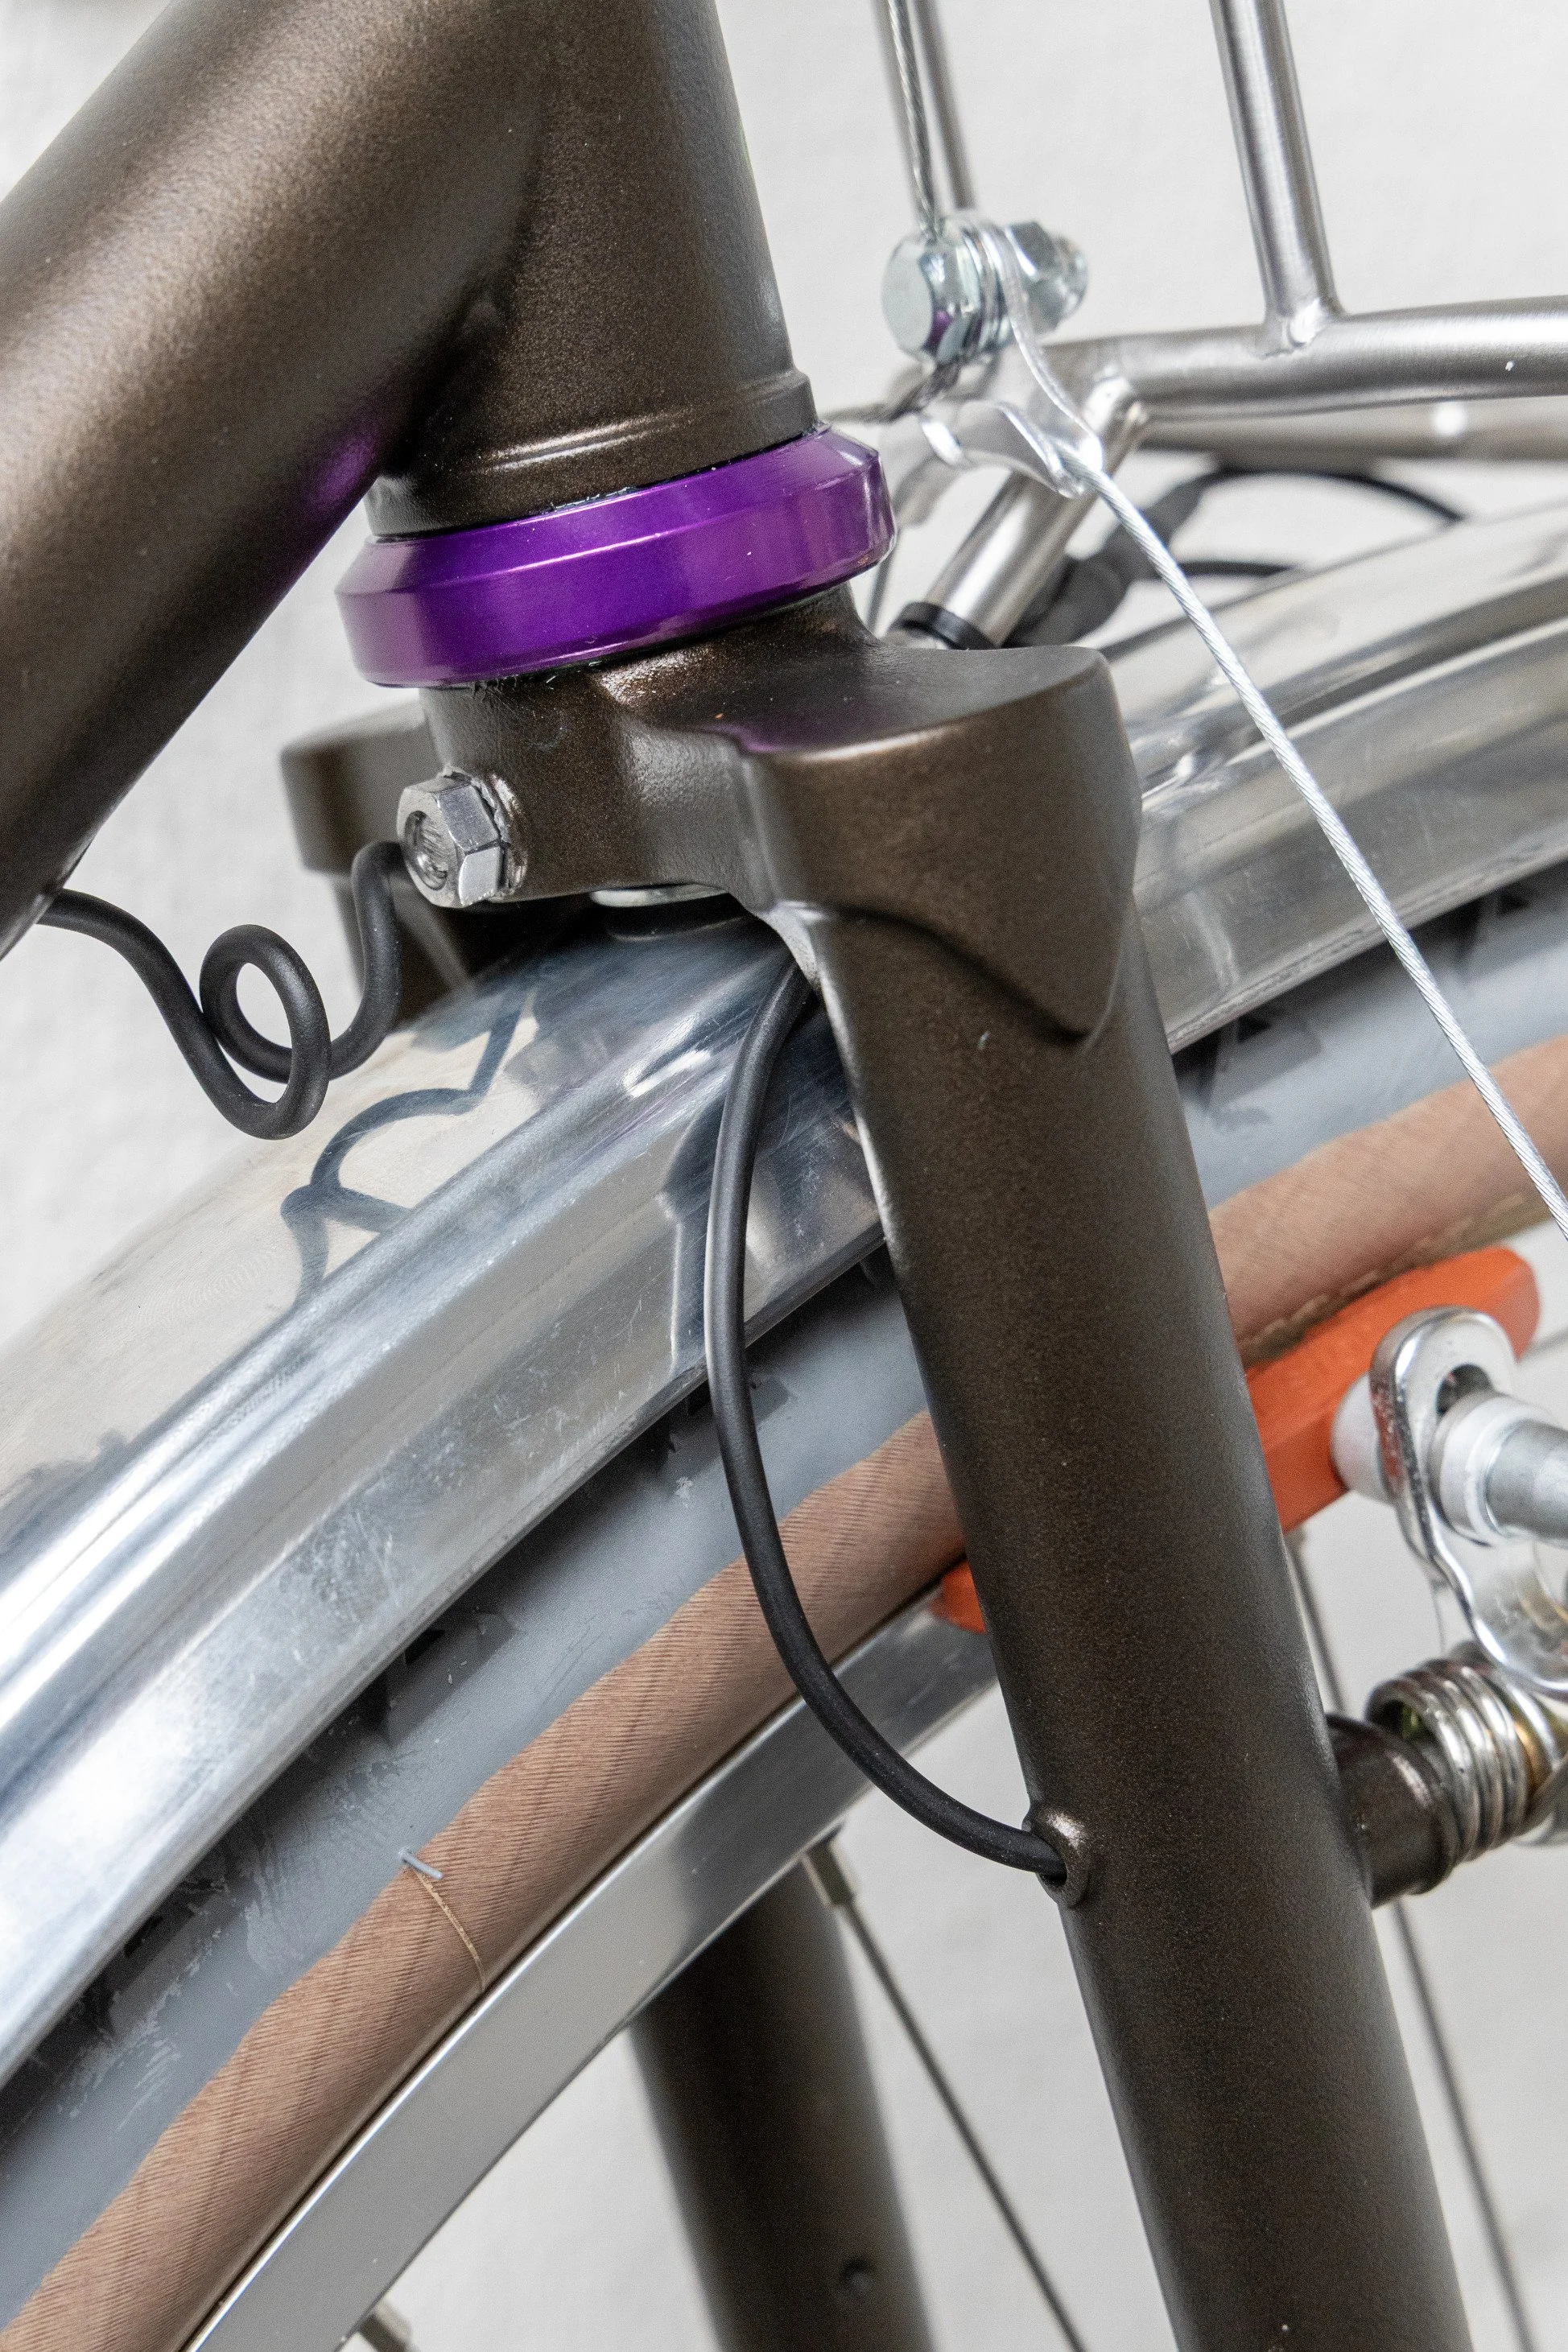
Our Hike-Use frame allows routing the dynamo cables internally inside the front fork and the frame. This makes for a very clean installation, but needs some special tricks to get the cables in place. This guide will show you how to go about it.
We can of course install the cables here as a separate service and you will be spared from reading this article and the job itself. If you have any questions concerning dynamo installation or wiring or anything at all, our email is always open and awaiting your inquiries.
The basic ‘string&vacuum’ method for routing internal cables
The idea is to pull the helping string through the fork or frame with the help of the vacuum cleaner, and then use the string to pull the cable itself through. This procedure is easiest to do before building up the bike, as it's easier to rotate the fork and bare frame around into the wanted position. Having a good bike repair stand helps but is not absolutely necessary.
What you will need:
A piece of helping string, a little thicker than basic sewing thread optimally. A tiny weight (piece of tin solder wire for example) attached to one end is even better.
Vacuum cleaner, possibly a funnel or similar adapter for it
Dynamo cable itself
Optional:
Lubricant
Tweezers or needle-nose pliers
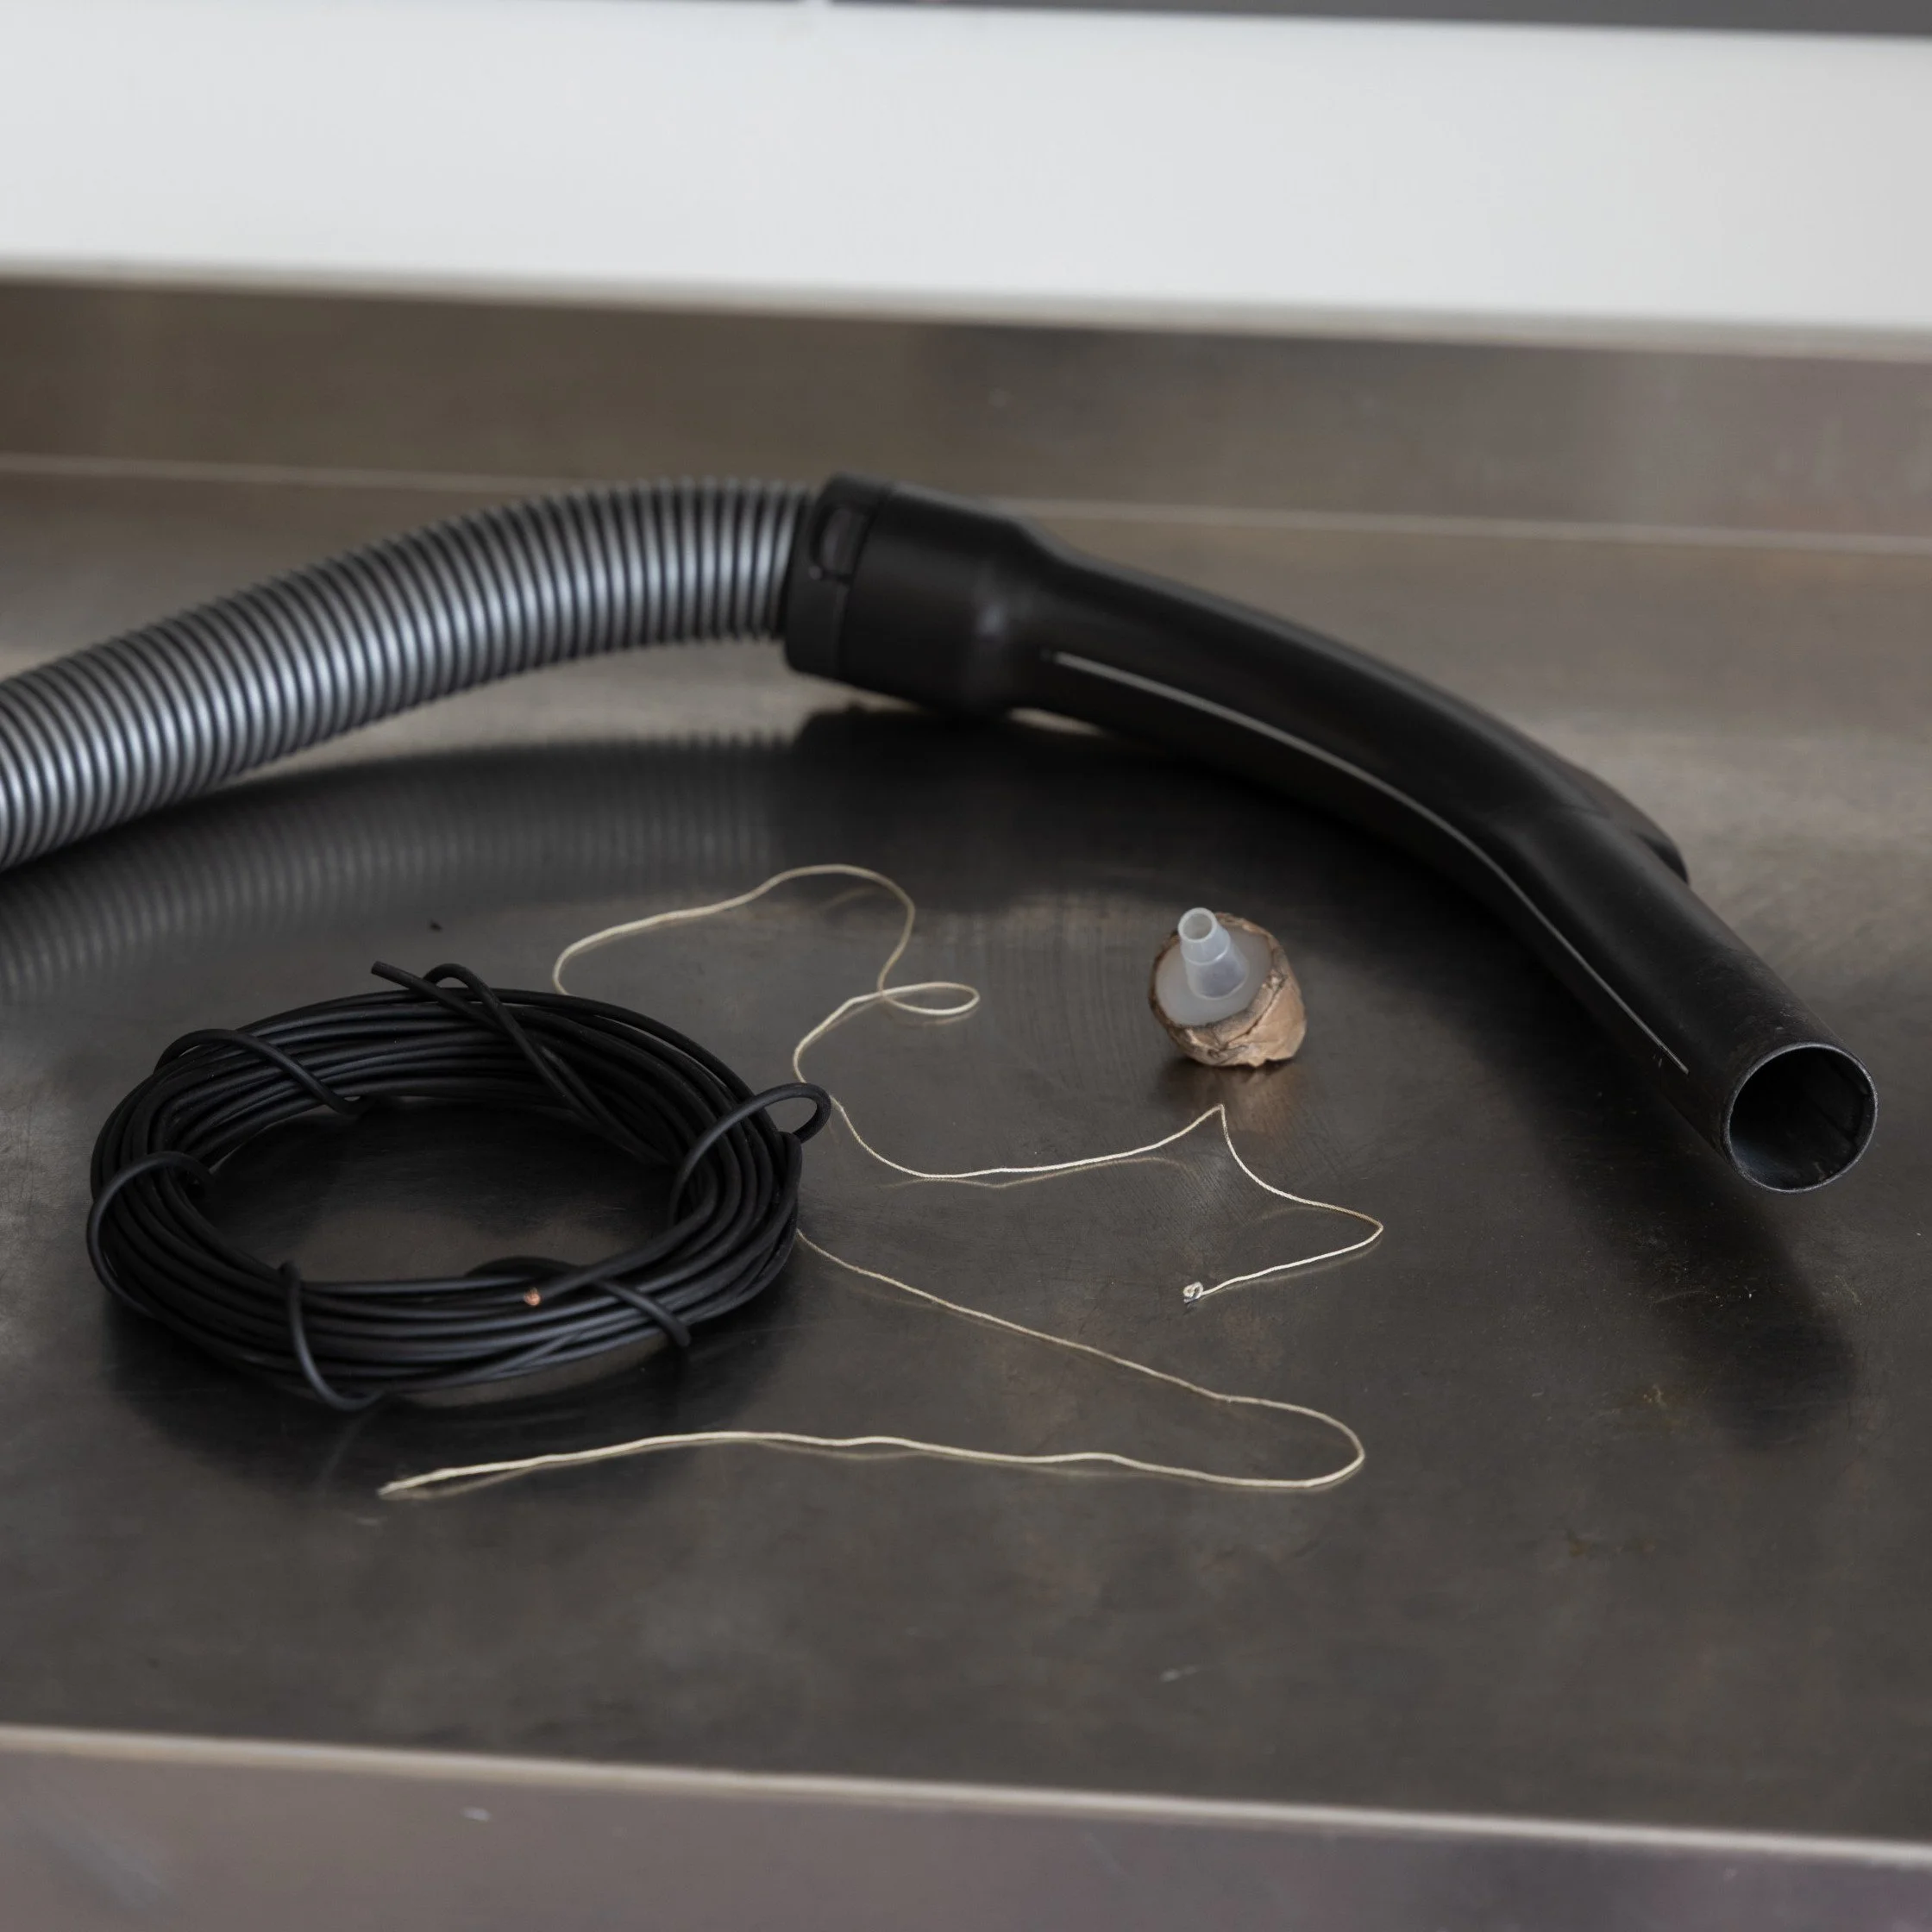
Coaxial cable, our special string with piece of tin solder attached. Funnel for vacuum
First, imagine how the string wants to “fall in place” inside the tube and orient the frame/fork in such a way that gravity will guide the string near the exit hole once it's inside. Tying a small weight on the string helps it fall into the tube.
Now push the string in from the entrance hole as far and as close to the exit hole as possible. Tie the string somewhere near the entrance hole so you have both hands free but won’t end up pulling the whole string into the vacuum cleaner! Or you can hold the end of the string with your teeth.
For the vacuum cleaner, you want to use some kind of an adapter, piece of inner tube, plastic funnel or something like that to make the ‘mouth’ of the vacuum smaller and to fit it better onto the exit hole to increase pulling pressure. You can also cover the string entrance hole partially or completely with your finger to increase the pressure. We’ve noticed that putting your finger on and off the entrance hole multiple times to change the pressure and pulling and pushing the string back and forth tends to help.
Eventually this should make the string come out the other end, pulled by the vacuum cleaner. If it doesn’t want to come, make sure the string is inserted far enough, and rotate the frame in such a way to make the string fall near the hole with help of gravity. Try a couple of different positions and pull out and re-insert the string a couple of times. This might take some trial and error.
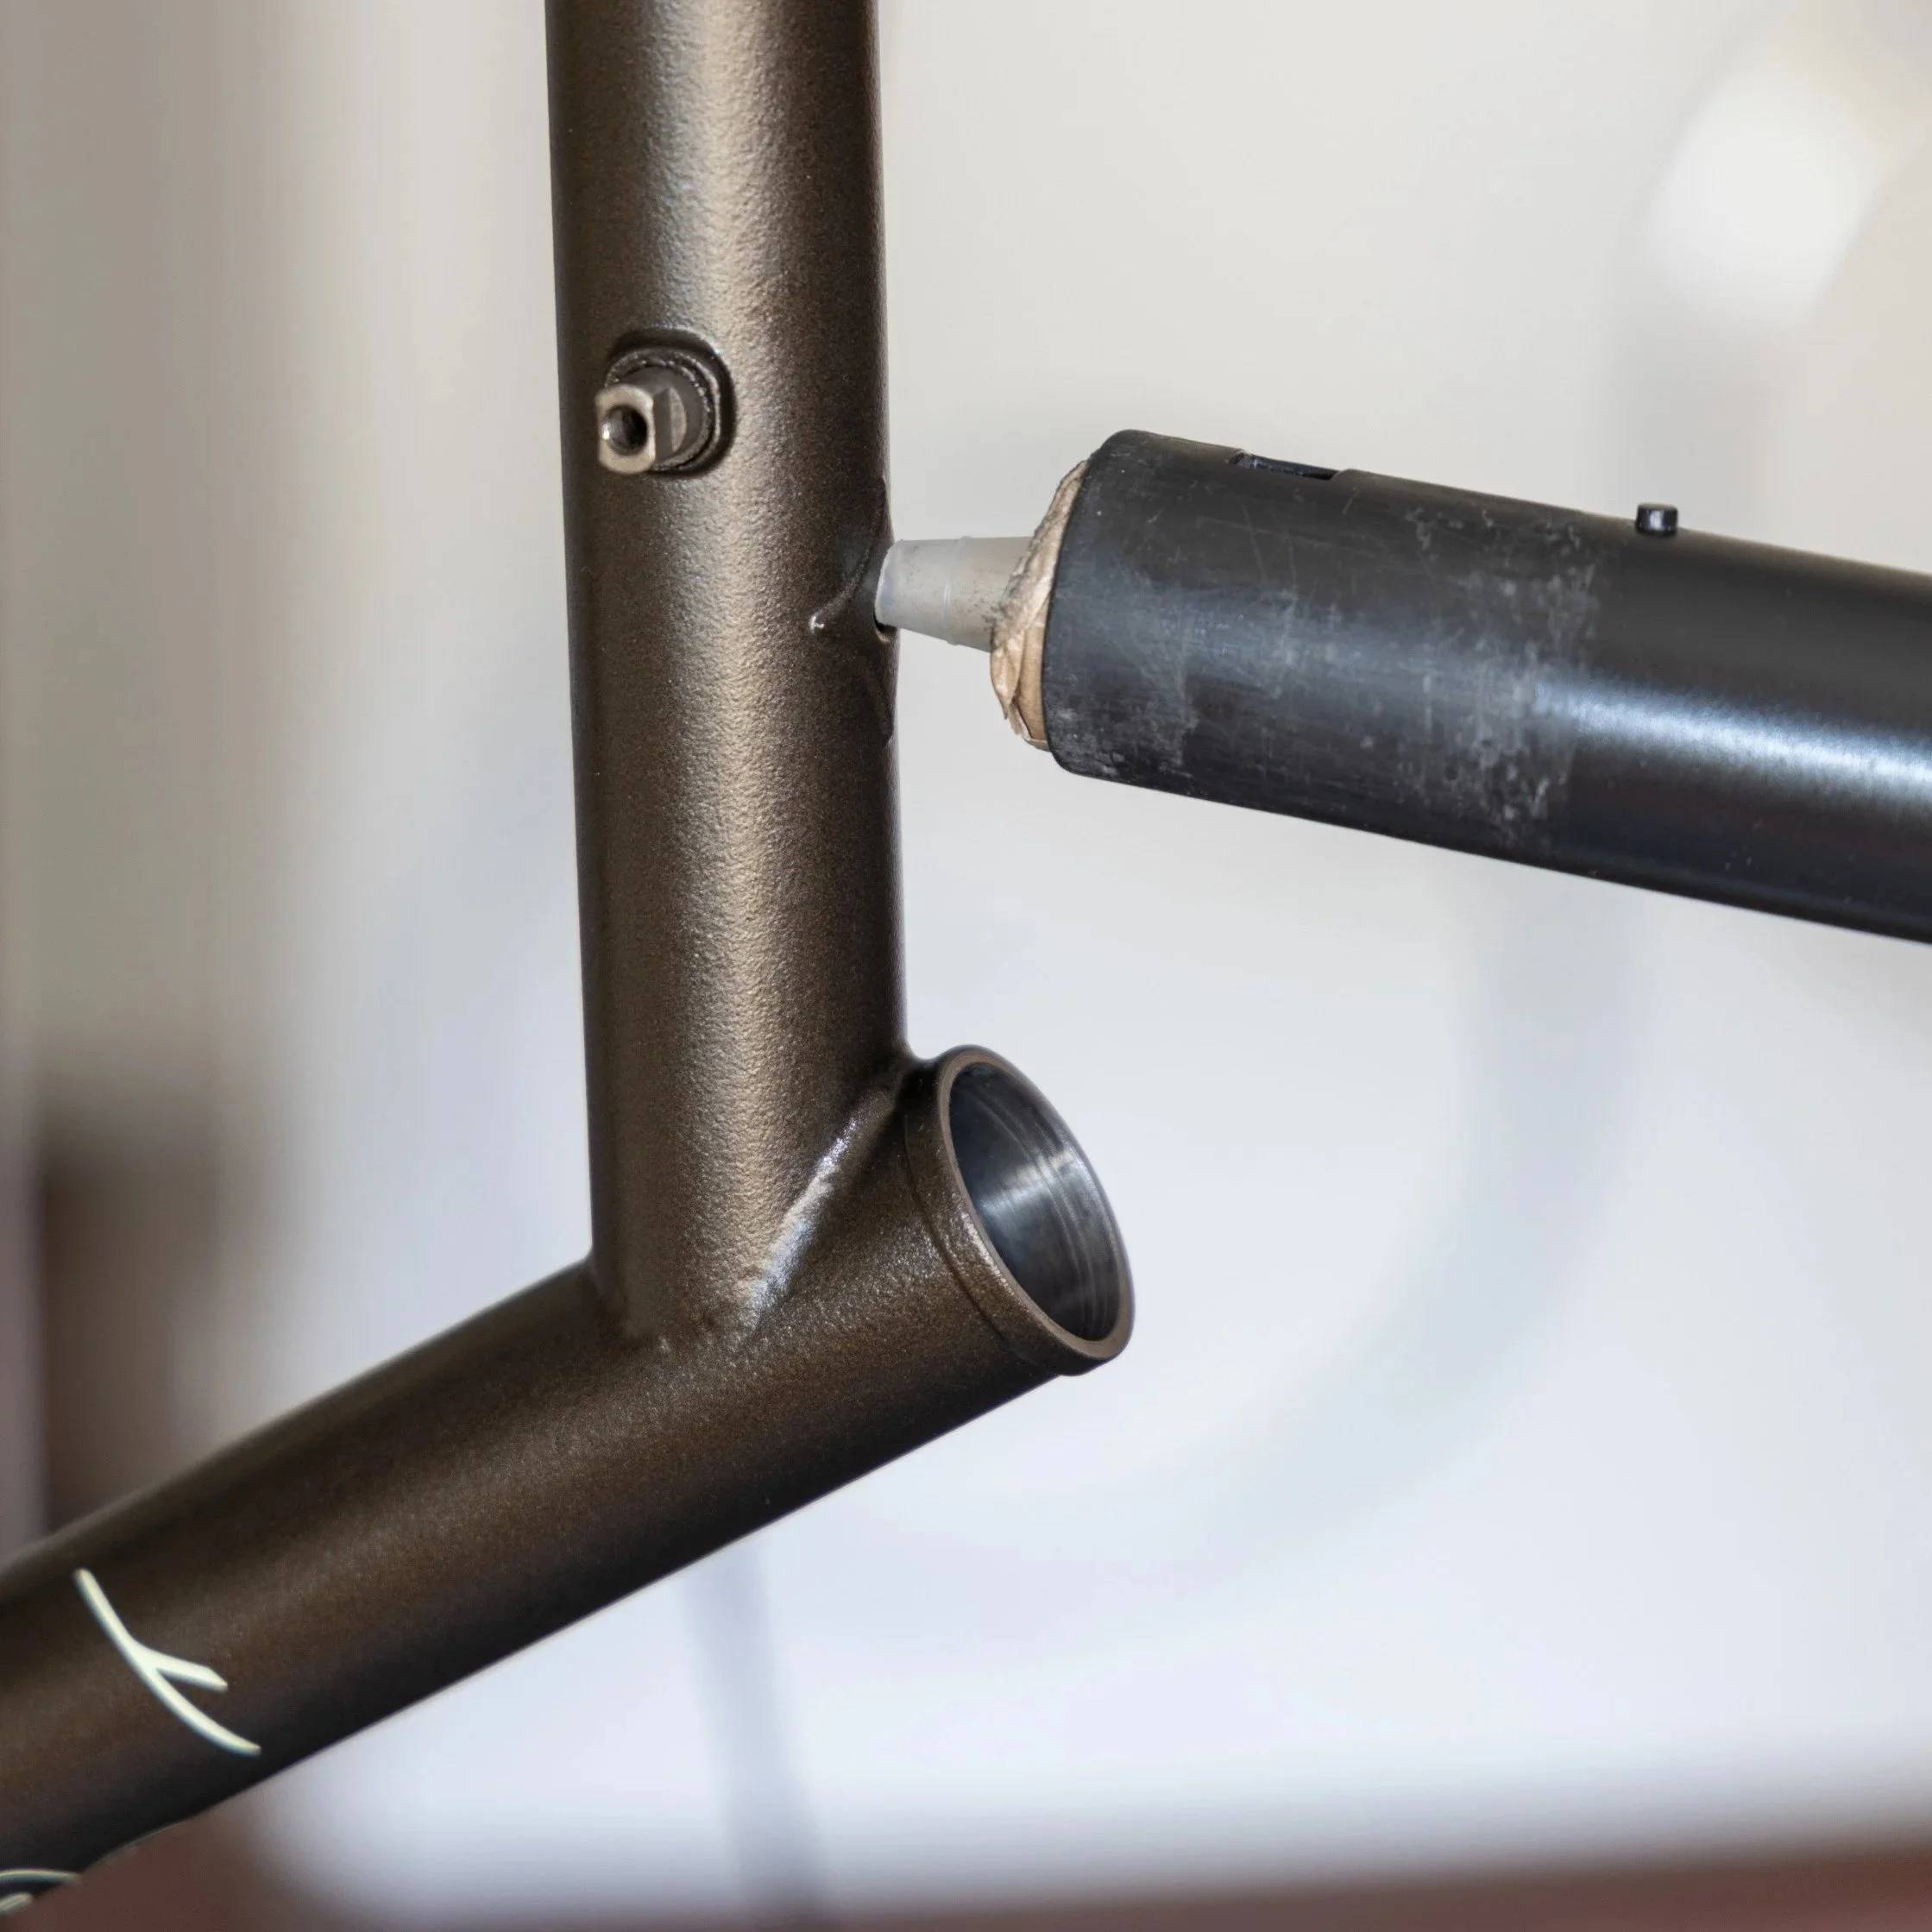
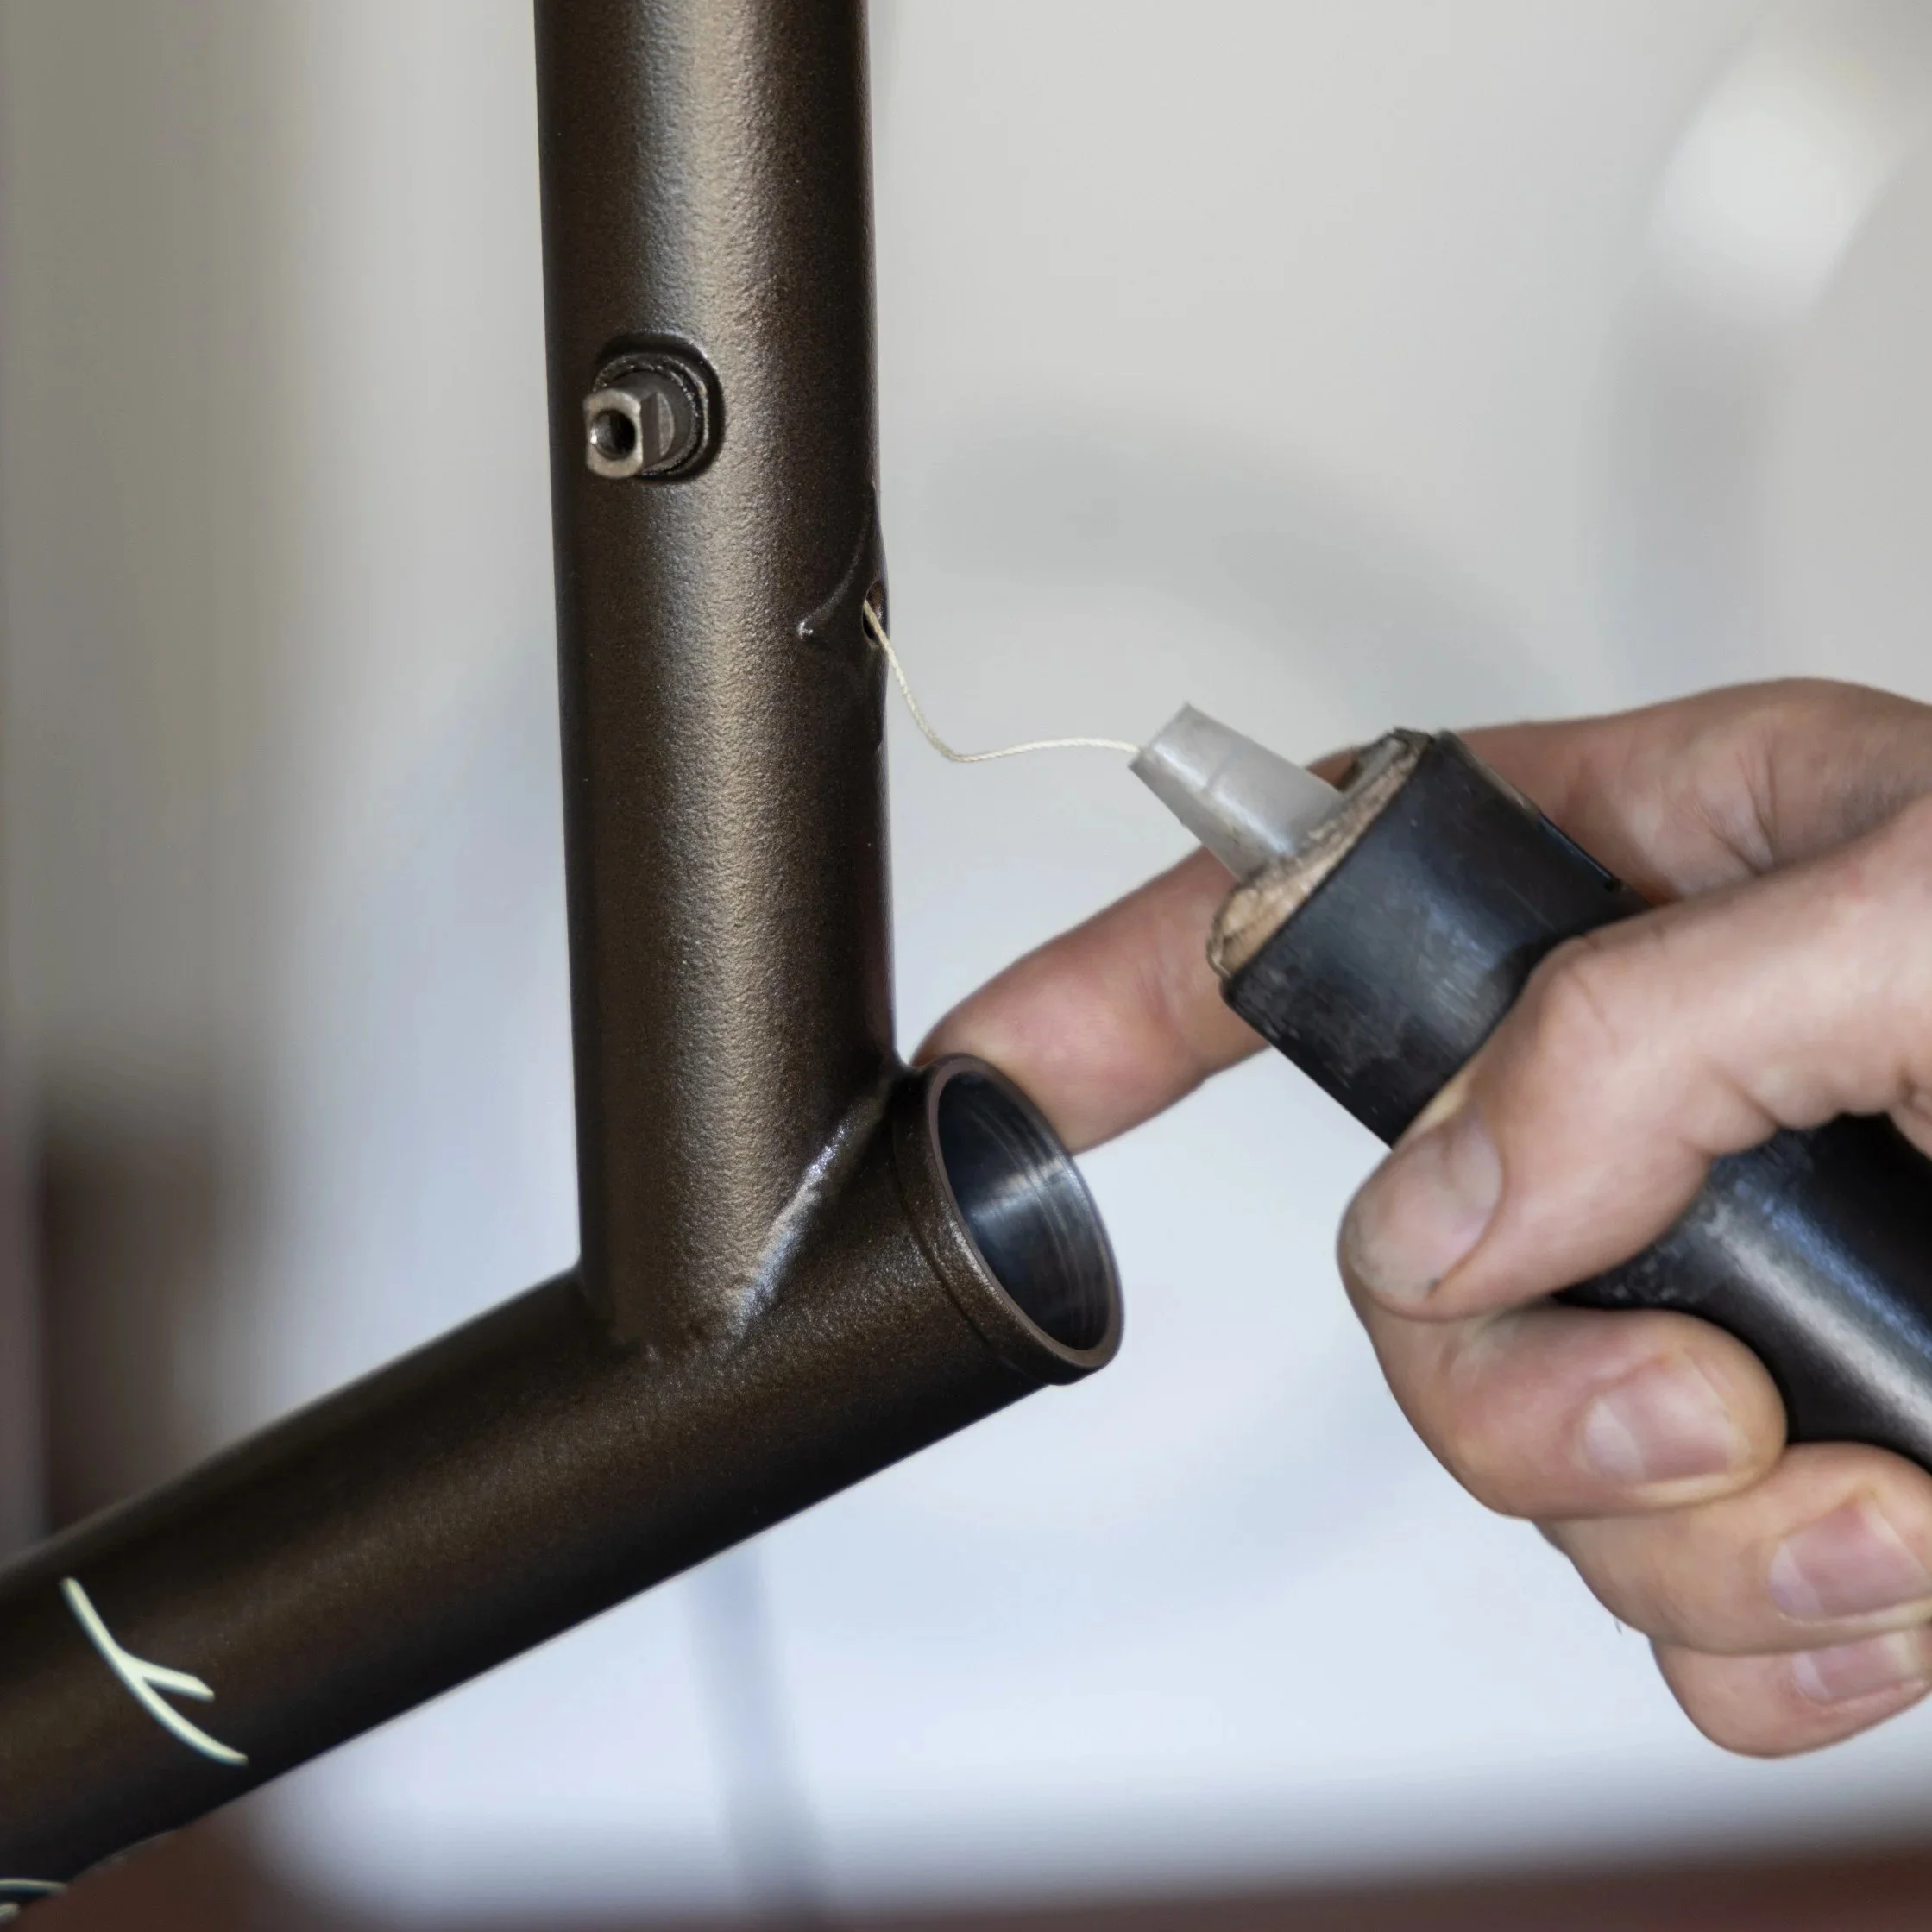
Now that you have the string through, figure out which hole it is easier to get the dynamo cable out of. Meaning you should insert the cable from the more difficult end (where the hole is smaller or at an angle). If your cable has a connector attached make sure that that comes to the correct location, having the hub connector near the fork crown isn’t going to work!
Strip the cable a little bit, and fold the copper wires. If using coaxial cable, cut off the insulated inner wire, to make the end thinner and easier to get through the holes. It’s quite annoying to have the cable all the way in, but having the end not fitting through the exit hole, and you having to start all over again.
Now tie the end of the string onto these folded copper wires. Be sure to make this connection of string and cable as small as possible, so it doesnt get stuck inside the frame or just before the exit hole. But it should also be strong enough to not come undone when you’re pulling the cable throught the exit hole.
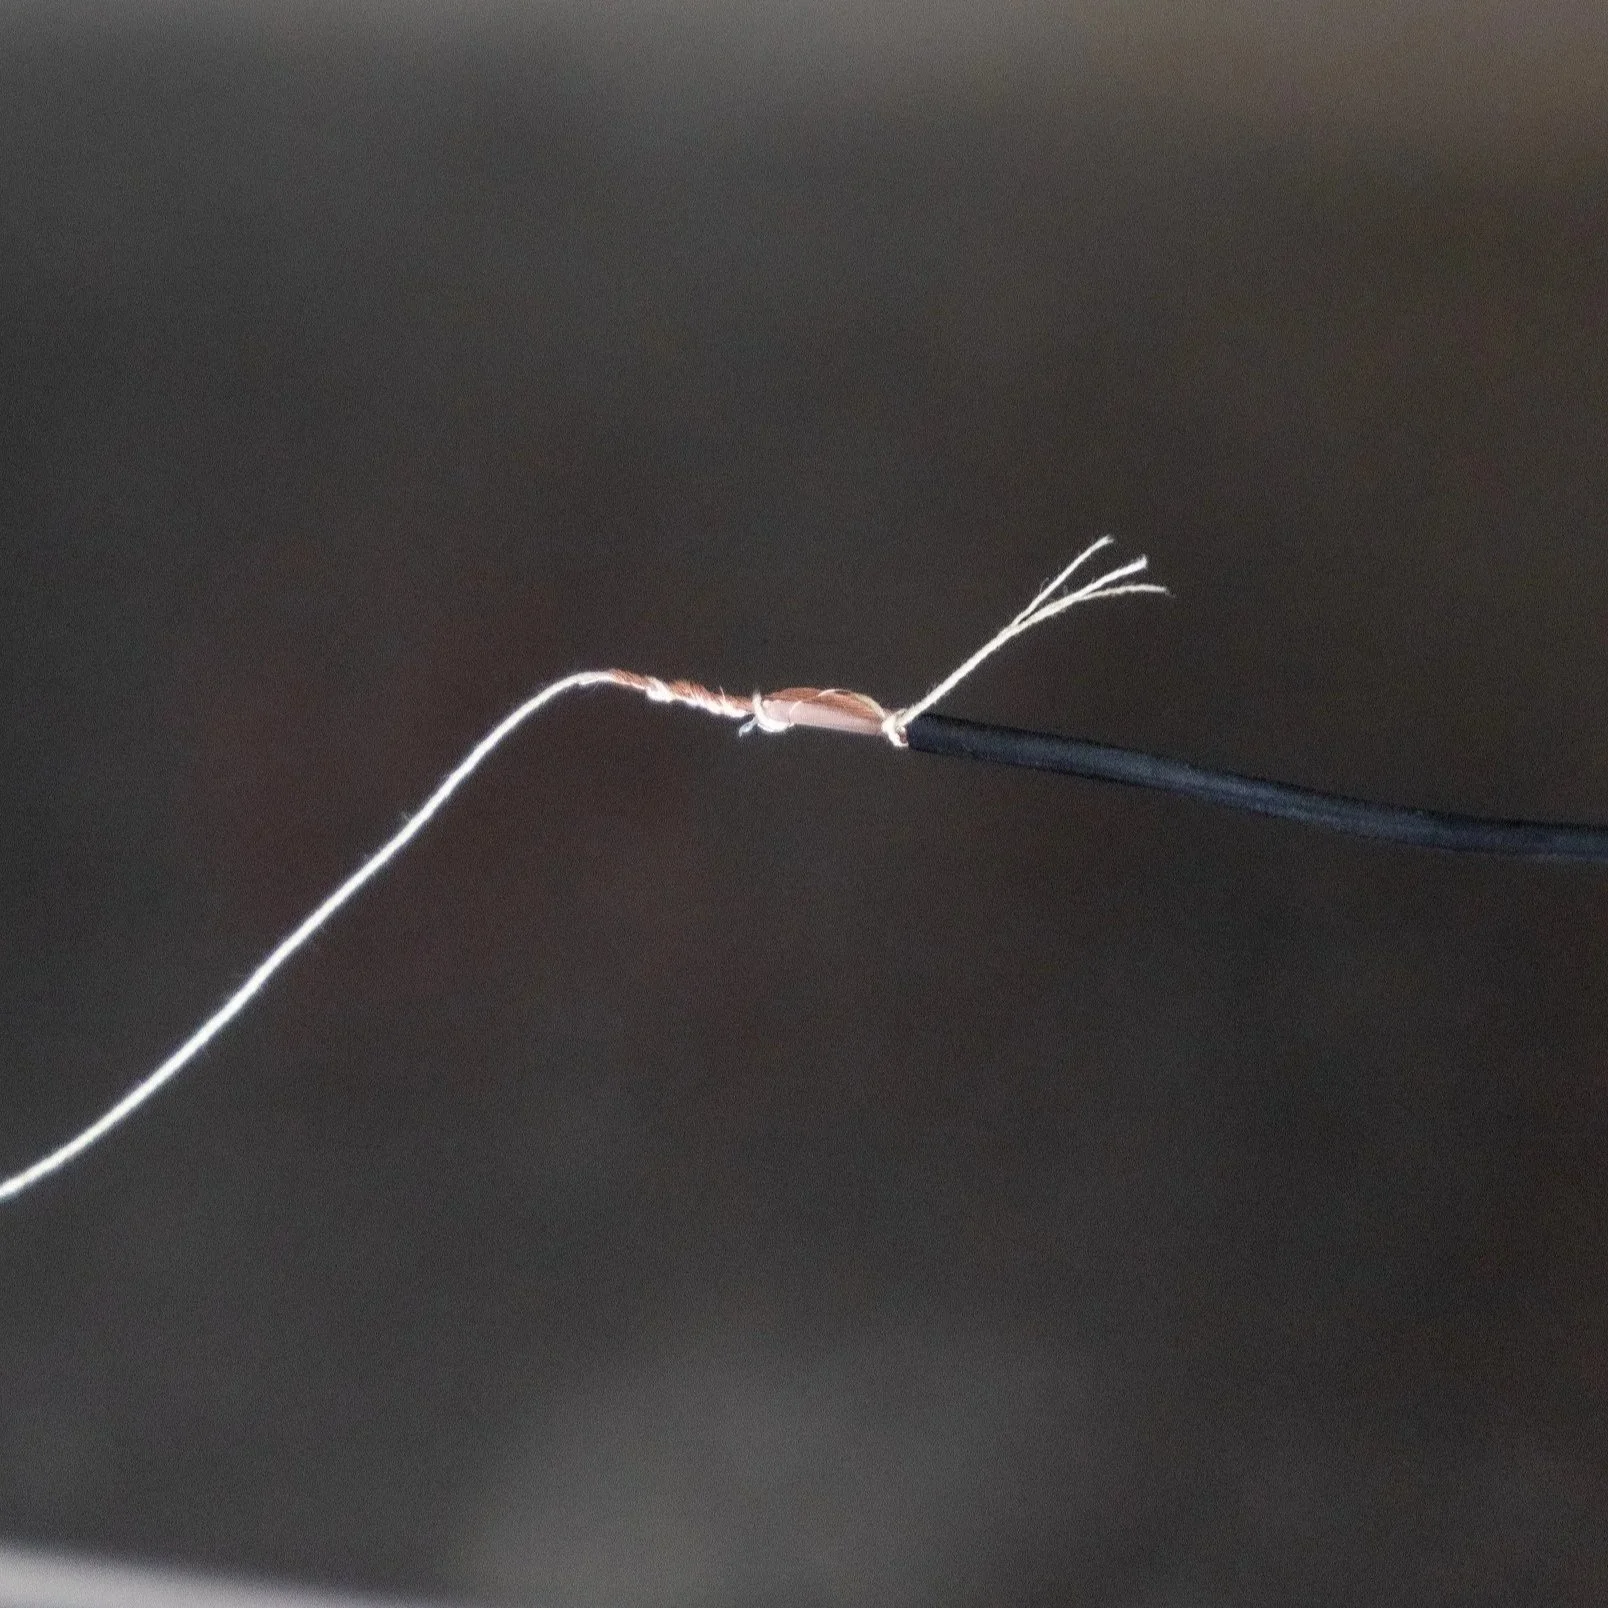
String attached to coaxial cable
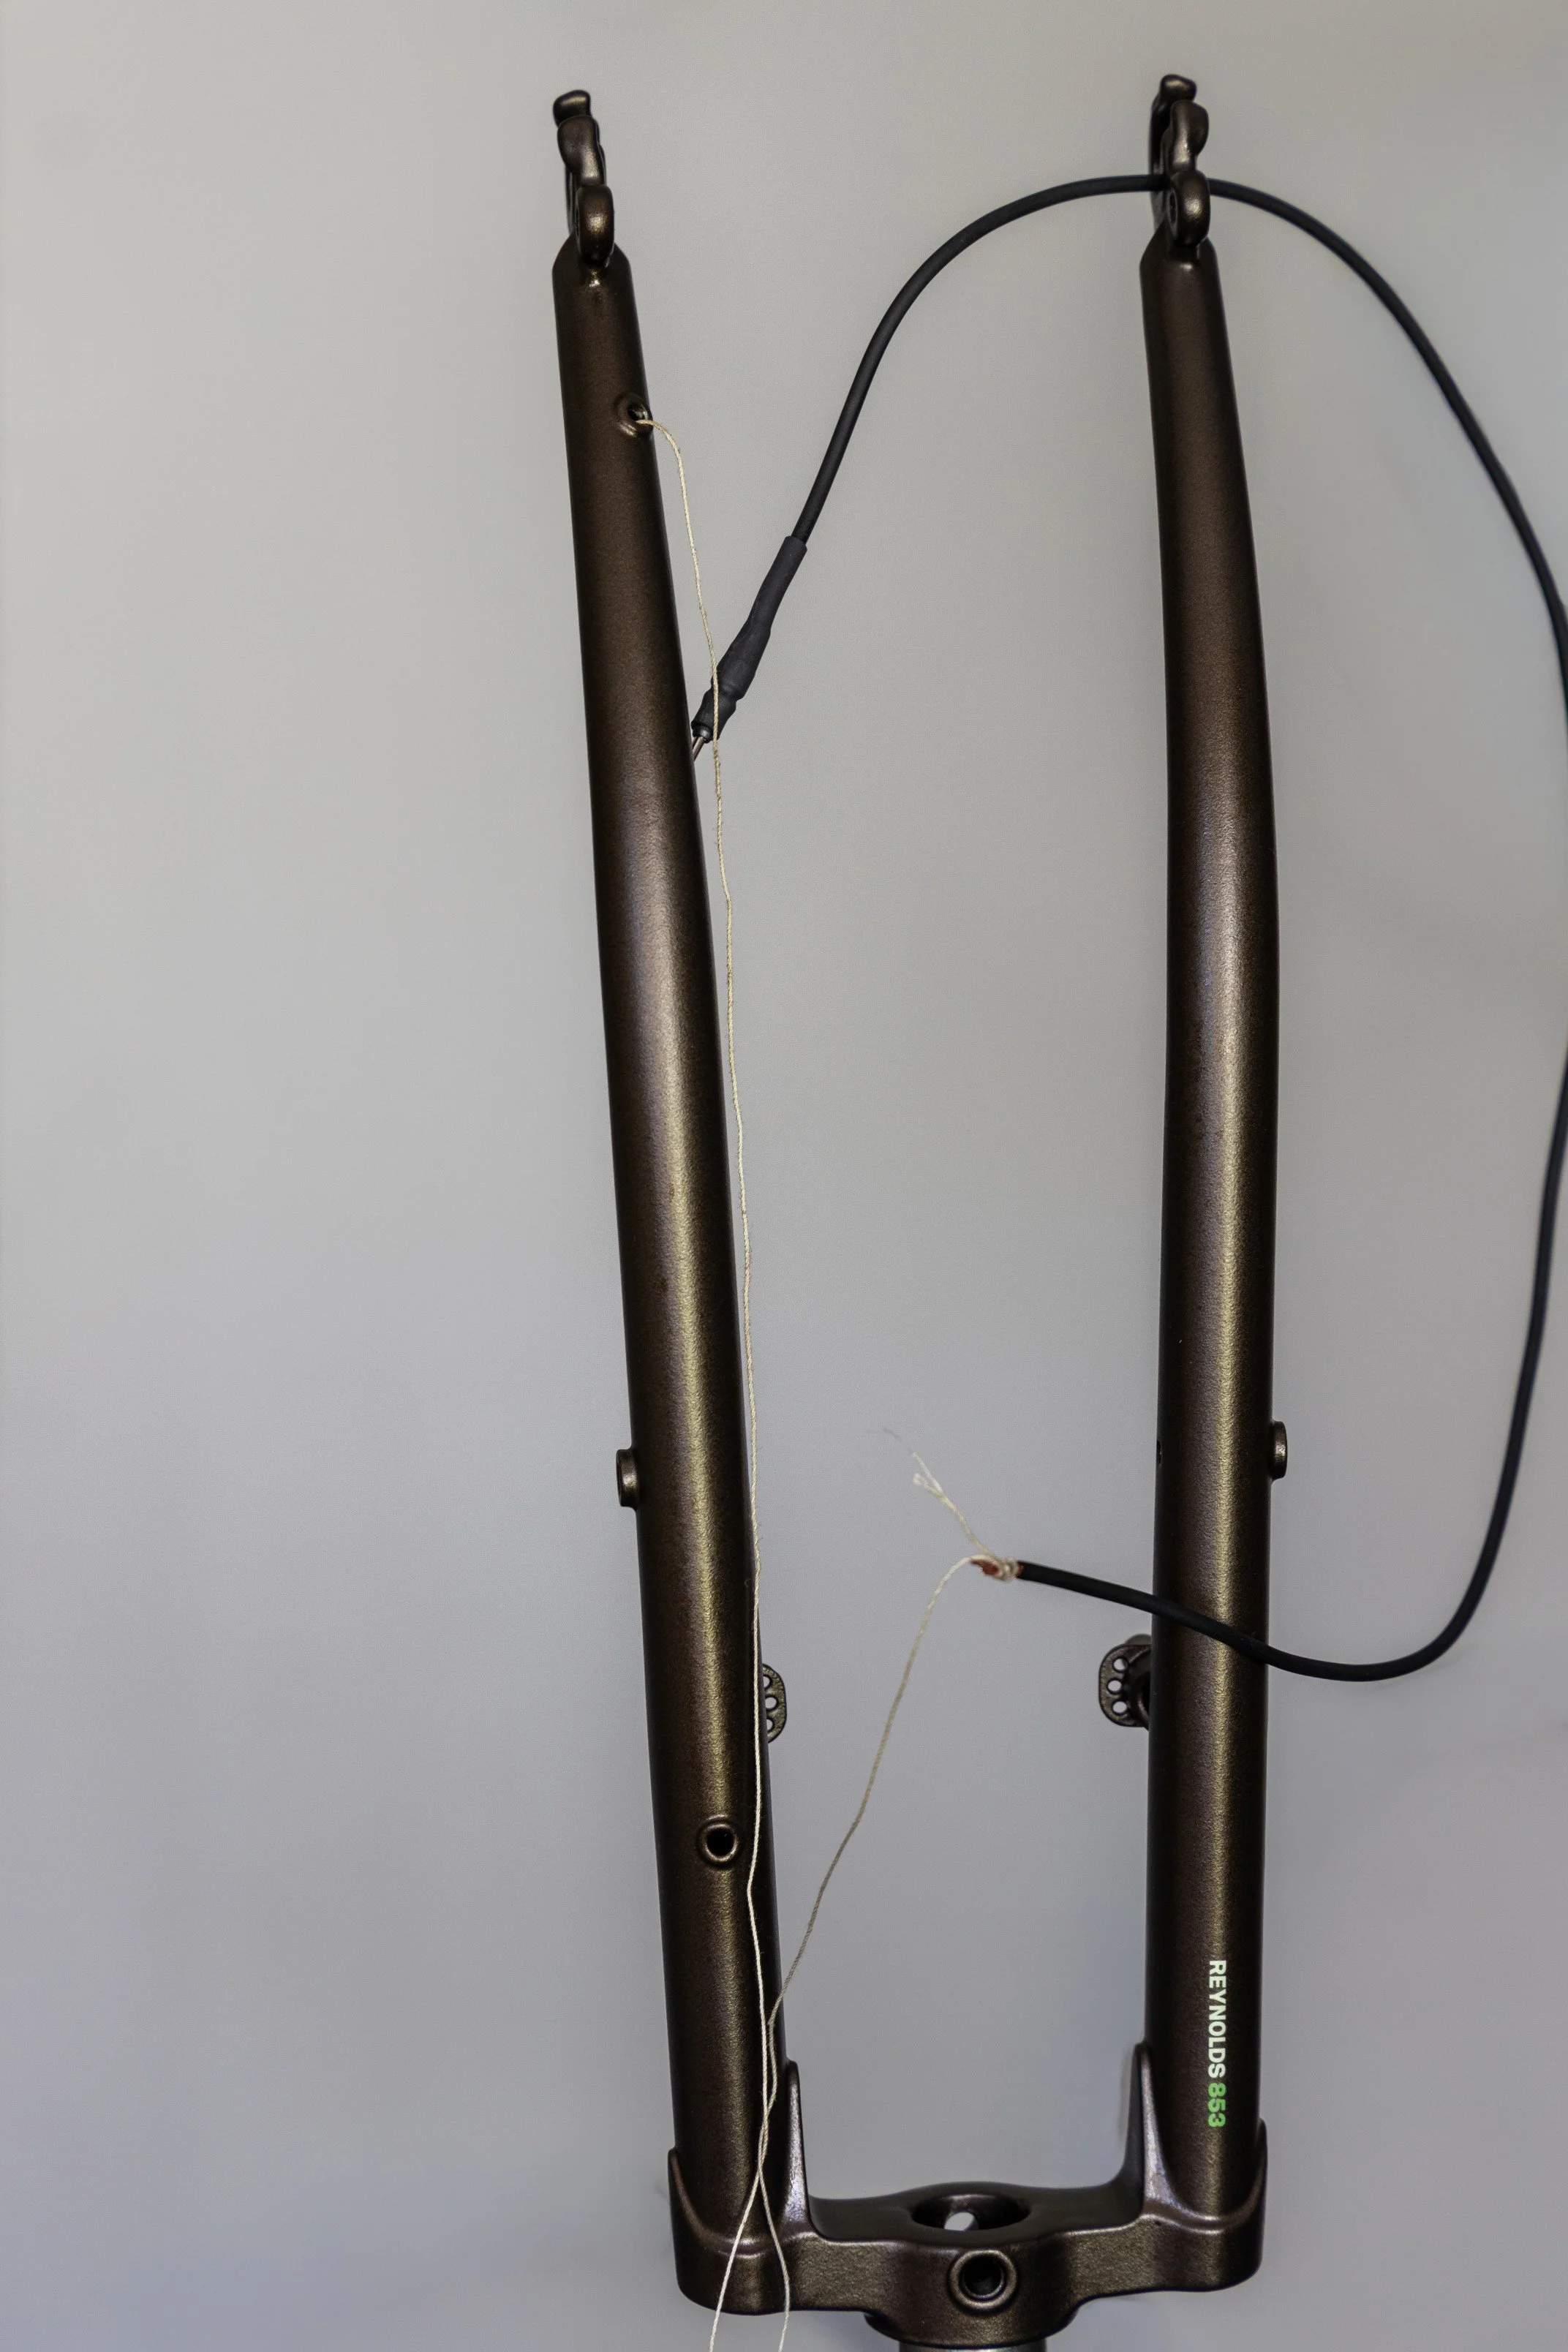
The cable can be attached to the string before or after the vacuuming
Especially when routing through the front fork, oil or silicone coat the cable to make it pass through easier. The cable sometimes likes to get stuck around the lowrider mounts mid-way the fork or at the exit.
Now start pushing the cable gently into the tube, while pulling on the string at the same time. Be extra careful when the cable is close to the exit hole, not to pull the string off the cable at this critical moment.
Voilá! The cable should be easy enough to pull through with the help of the string. Sometimes you might need tweezers or small pliers to help pull the end of the dynamo cable out of the exit hole. Now pull enough cable out and maybe secure it somehow so you don’t accidentally pull it out from the other end.
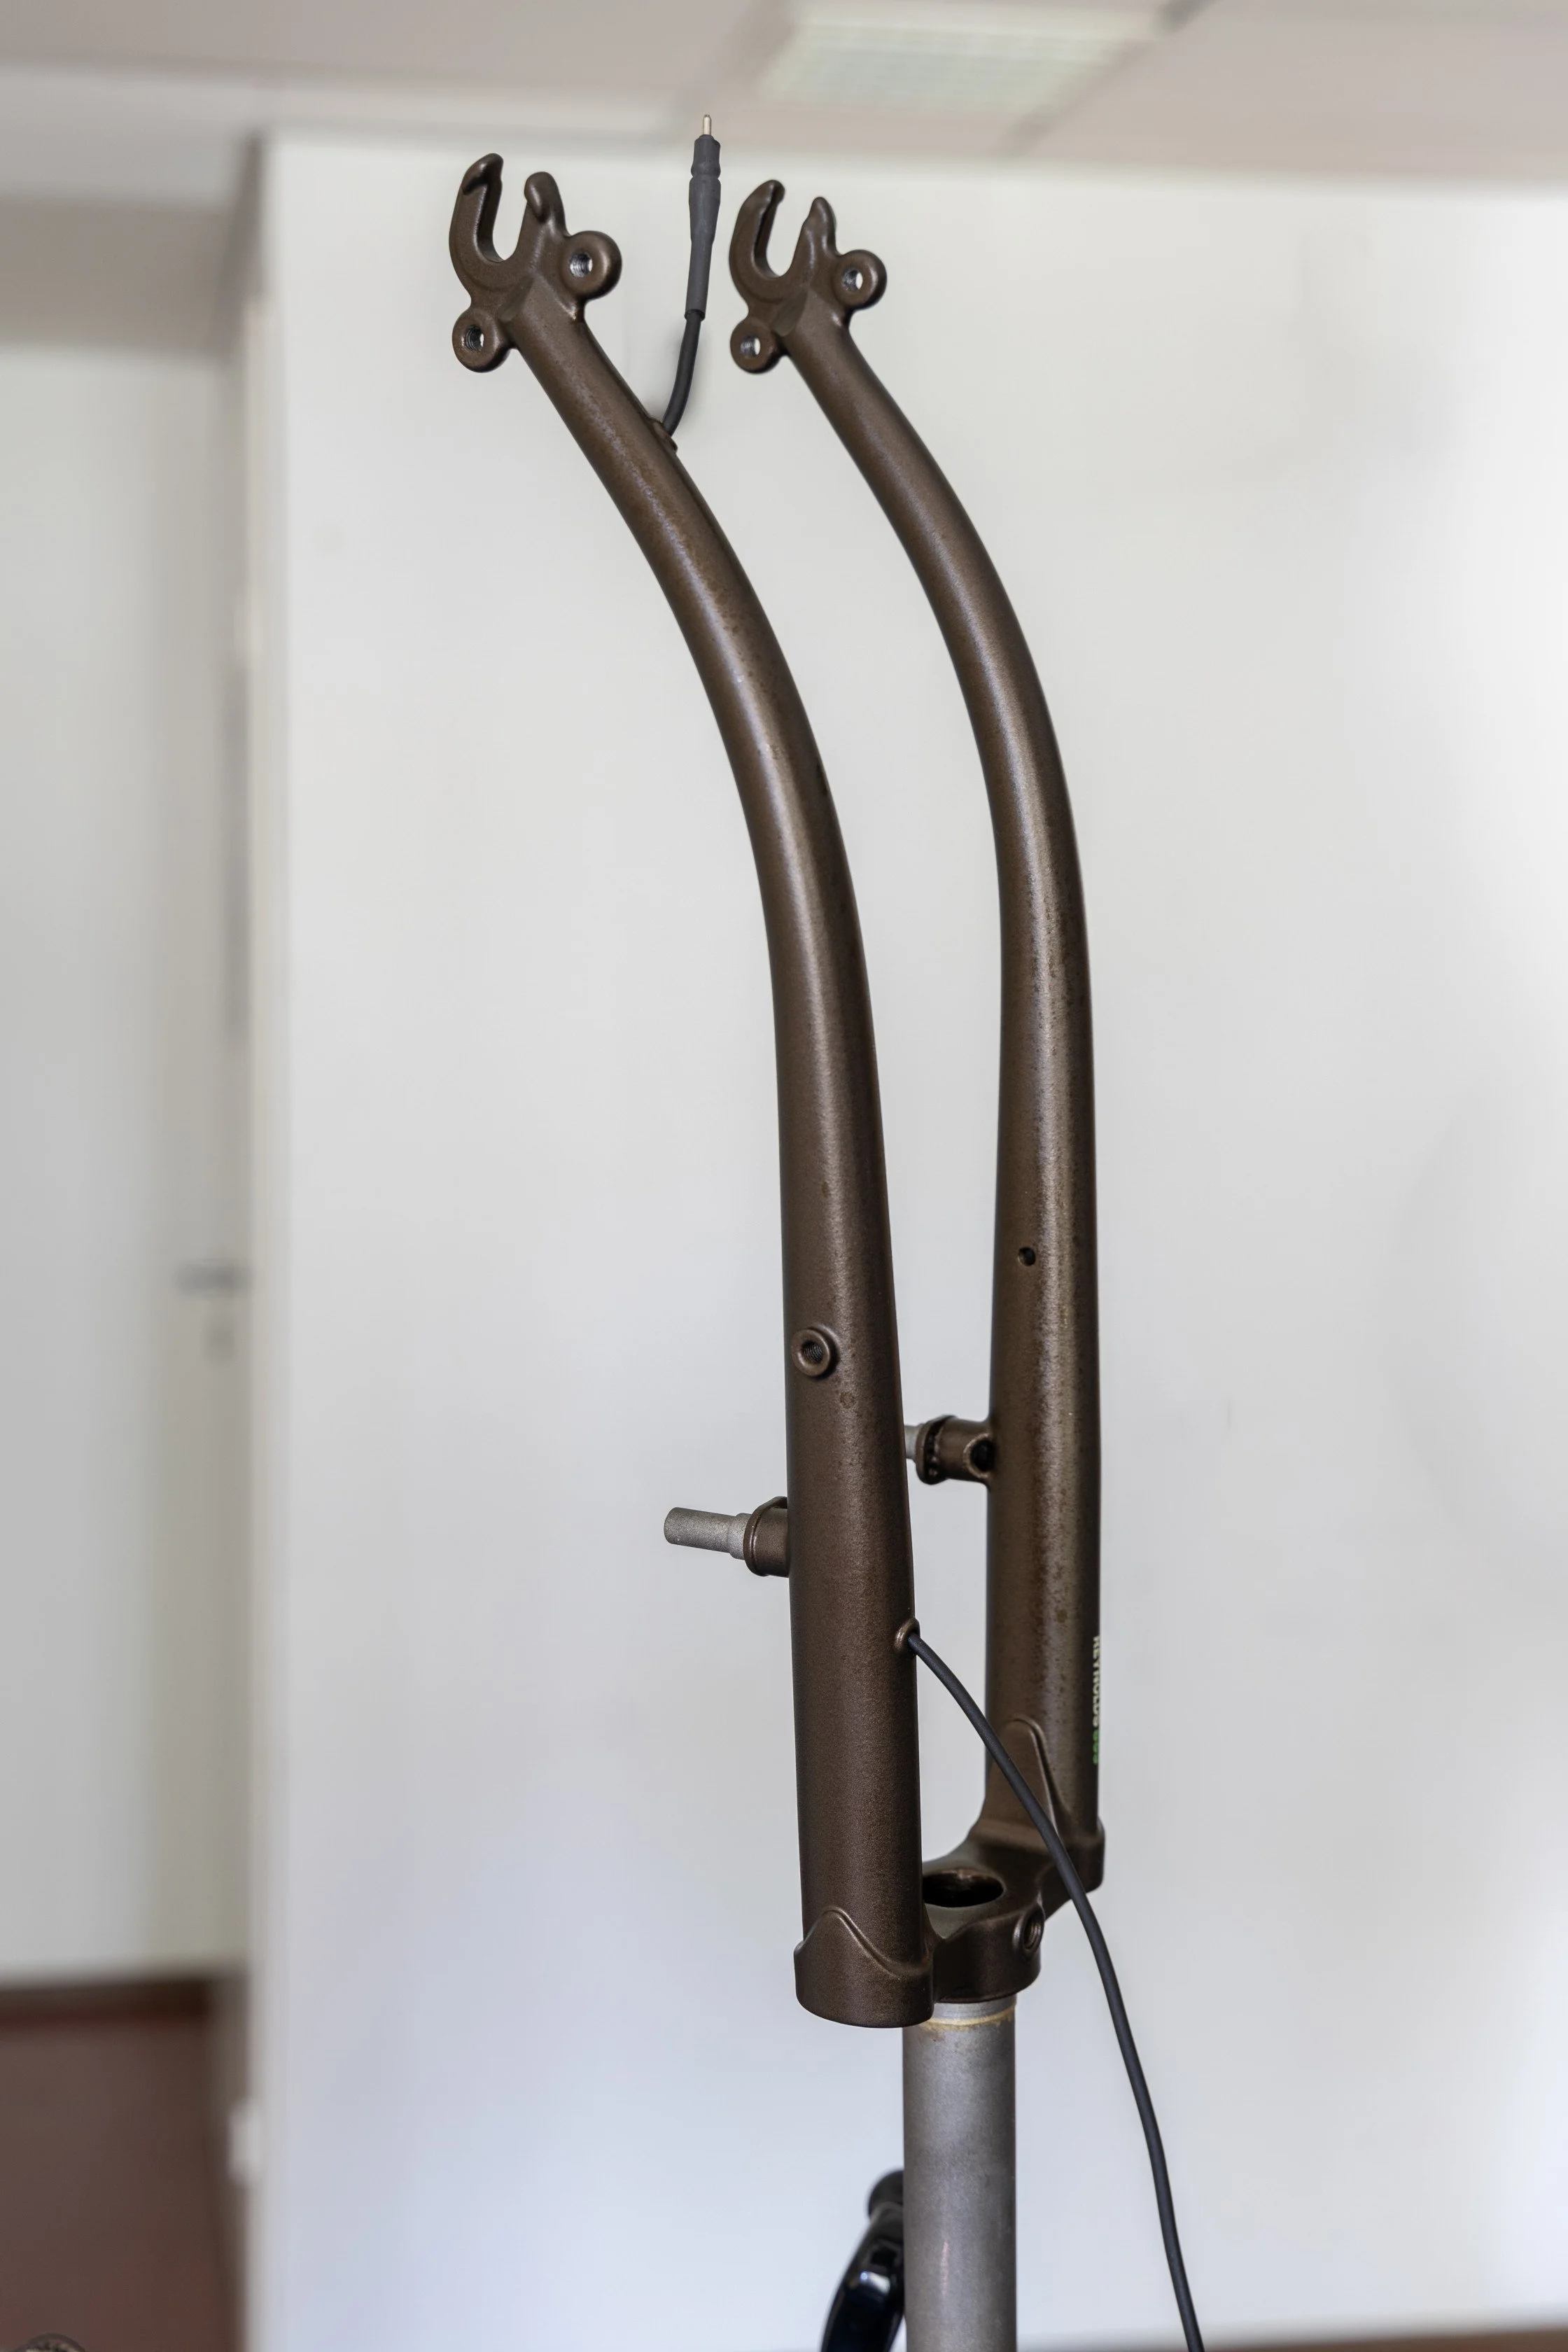
Front cable in place. Note the SON male connector near the hub area, the “coax adapter” fits onto this
General notes on cables and connectors
We would recommend using the SON coaxial cable (link to the product in our webshop) when possible. It just seems stronger and prettier than the more standard two-wire flat ones. But both work completely OK. The SON cable works best with their own connectors, which are more expensive, and a bit more challenging to install and require soldering, whereas normal ‘spade’ connectors can be crimped with just pliers. But you will thank yourself in the future if you do the best possible job with the best materials the first time around!
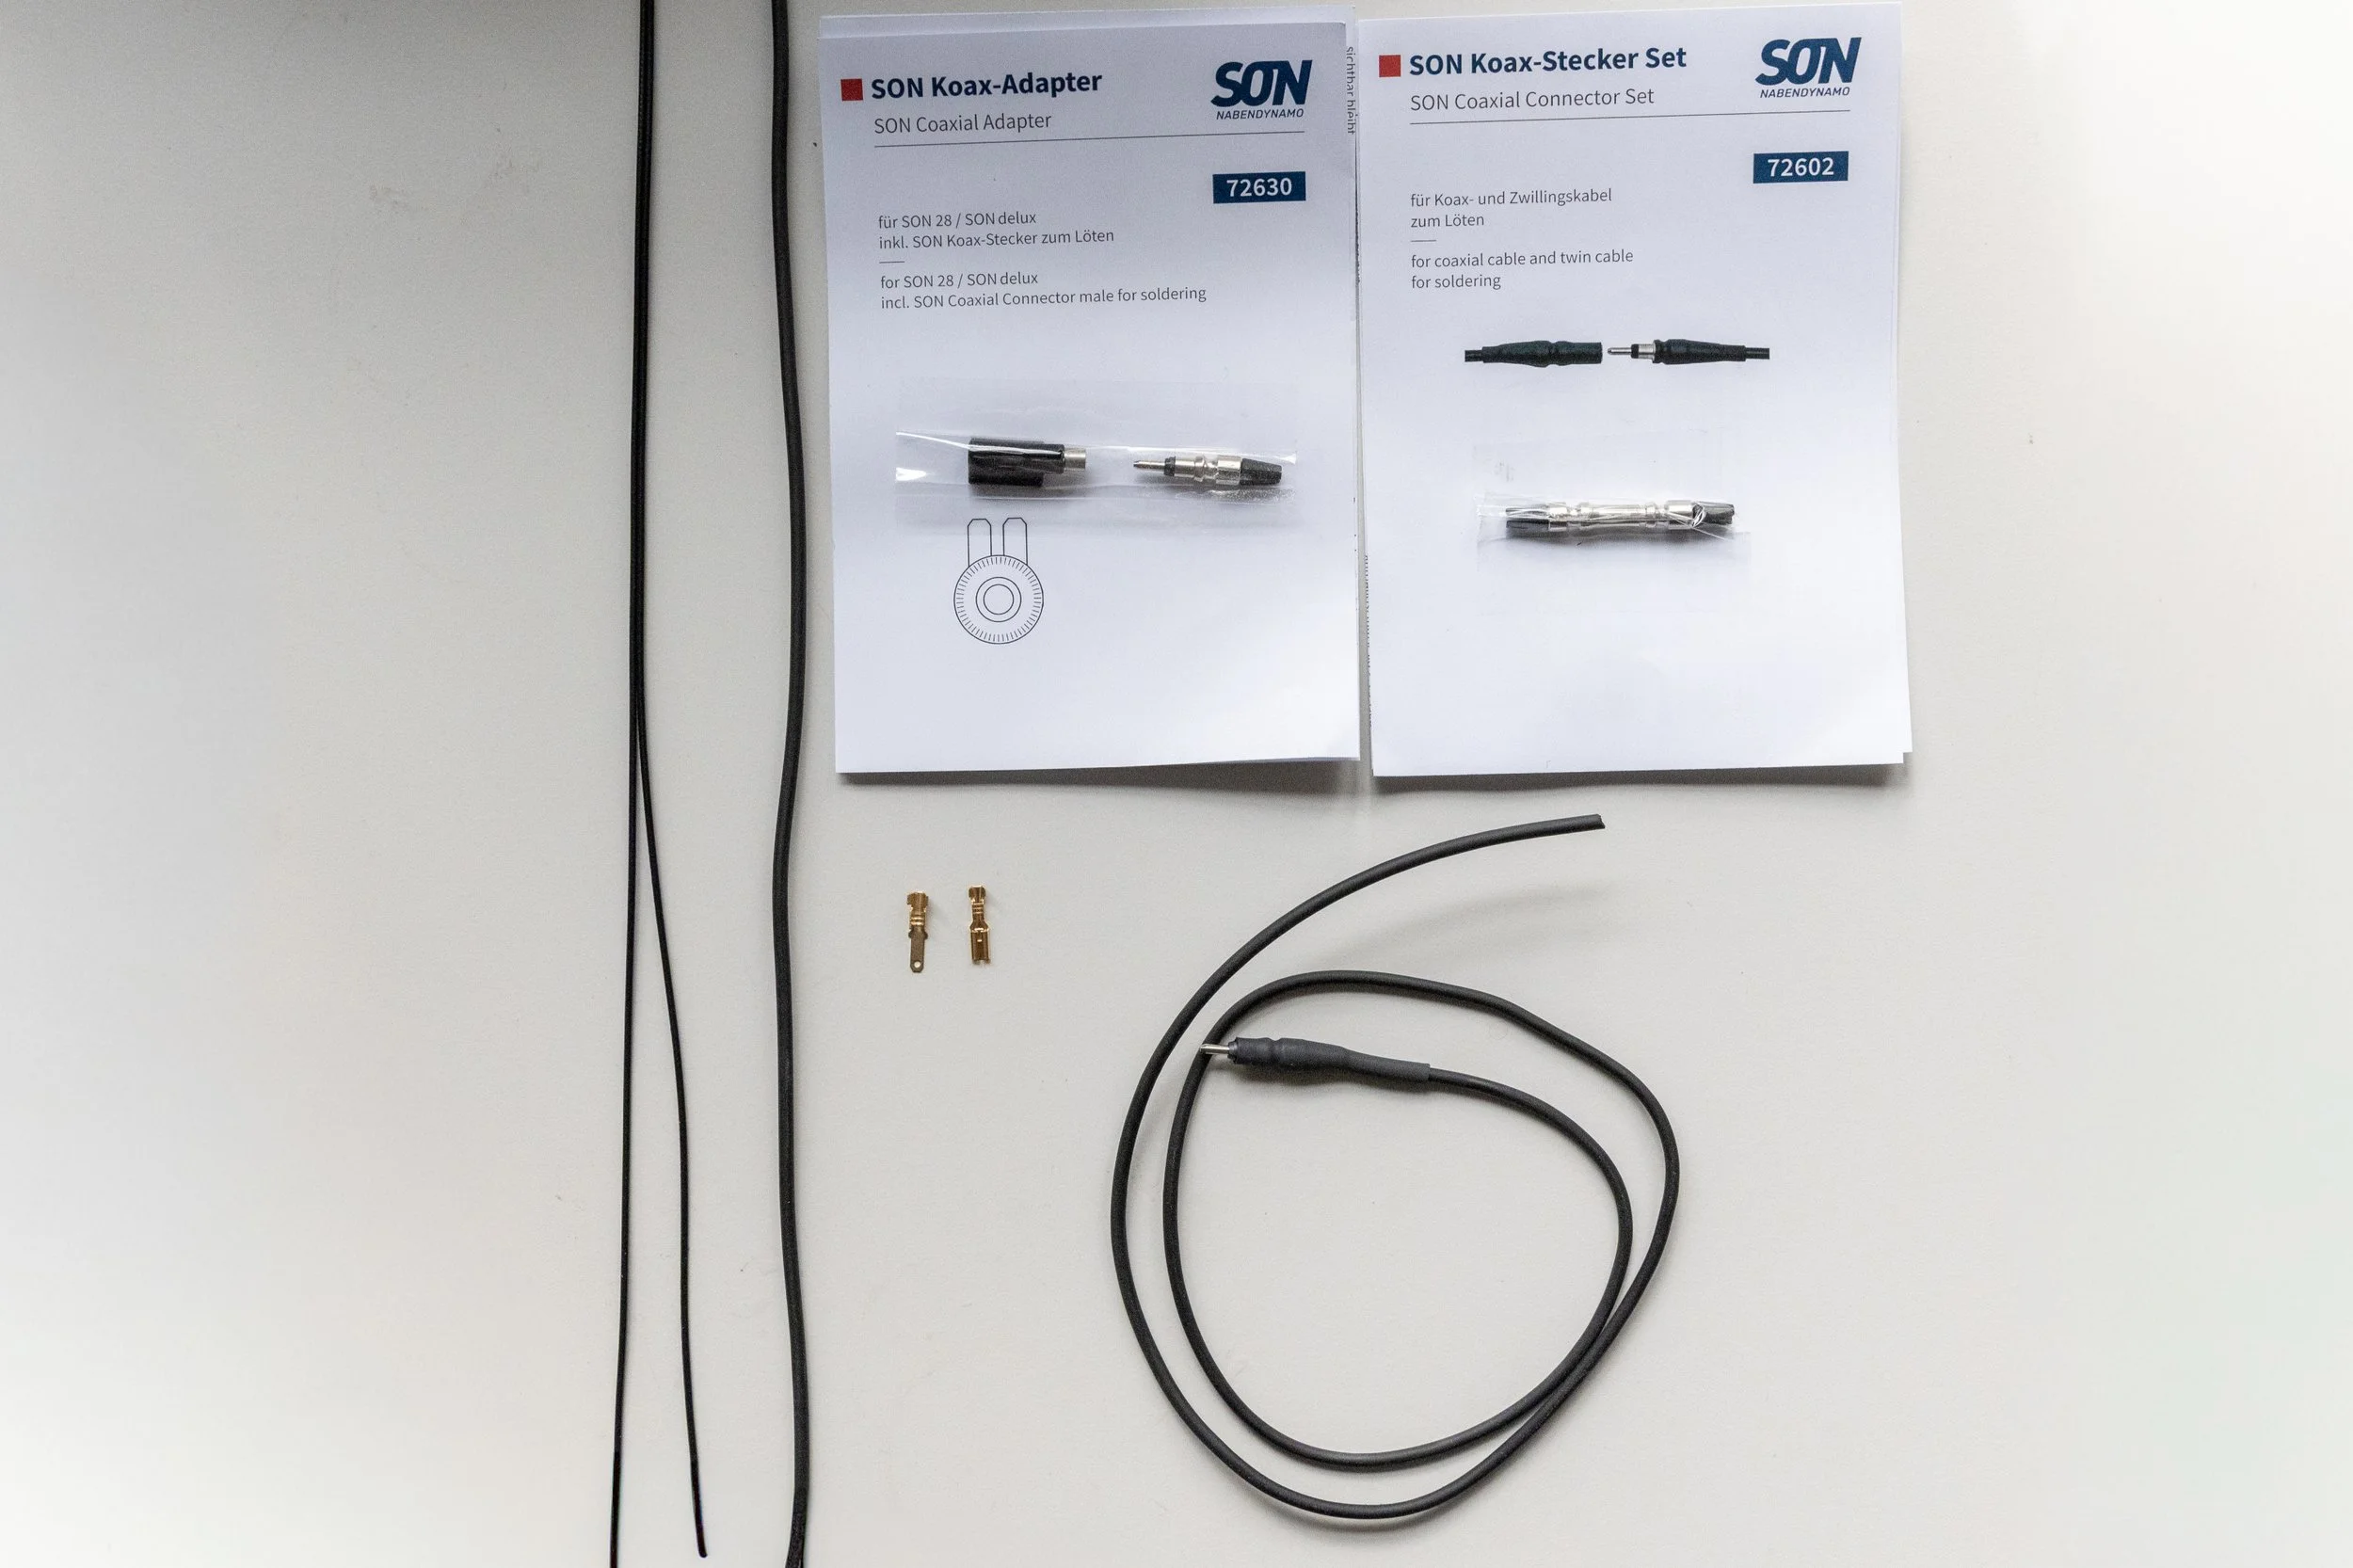
Left: “normal” flat cable. Right: coaxial cable and spade connectors (golden) and SON special connectors
Special considerations for the Hike-Use frame&fork in particular
If you’re using a SON front dynamo hub and routing the cable through the front fork, we heavily recommend using the ready cable with the “SON Coaxial adapter”. This makes it much easier to take the cable on and off the hub than the two separate spade connectors that come with the hub. The short loop of cable you have coming out of the bottom of the fork can otherwise be hard to work with. With Shimano and Shutter Precision hubs it’s fine to use their own connector.
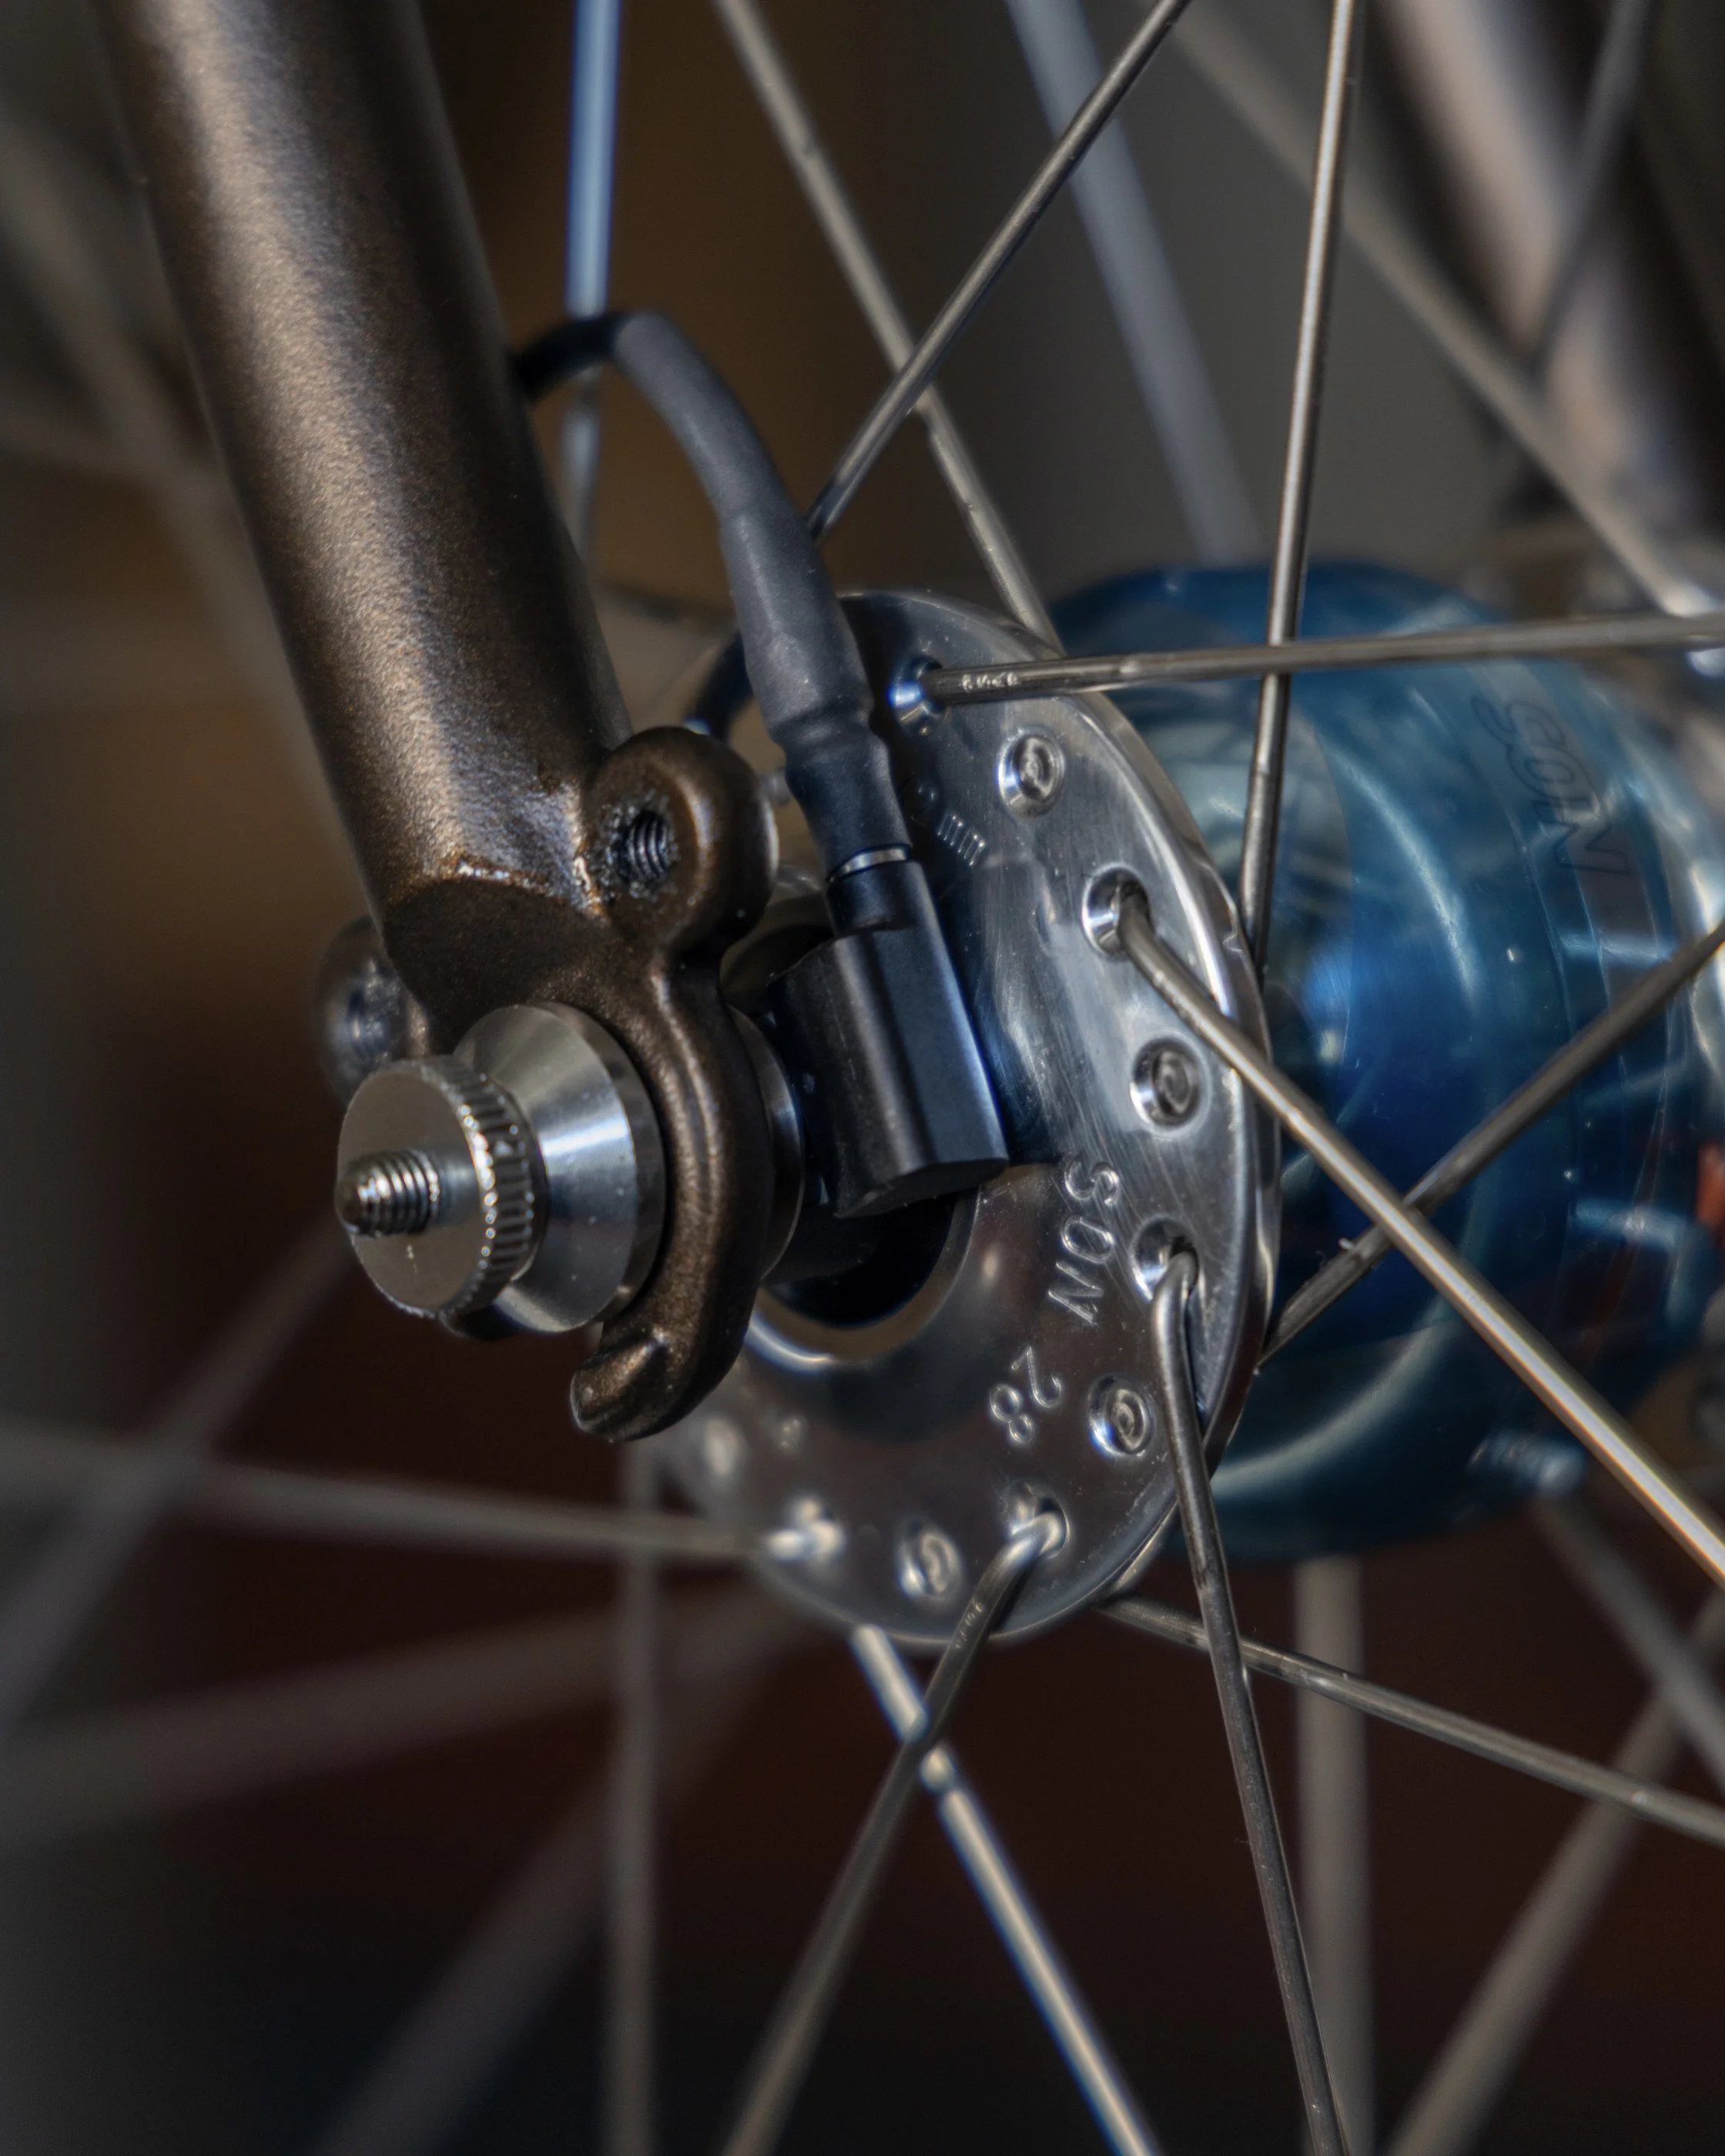
Son coax adapter on SON hub
Routing through the bottom bracket shell - cable and BB compatibility
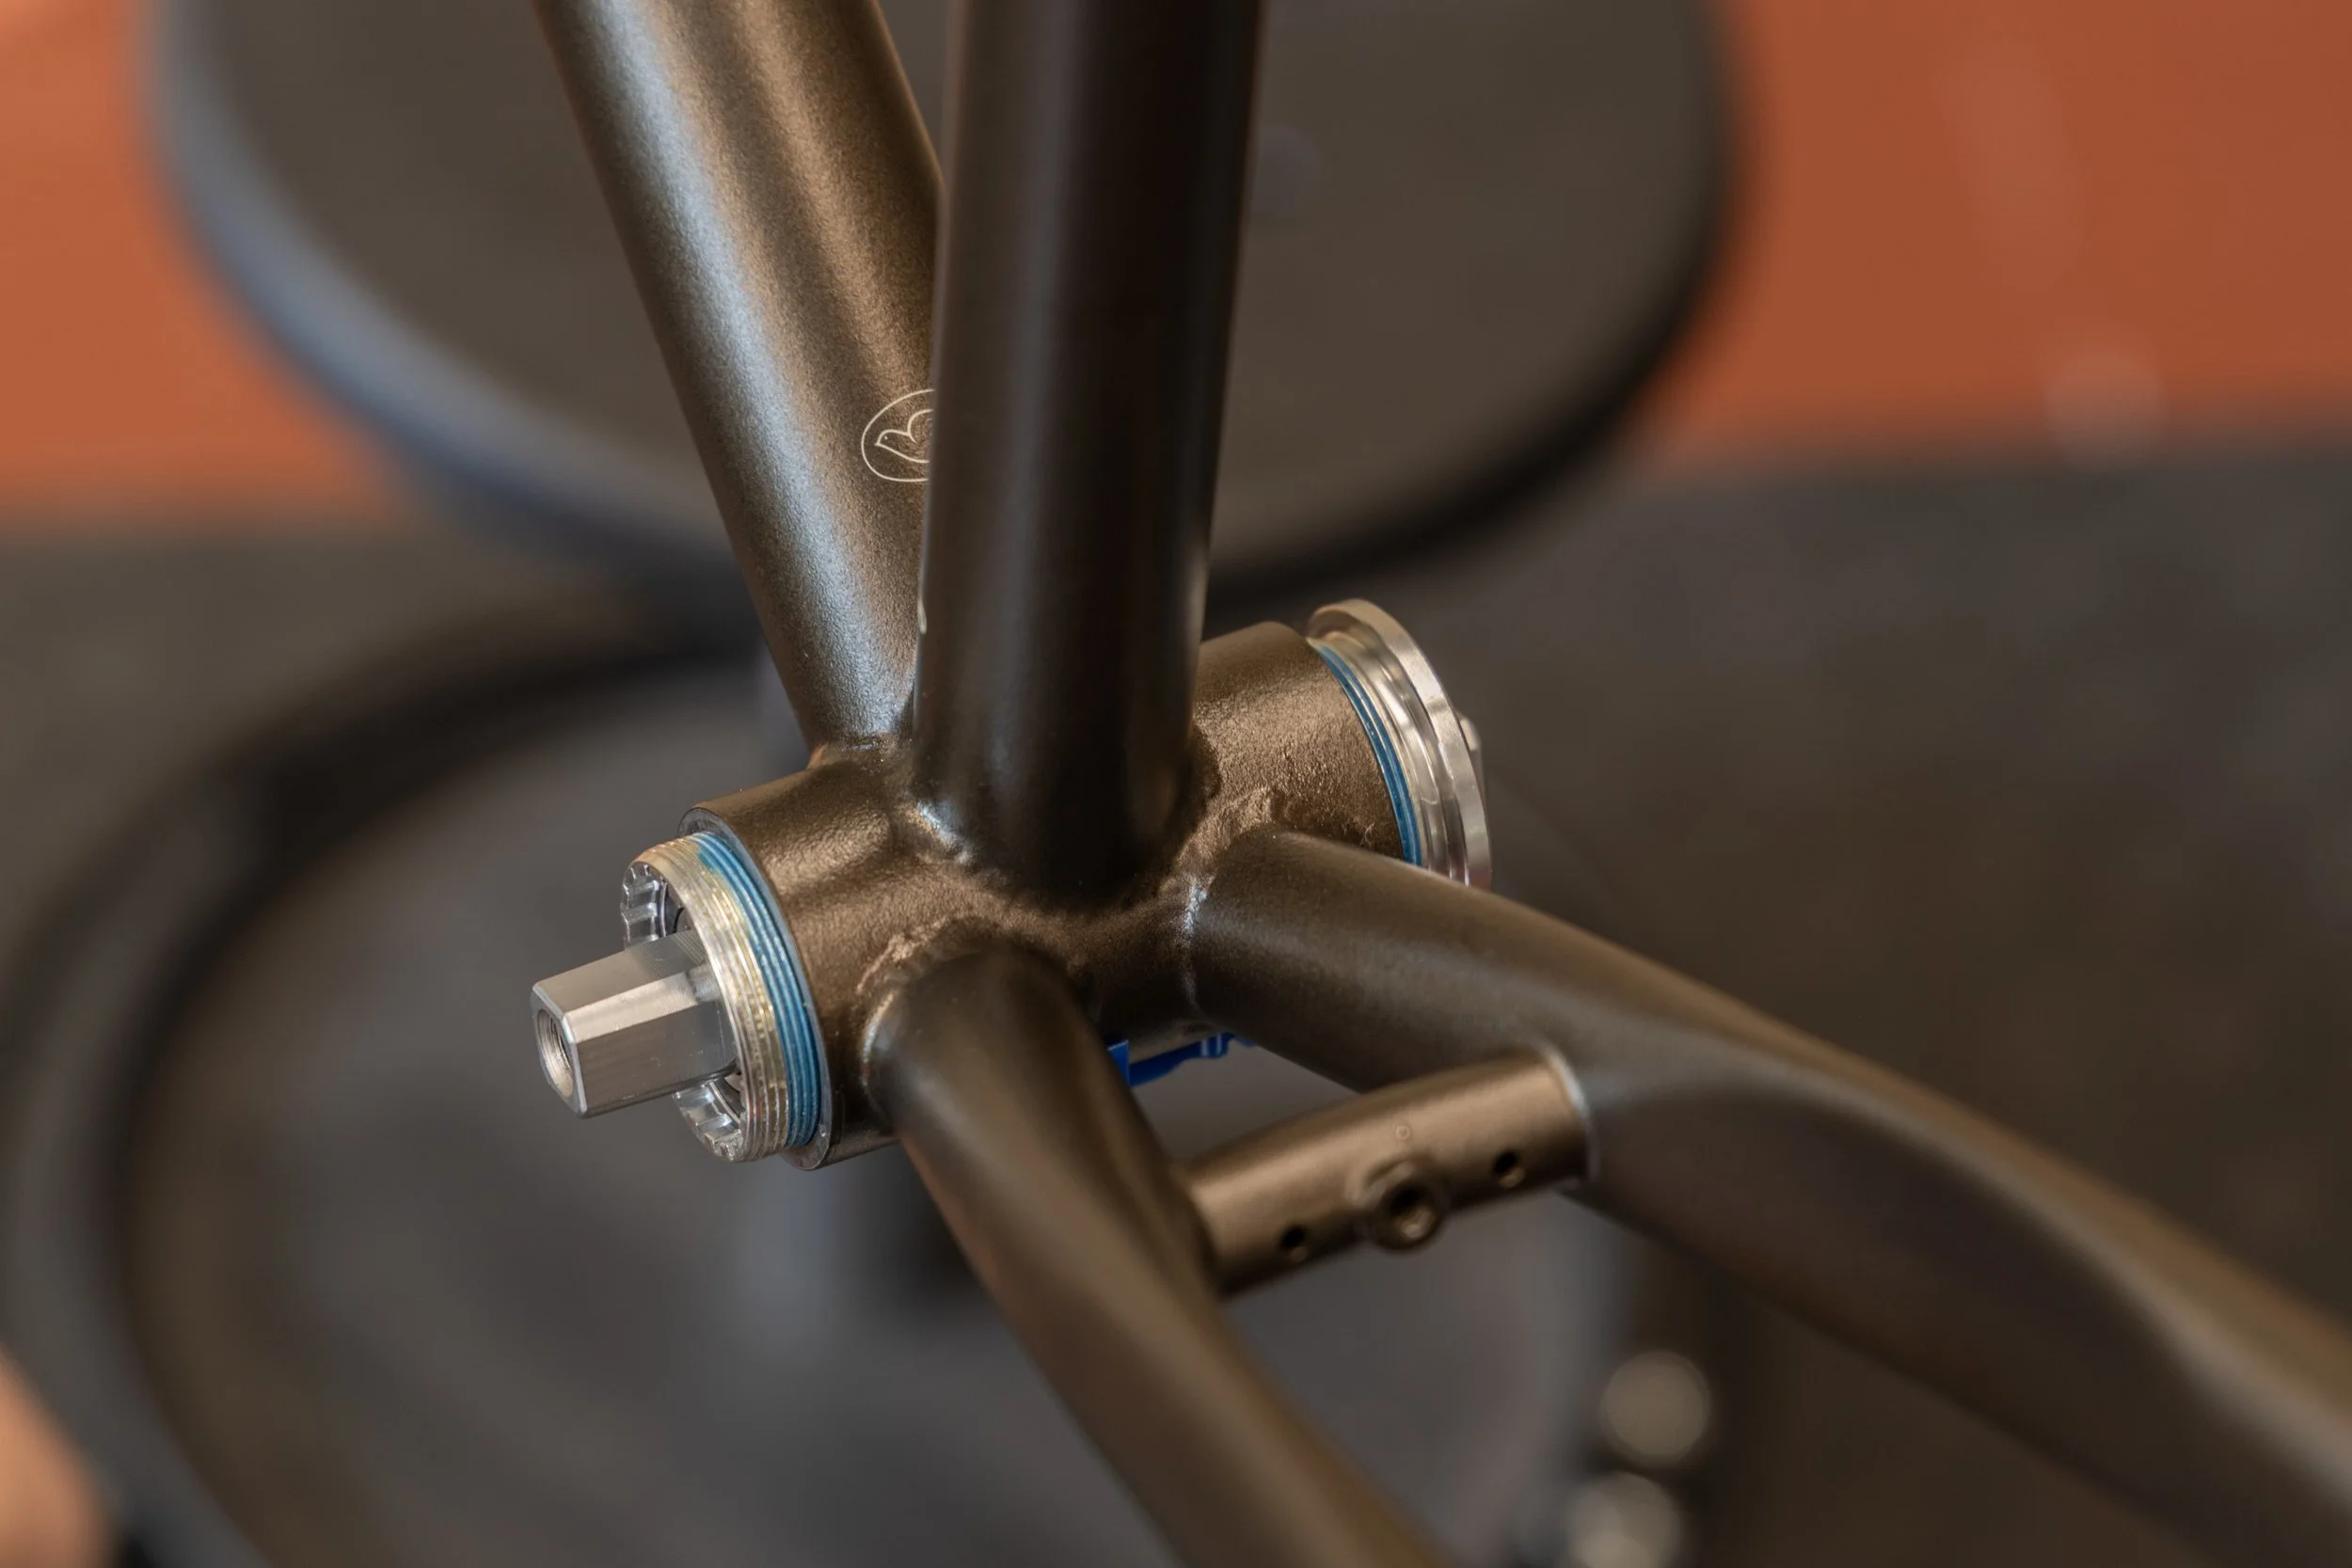
The standard threaded BSA BB shell on the Hike-Use has an internal diameter of about 34mm. Many square taper bottom brackets are almost this thick at ~32mm, leaving very little space for a cable to pass through. You either need to use a flat, thin cable and/or use a BB that has a thinner center section. Thinner units include the Genetic Karyotype we sell, older Shimano UN55 (and UN5x, UN7x series), Thun, Token brand and Campagnolo ones and loose ball cup&cone BBs. And probably some others.
Many standard contemporary square taper BBs like Tange, Sunrace, Stronglight etc will have difficulty passing a wire through, but we have managed to use a standard (Busch+Müller) double flat cable with these, it just takes some patience. A SON coaxial cable will not fit, or will be very difficult.
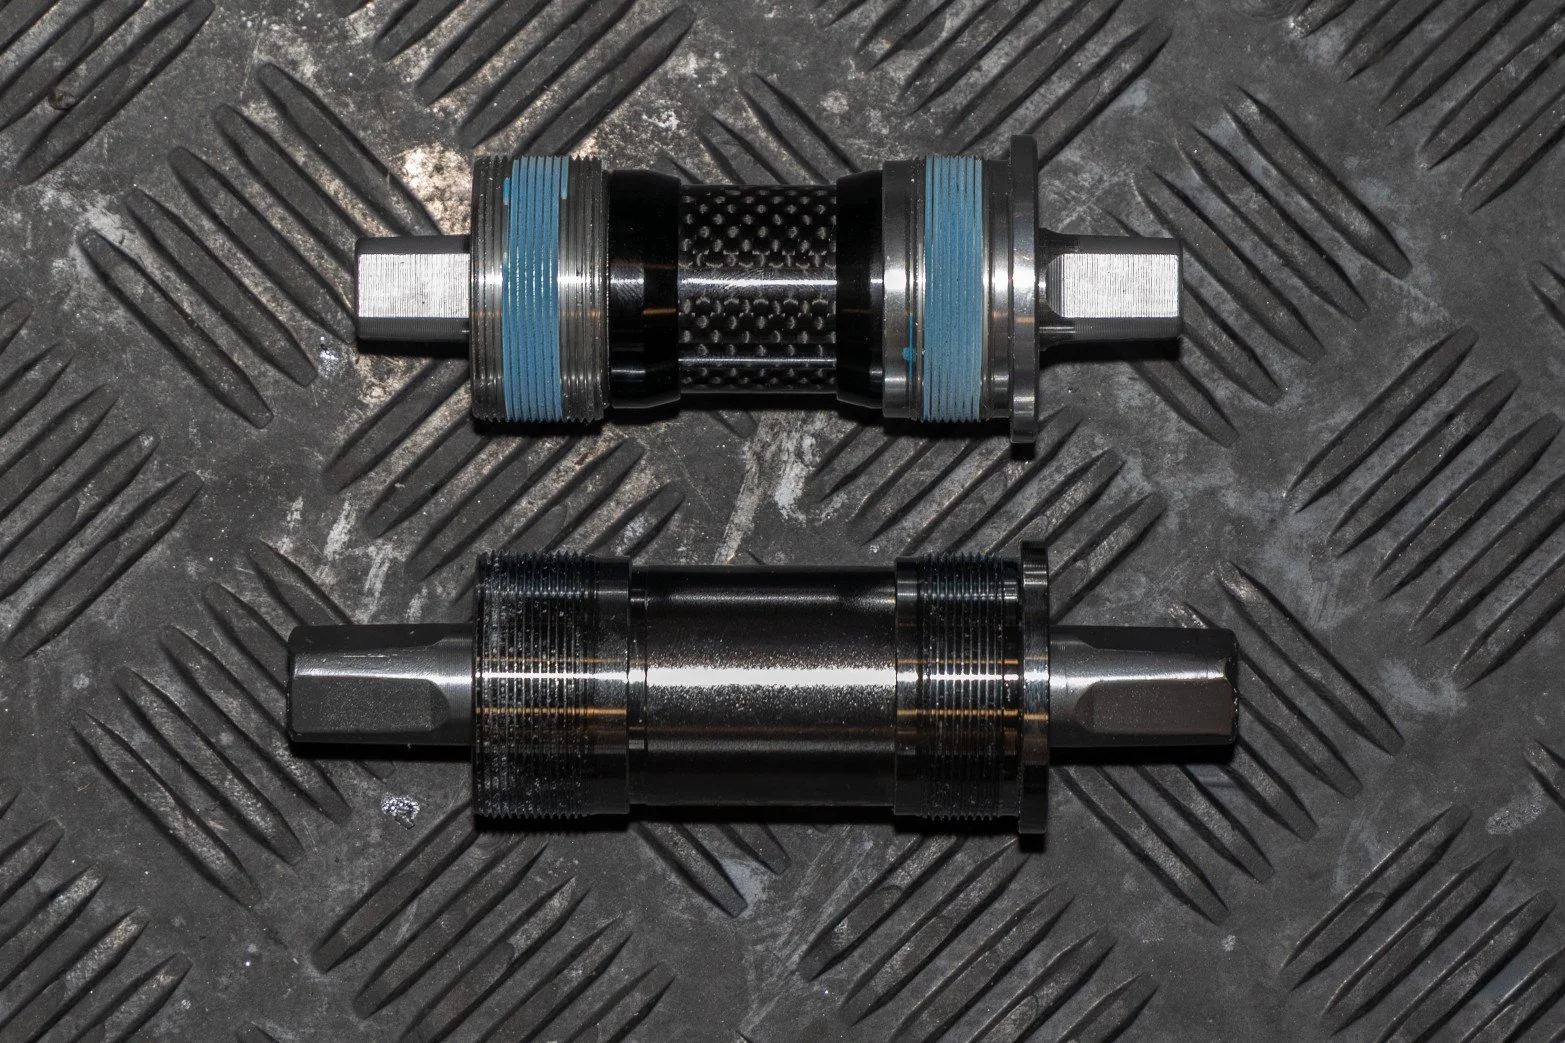
Genetic Karyotype and Tange BB. Note the different thickness in the middle
On some BB units the left cup might be long enough to block the hole that leads to the chainstay inside the frame’s BB shell. We have then modified the left cup of the BB, shortening it about 3-4mm. For aluminum cups, this can be done quite easily by filing the cup. We have used an old BB lockring to hold the cup on a bench vise. Just be careful not to file the threads so its easy to “start” the cup on the frame threads.
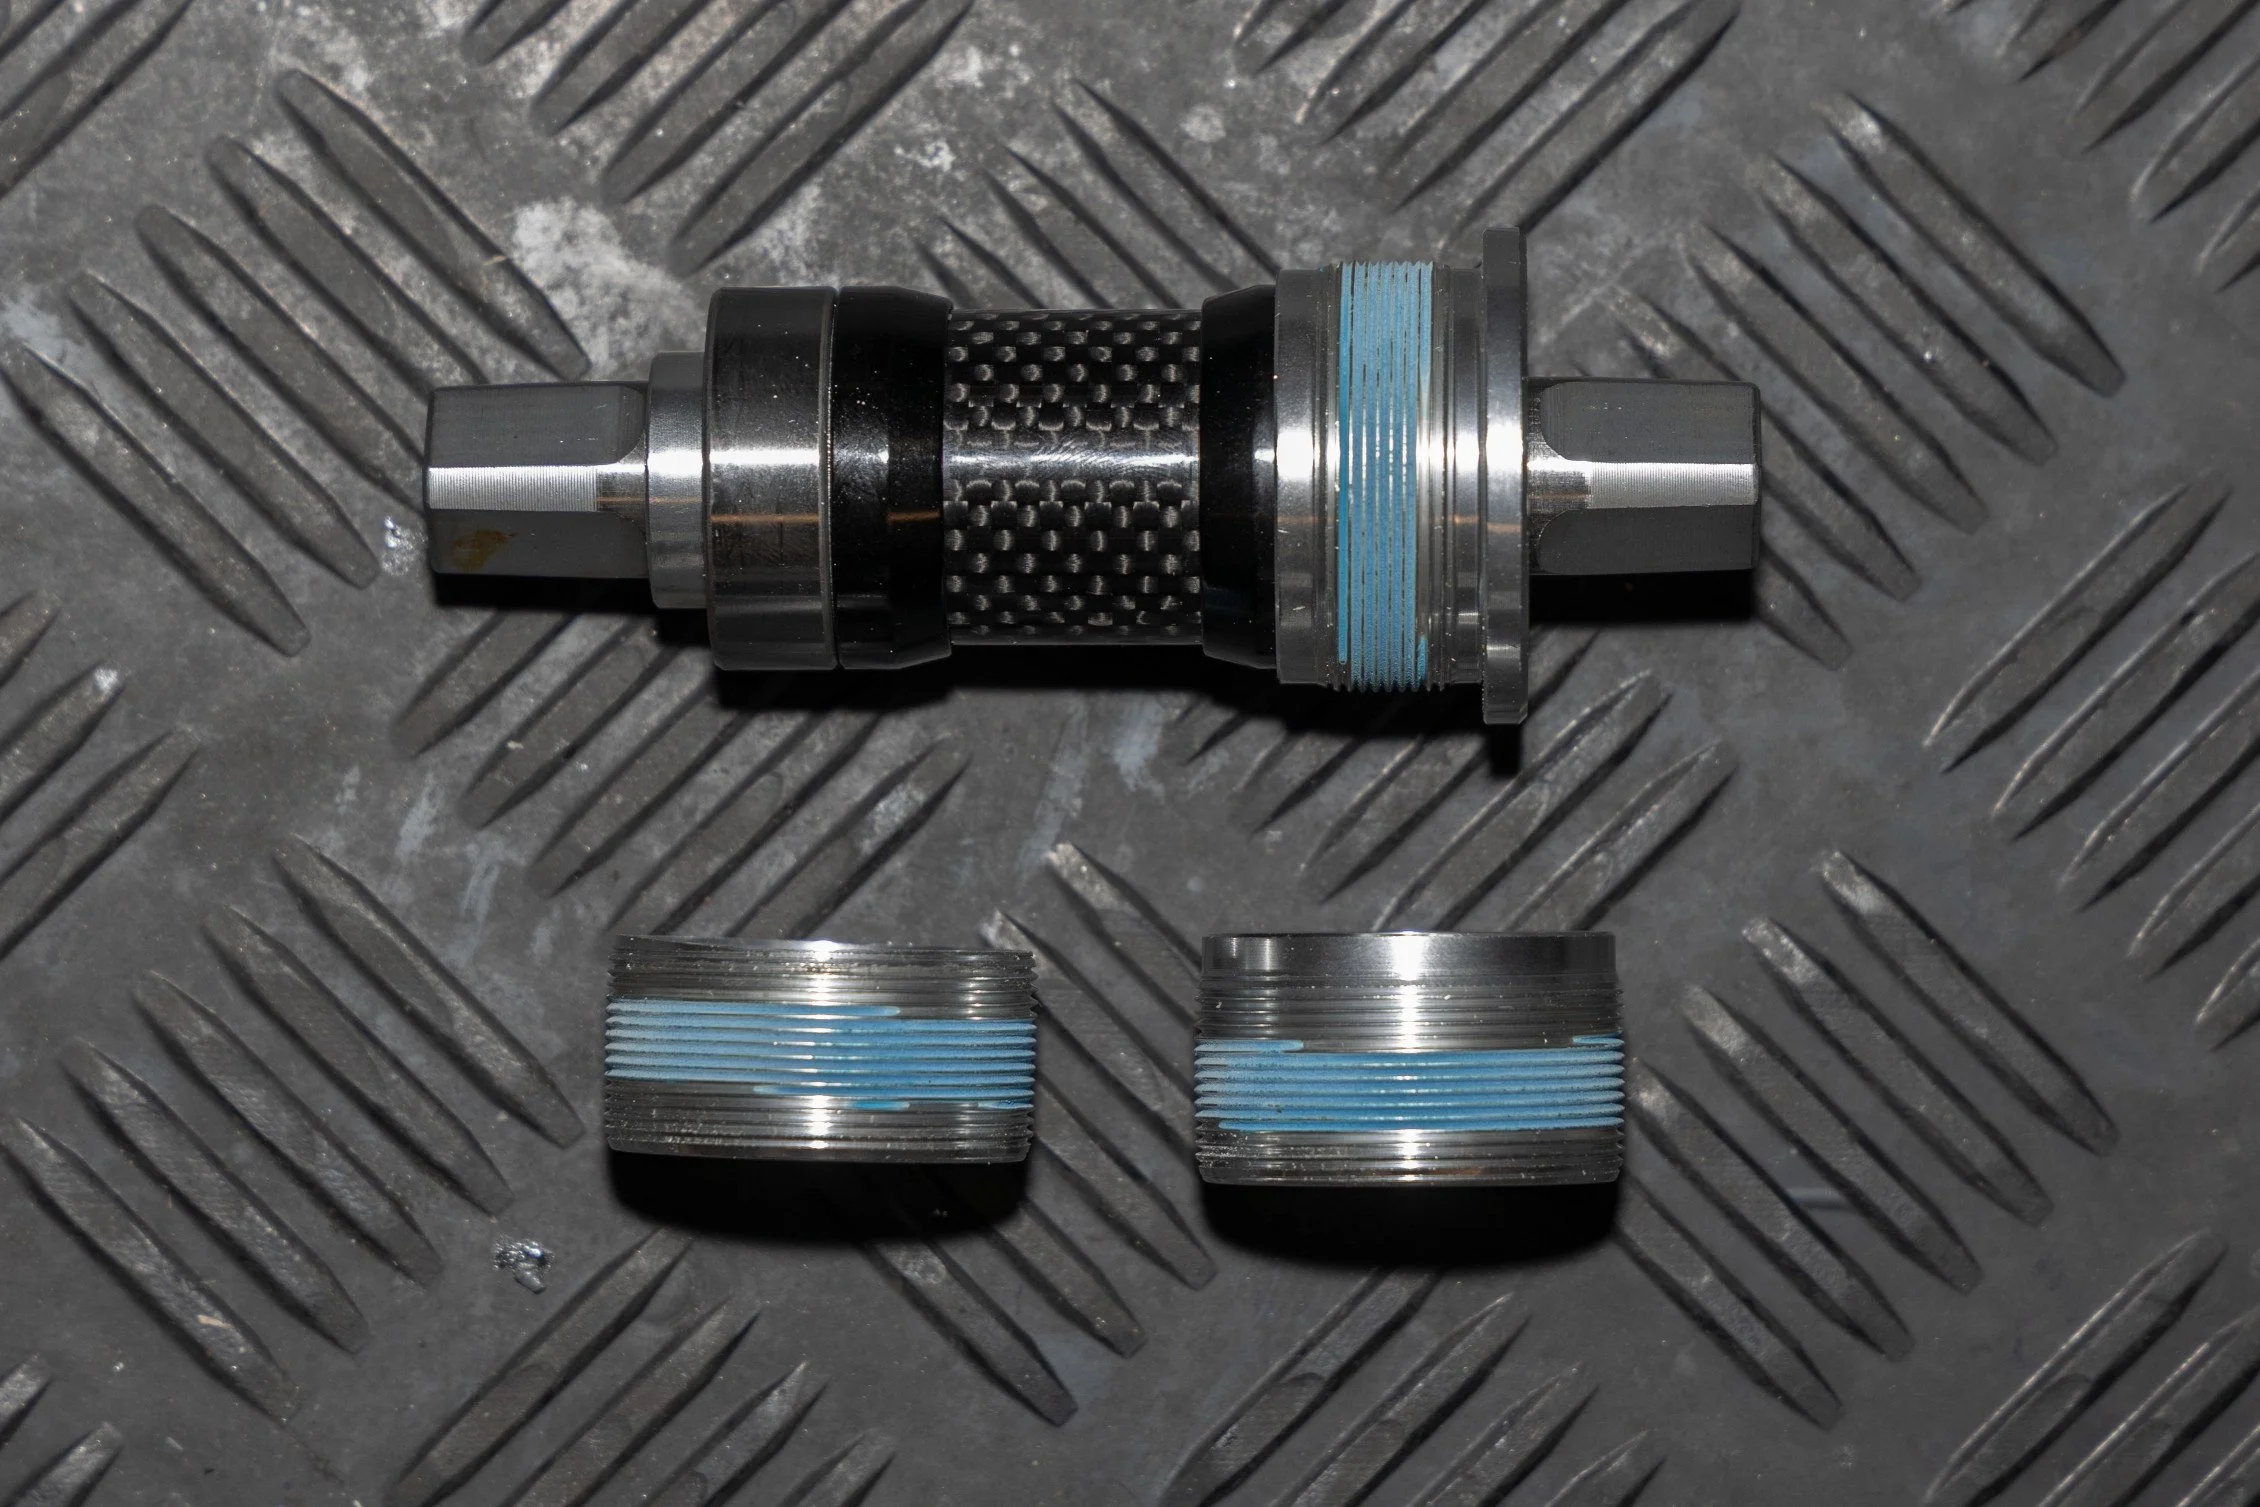
Left cup has been shortened
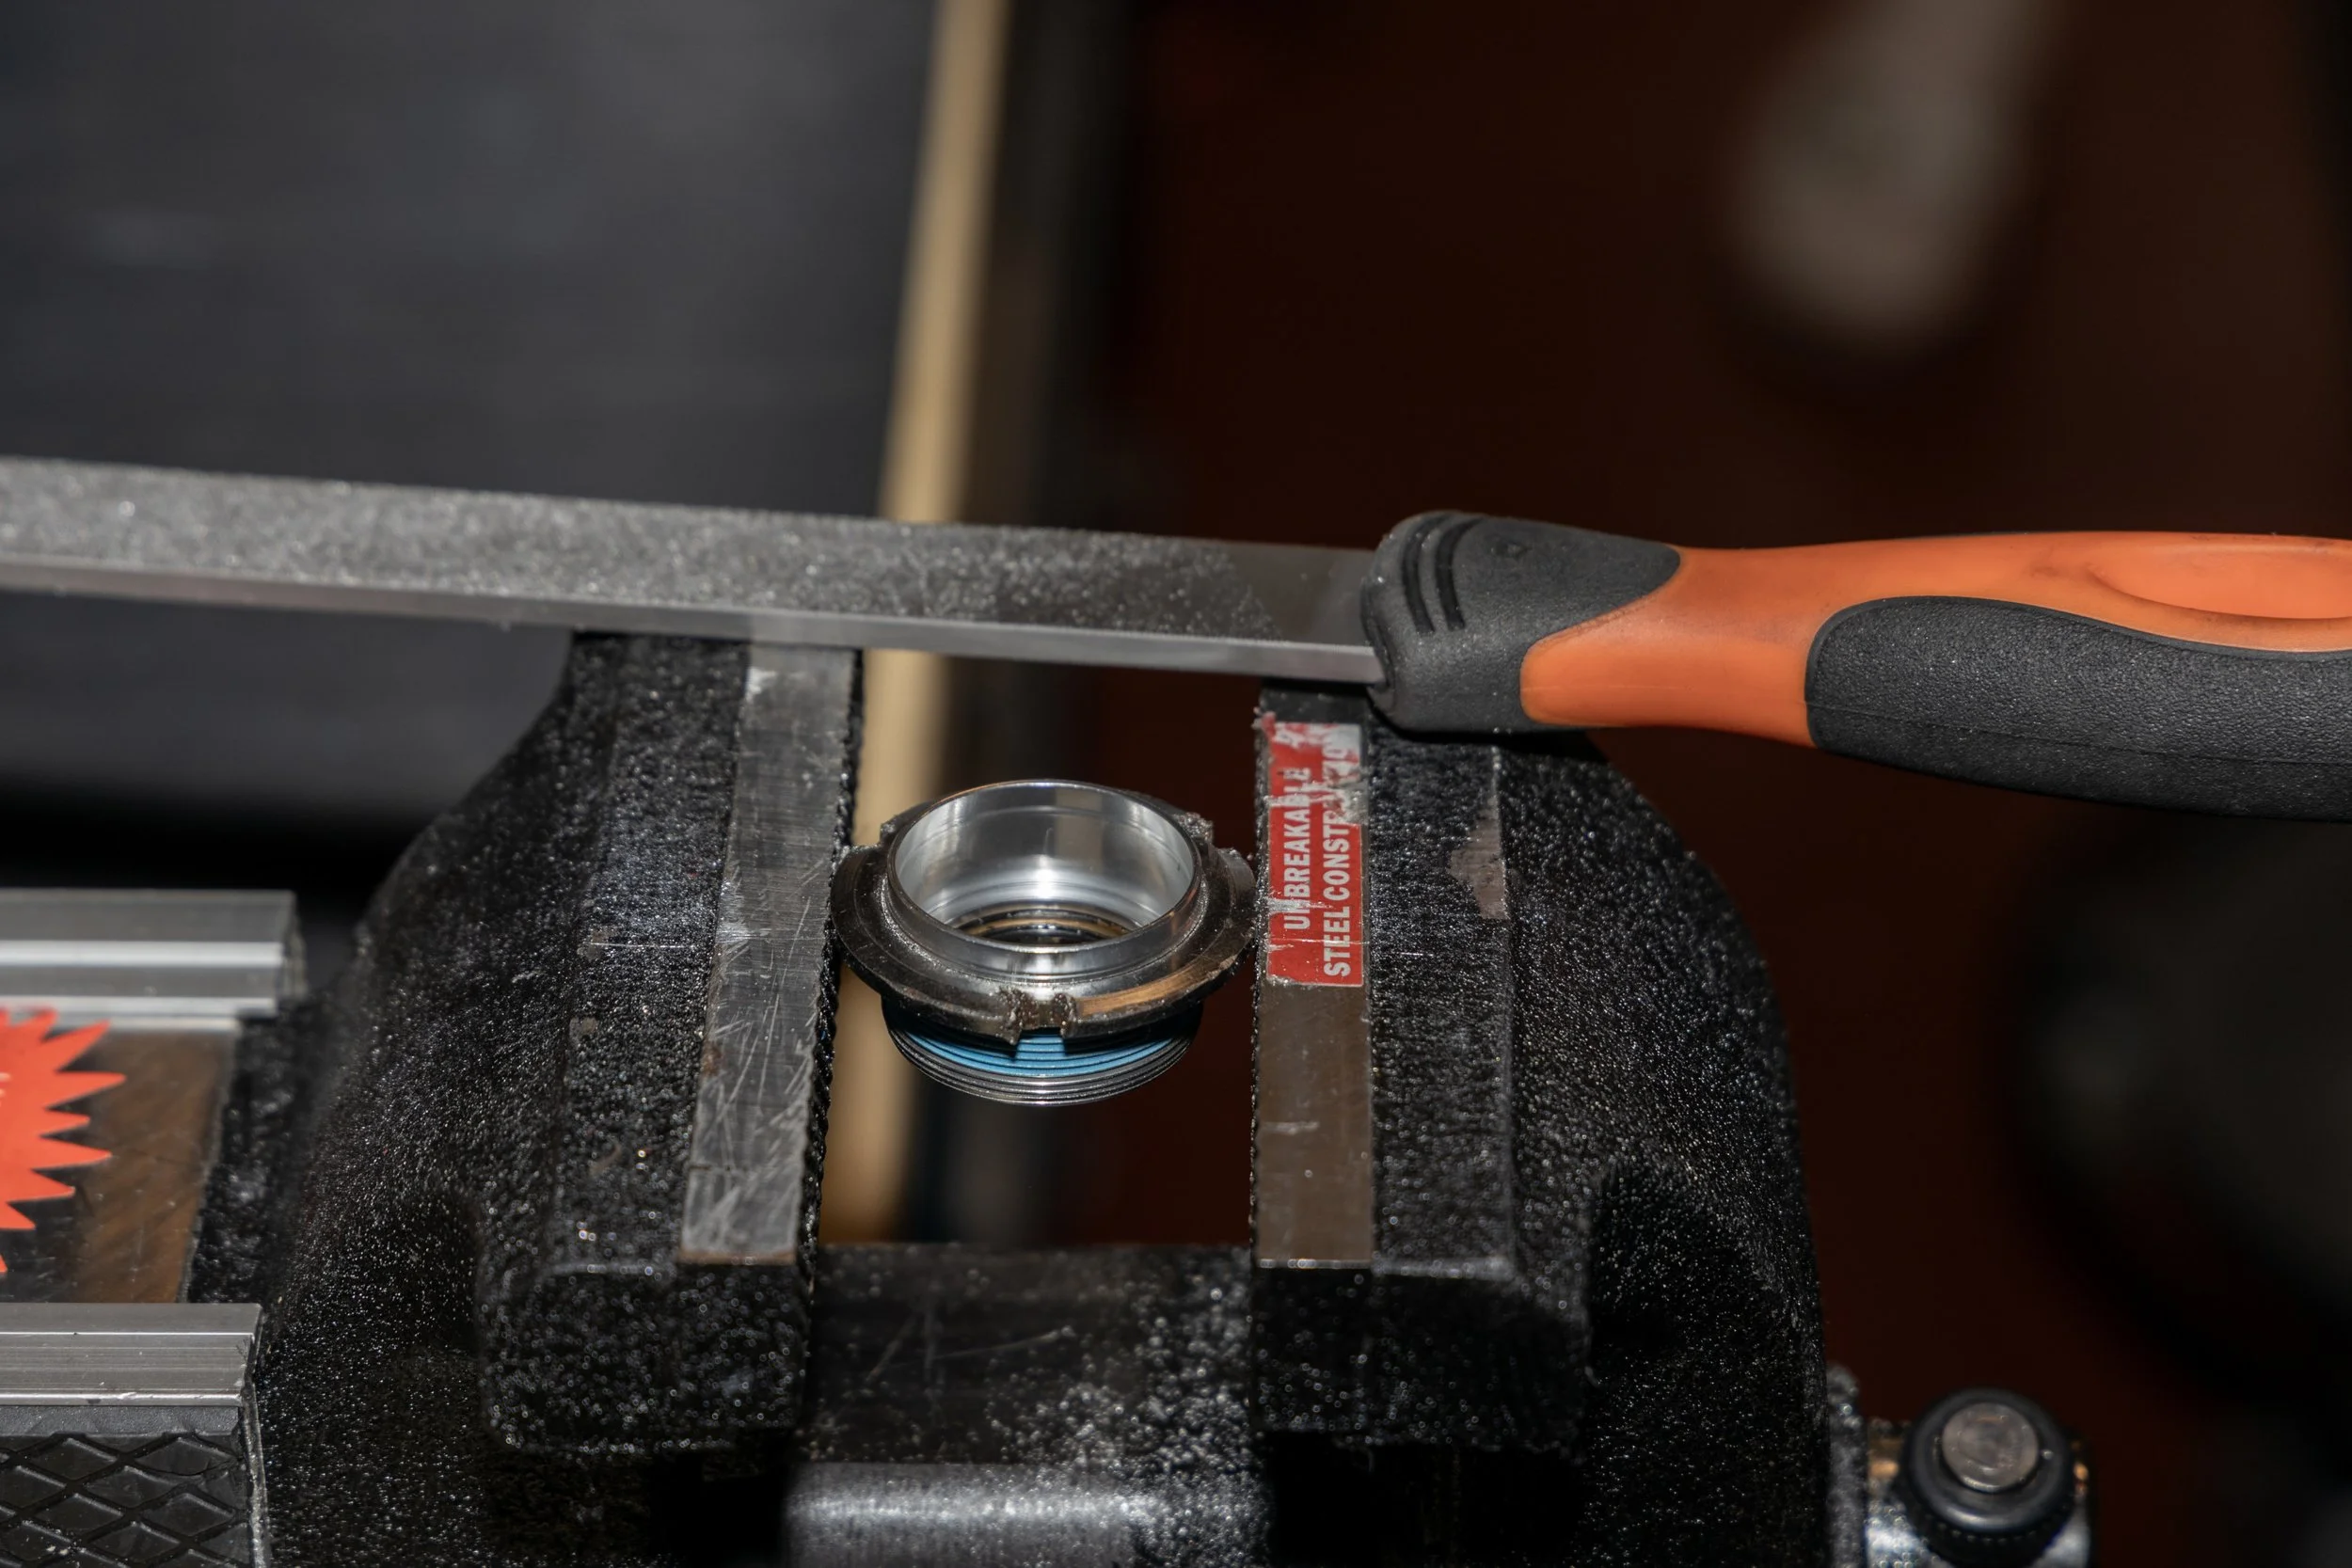
Using a bb lockring as a guide
When designing the dynamo cable routing on the frame, we considered routing outside of the BB shell, with two extra ports, one on the downtube and one on the chainstay to get around the bottom bracket more easily. But we were concerned about drilling and brazing in these highly stressed areas of the frame, and opted for the safer but more difficult to route cable option.
External bottom brackets - Hollowtech 2 etc
With external bottom brackets such as Shimano Hollowtech 2, Sram GXP and Campagnolo Ultra-Torque there should be no issue with routing the cable through the frame and BB shell, as they leave more space there. Also the threaded portion of the cup is generally shorter so it doesn’t block the chainstay hole either.
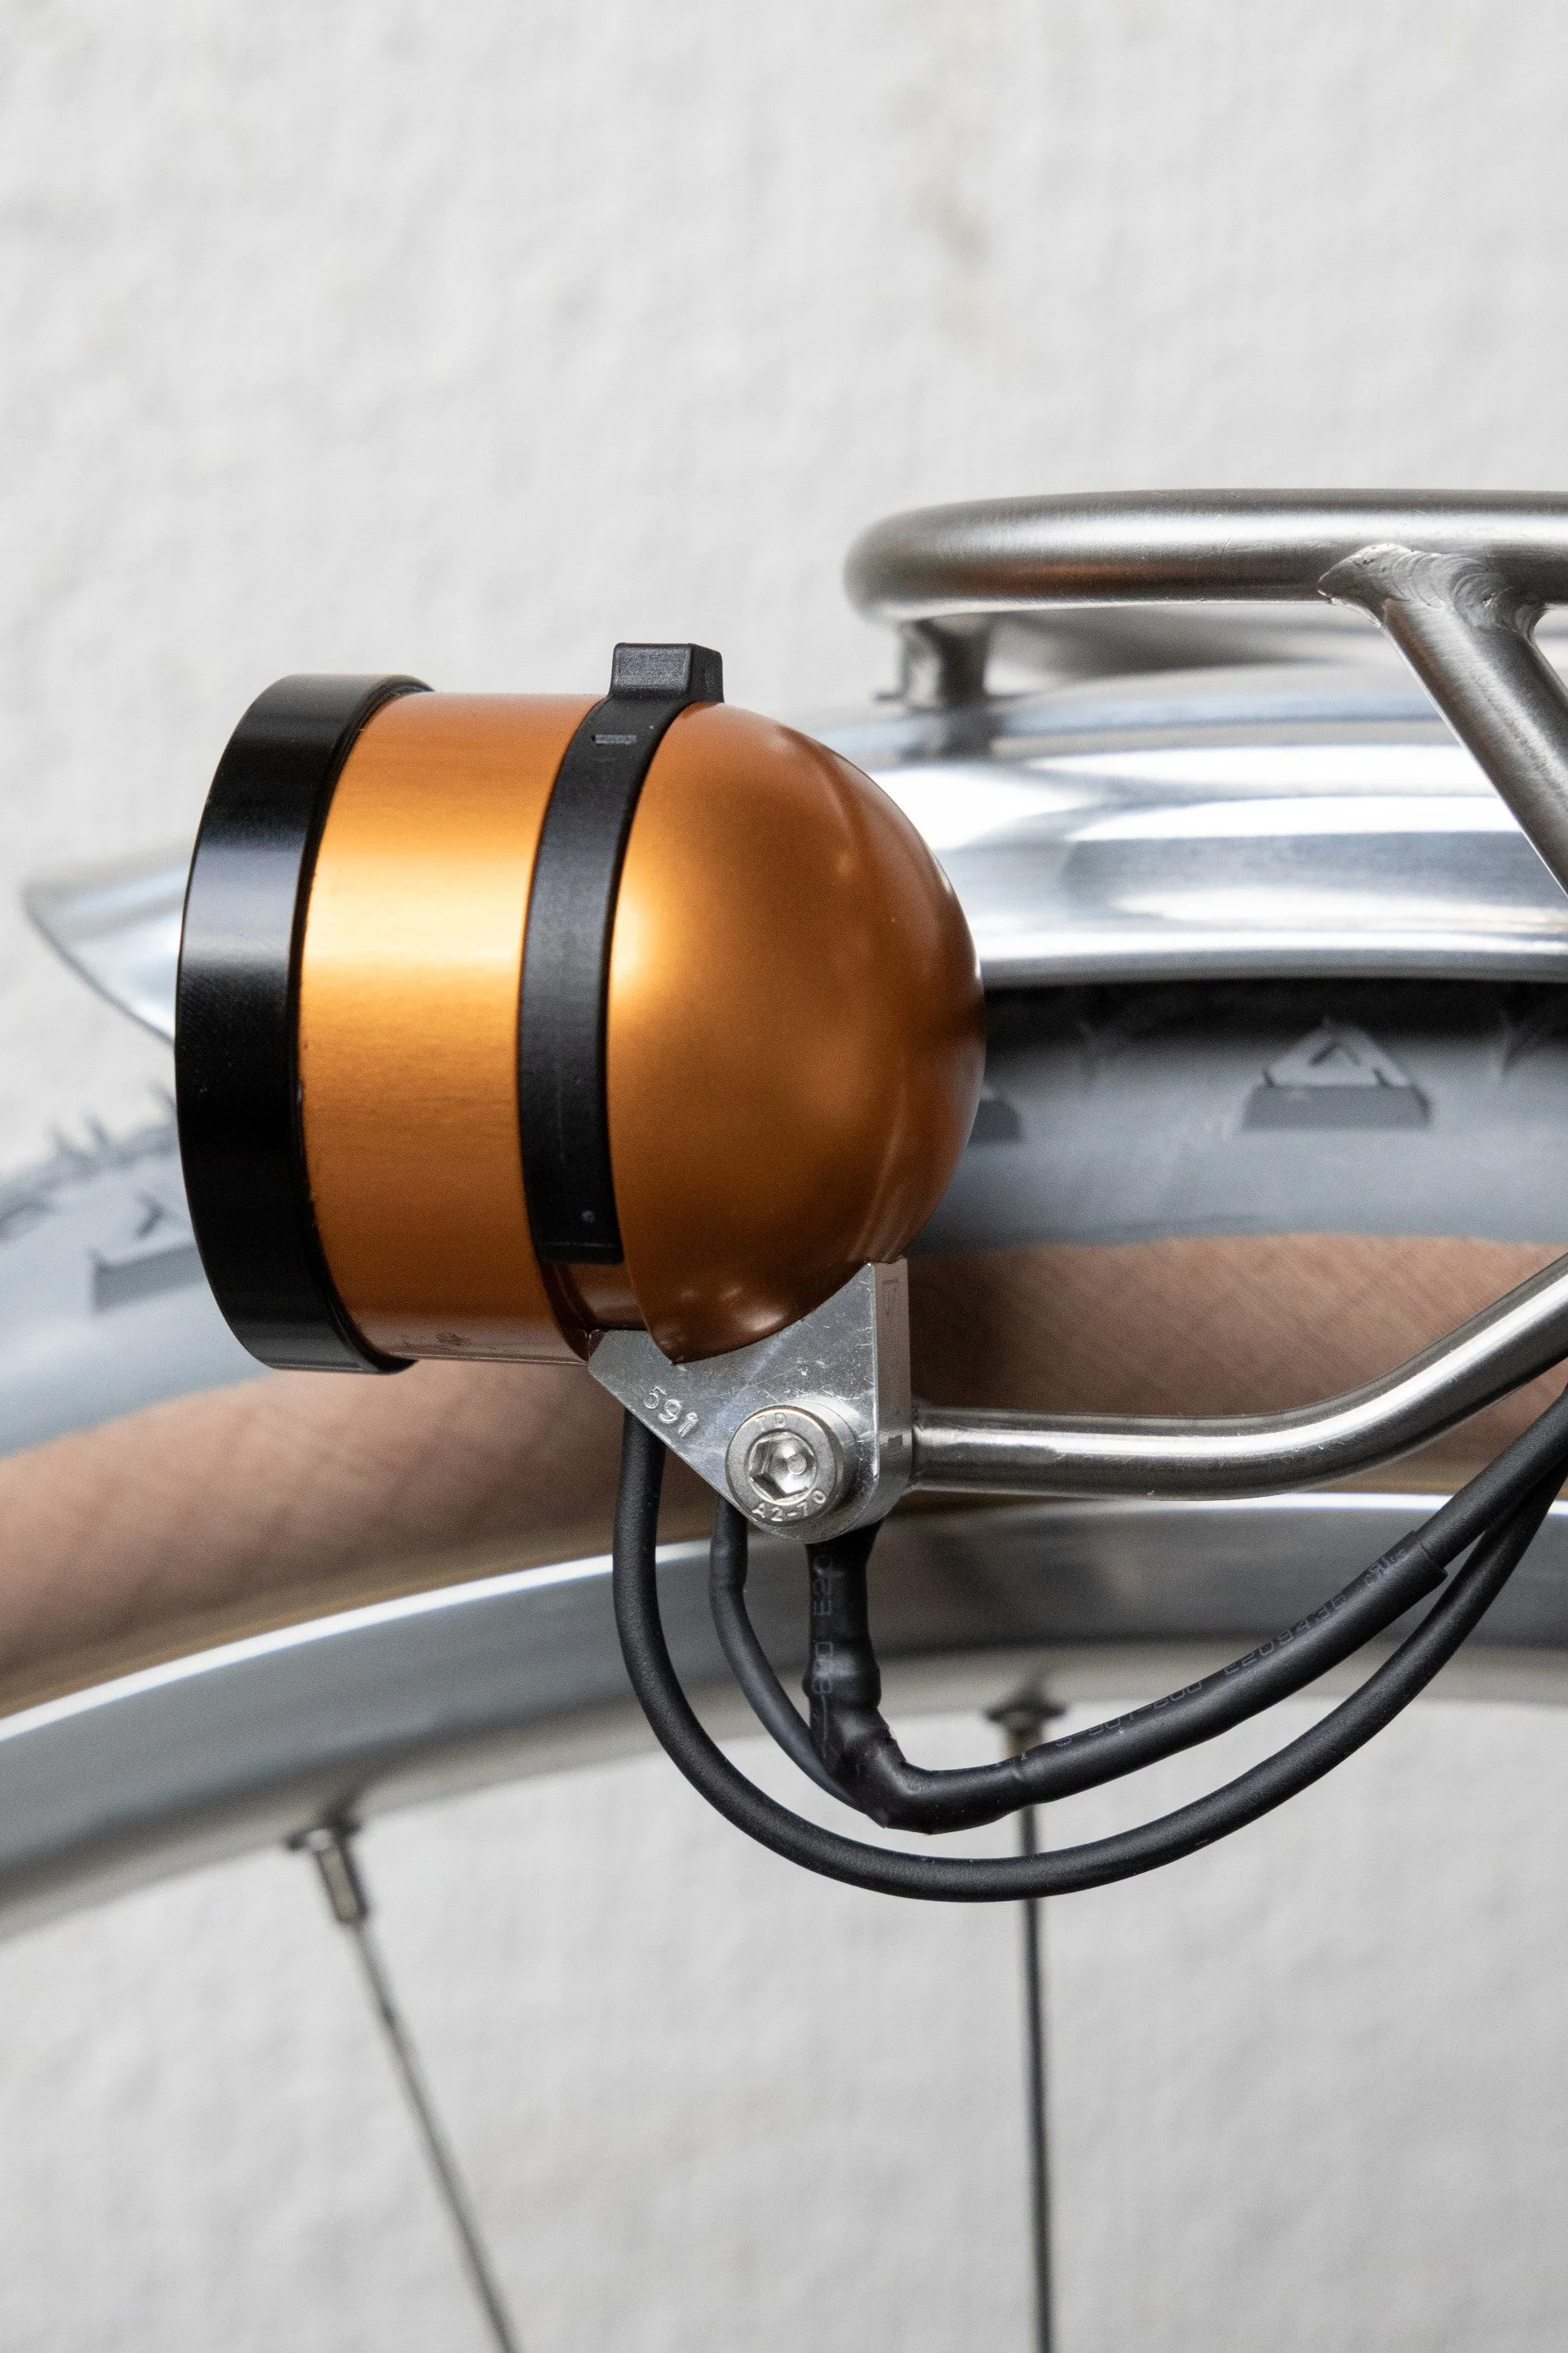
Using a rear light mounted on left dropout
The routing to the dropout exit is done similarly as any other one: first get the string and cable through the down tube, and then do the chainstay part separately, first pulling the string through with the vacuum and then the cable with the string.
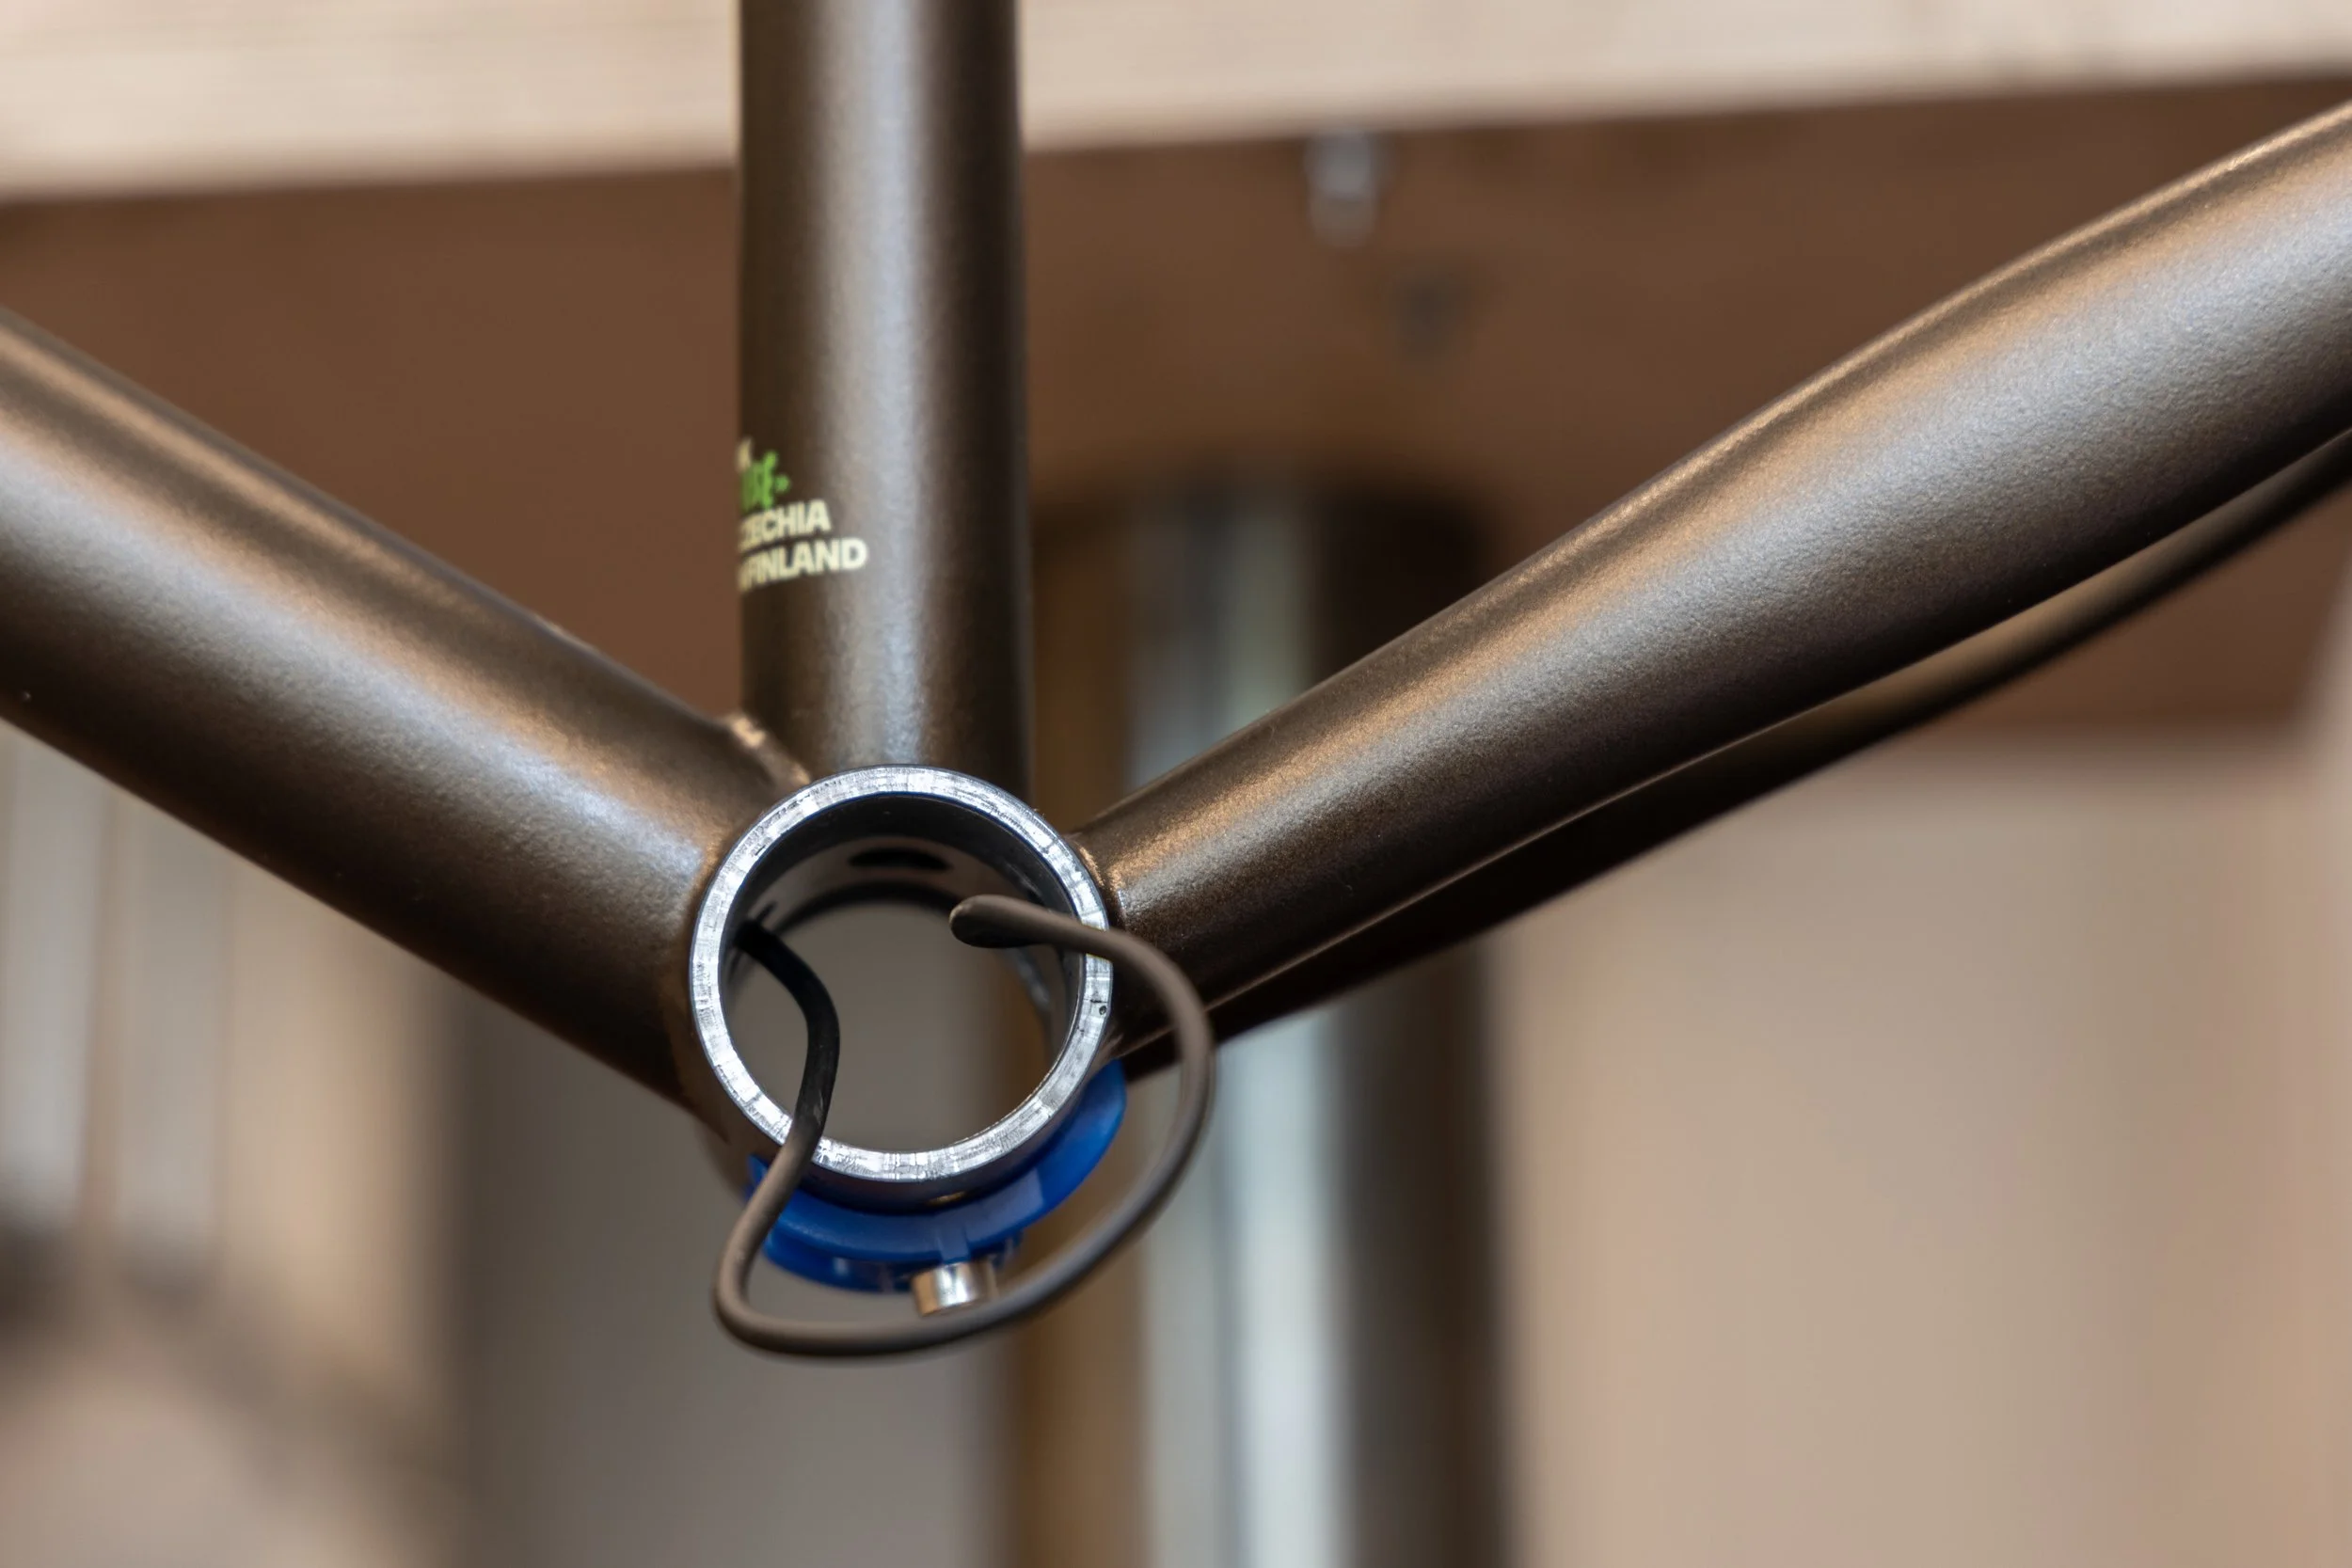
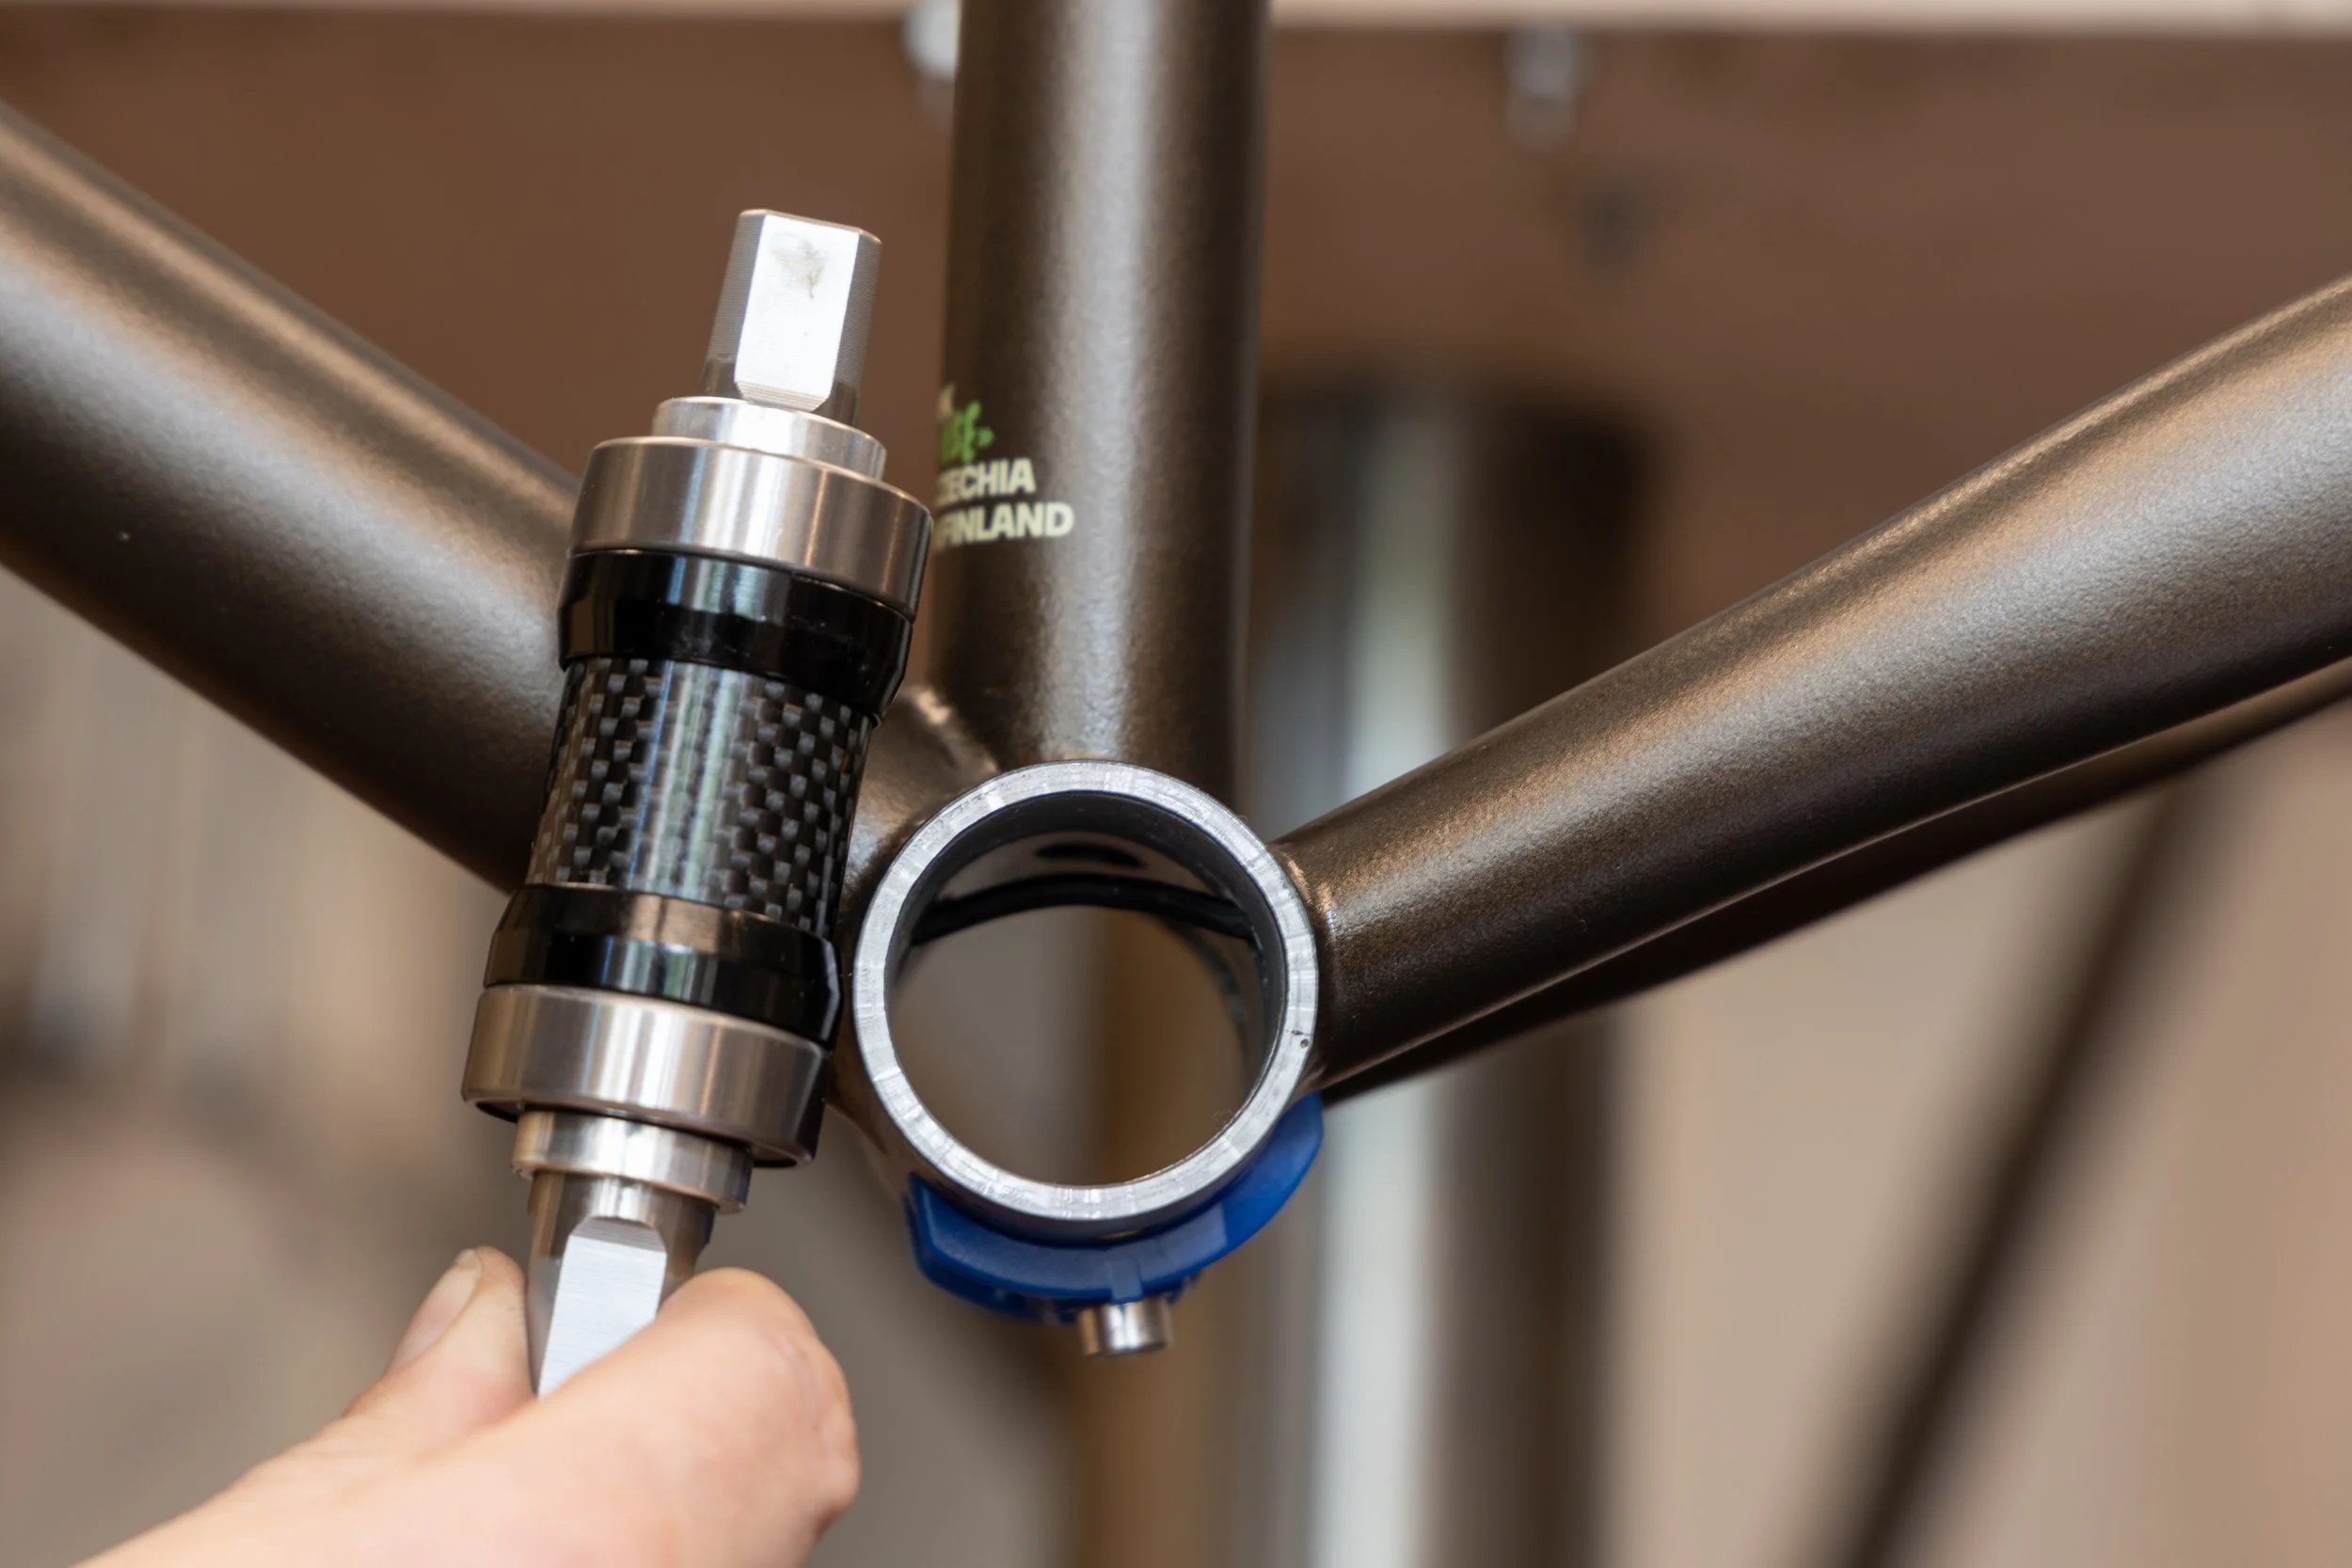
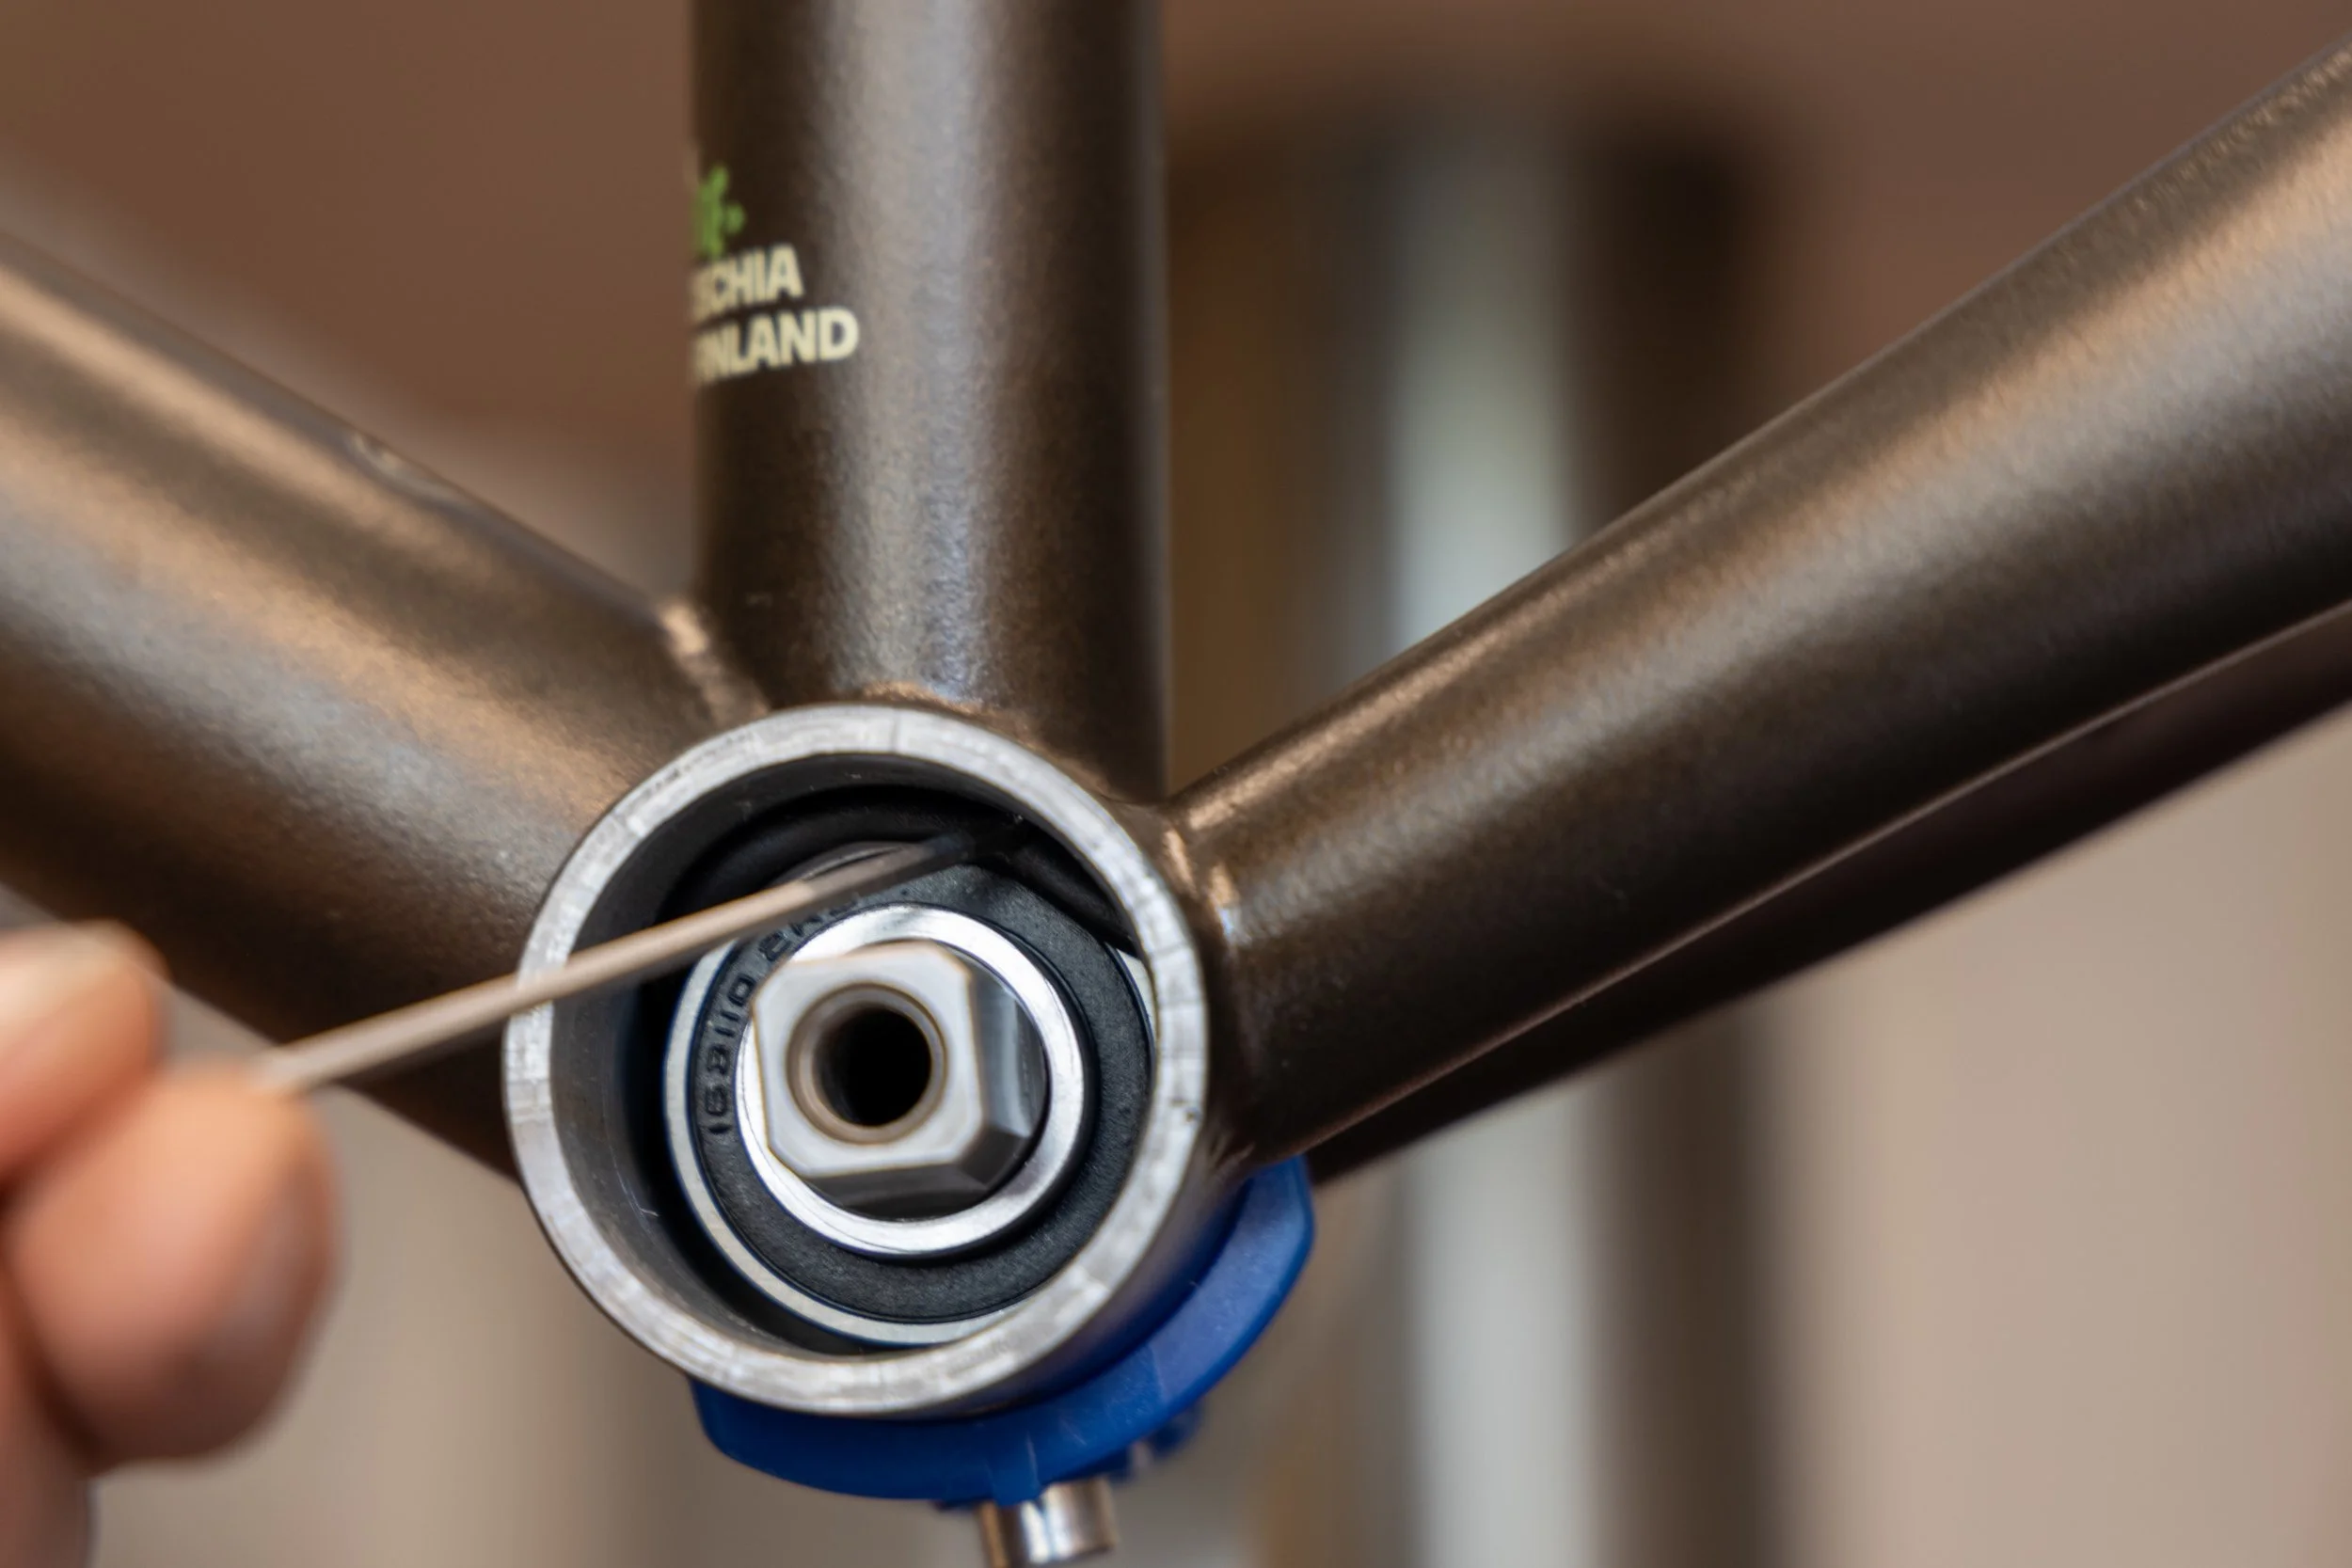
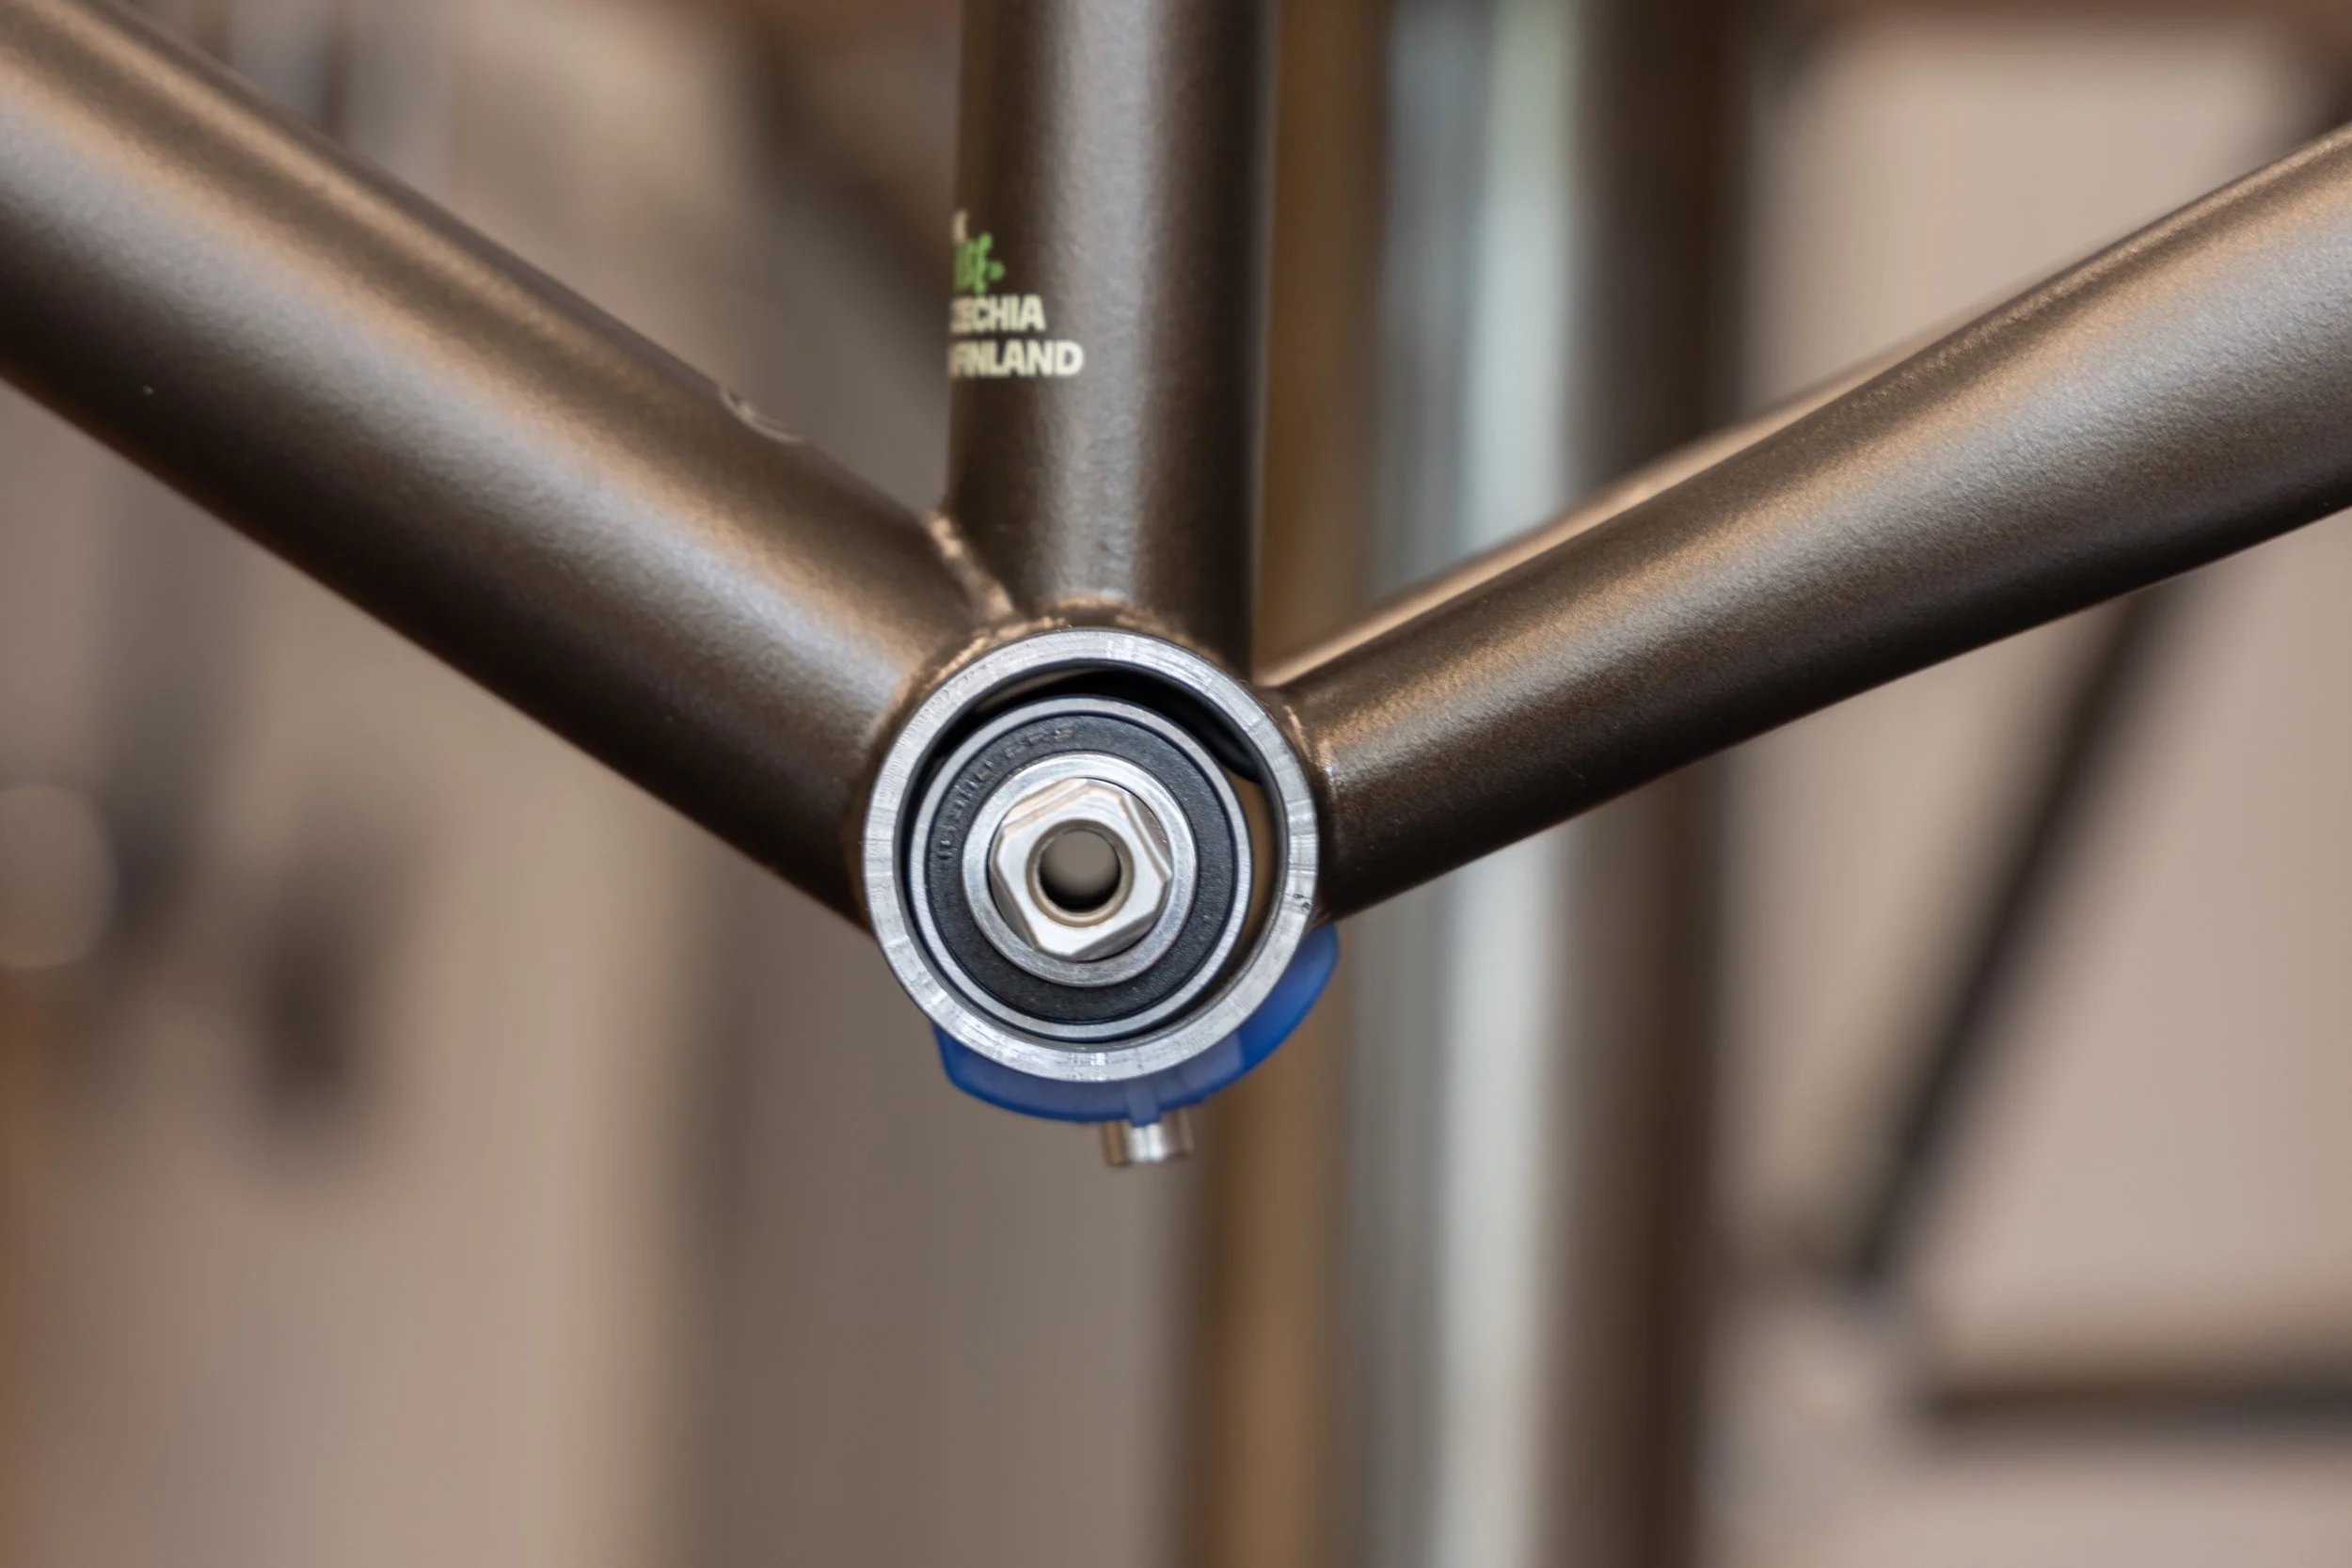
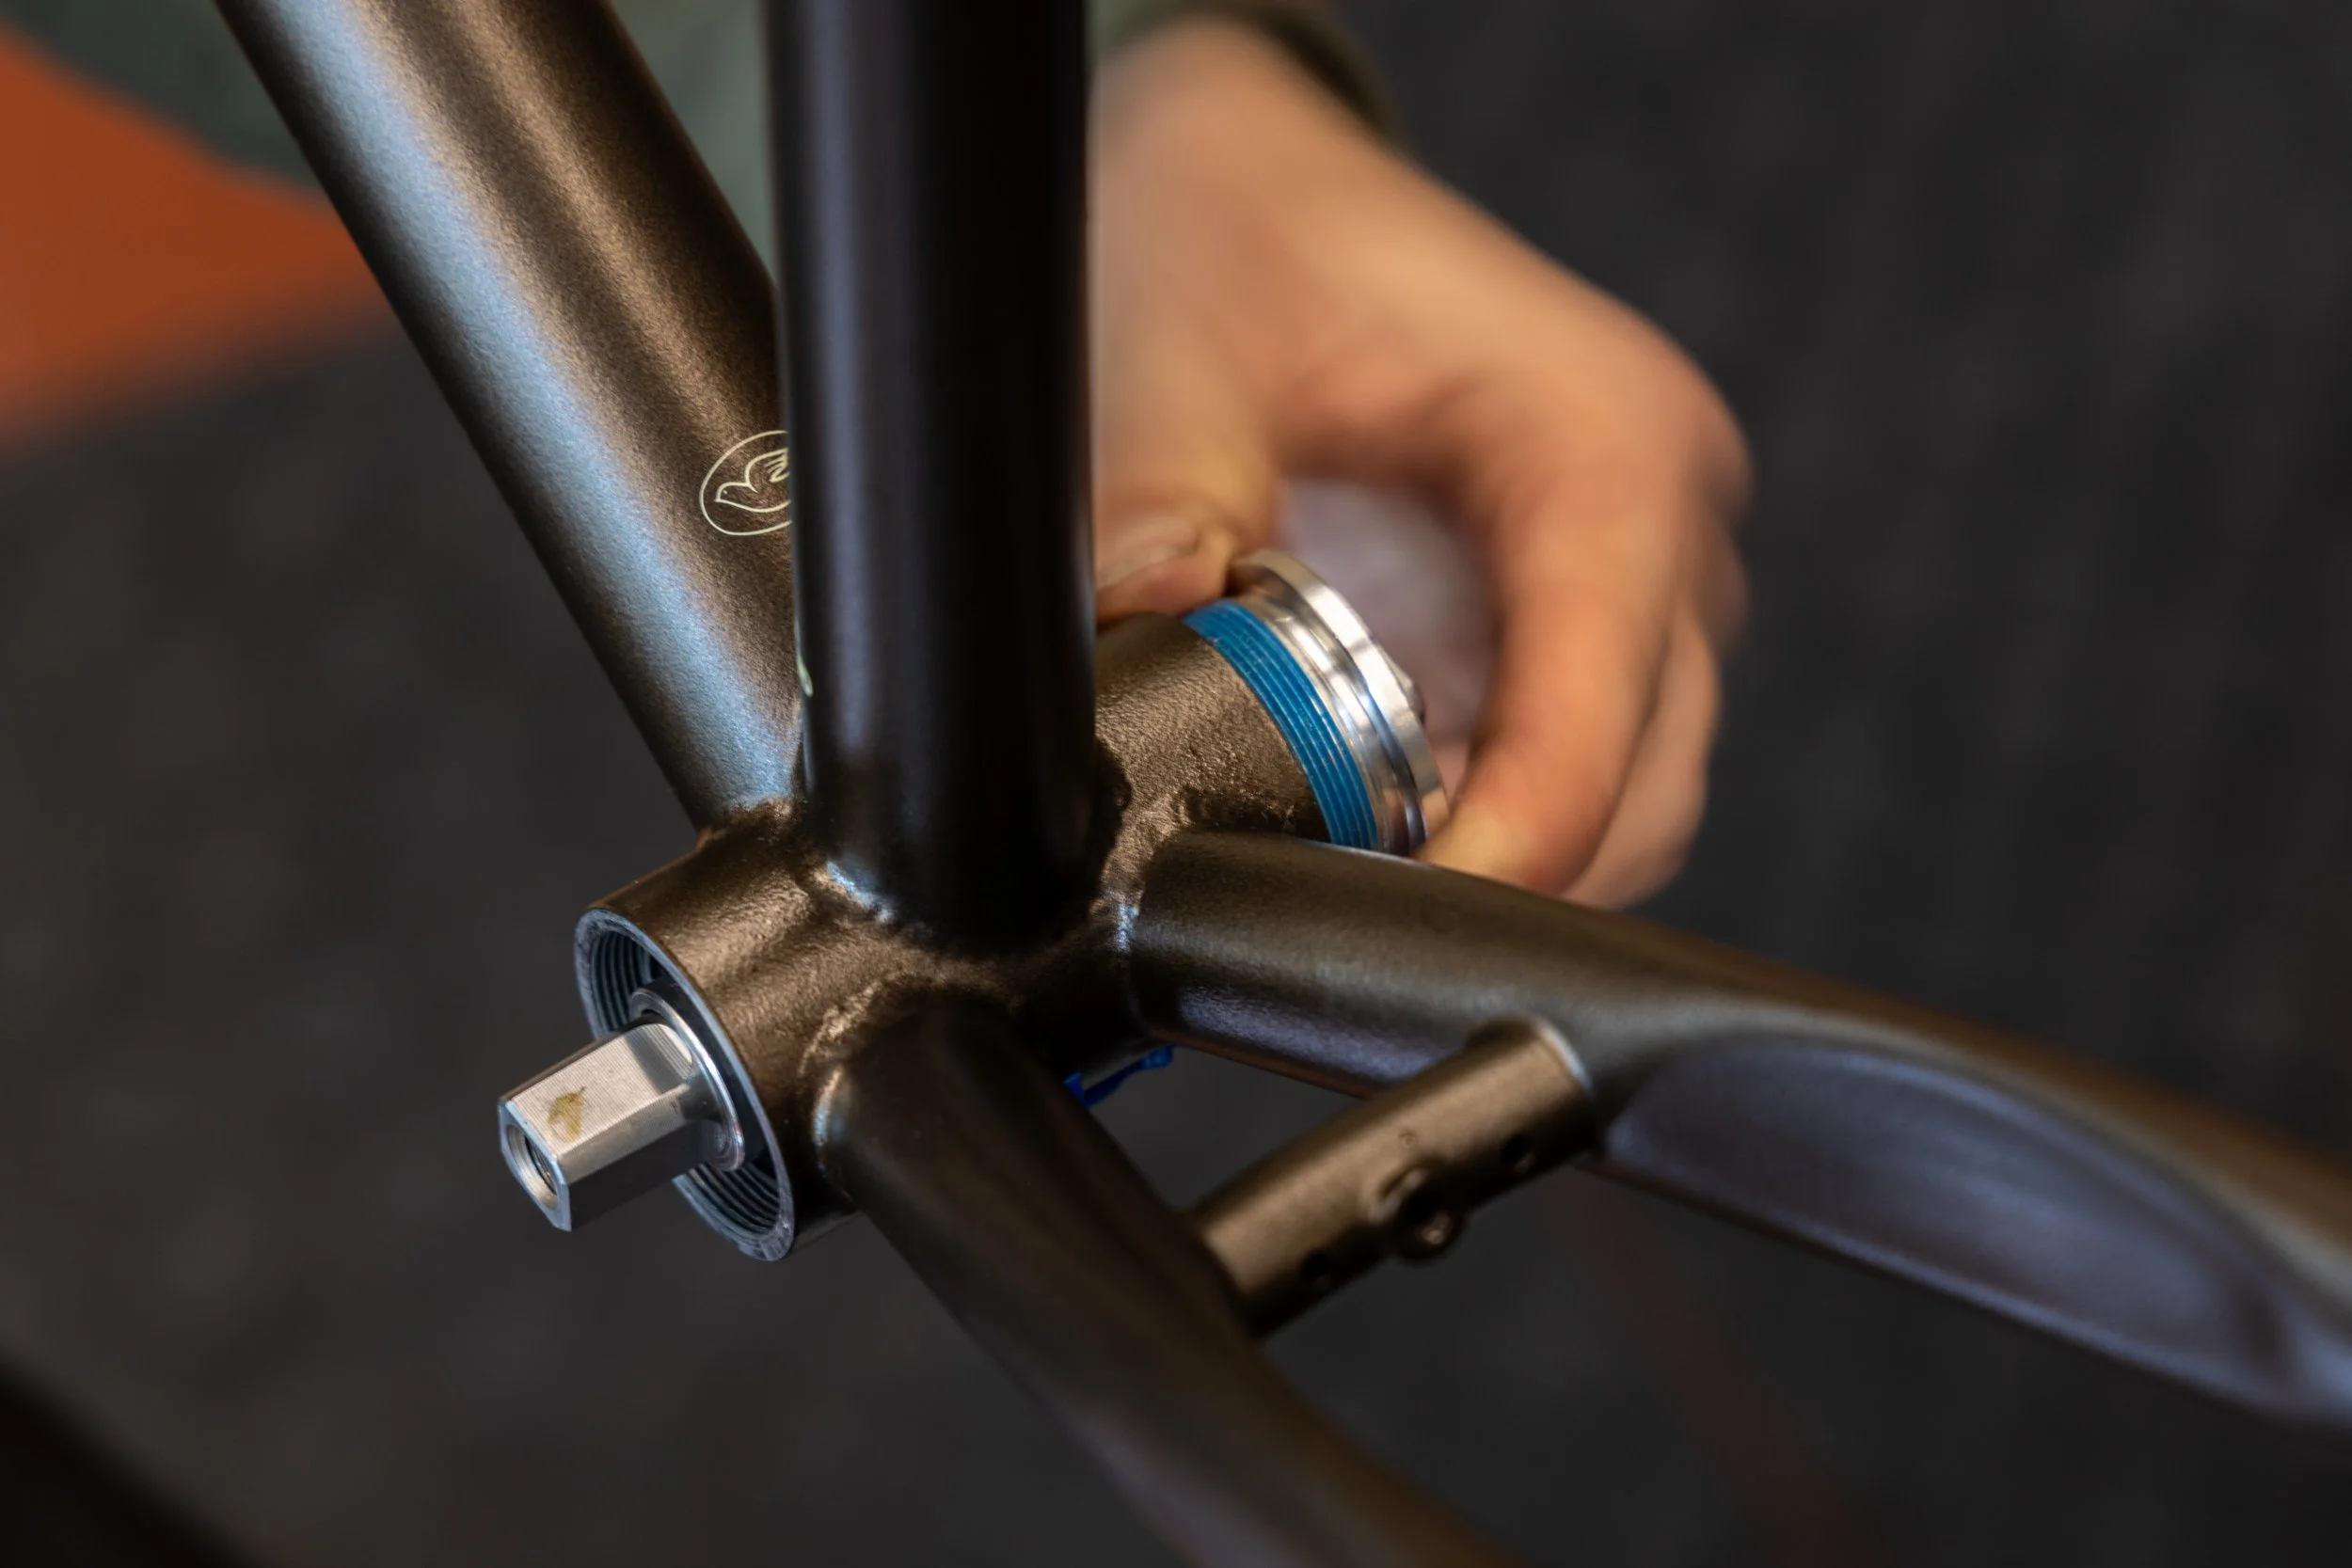
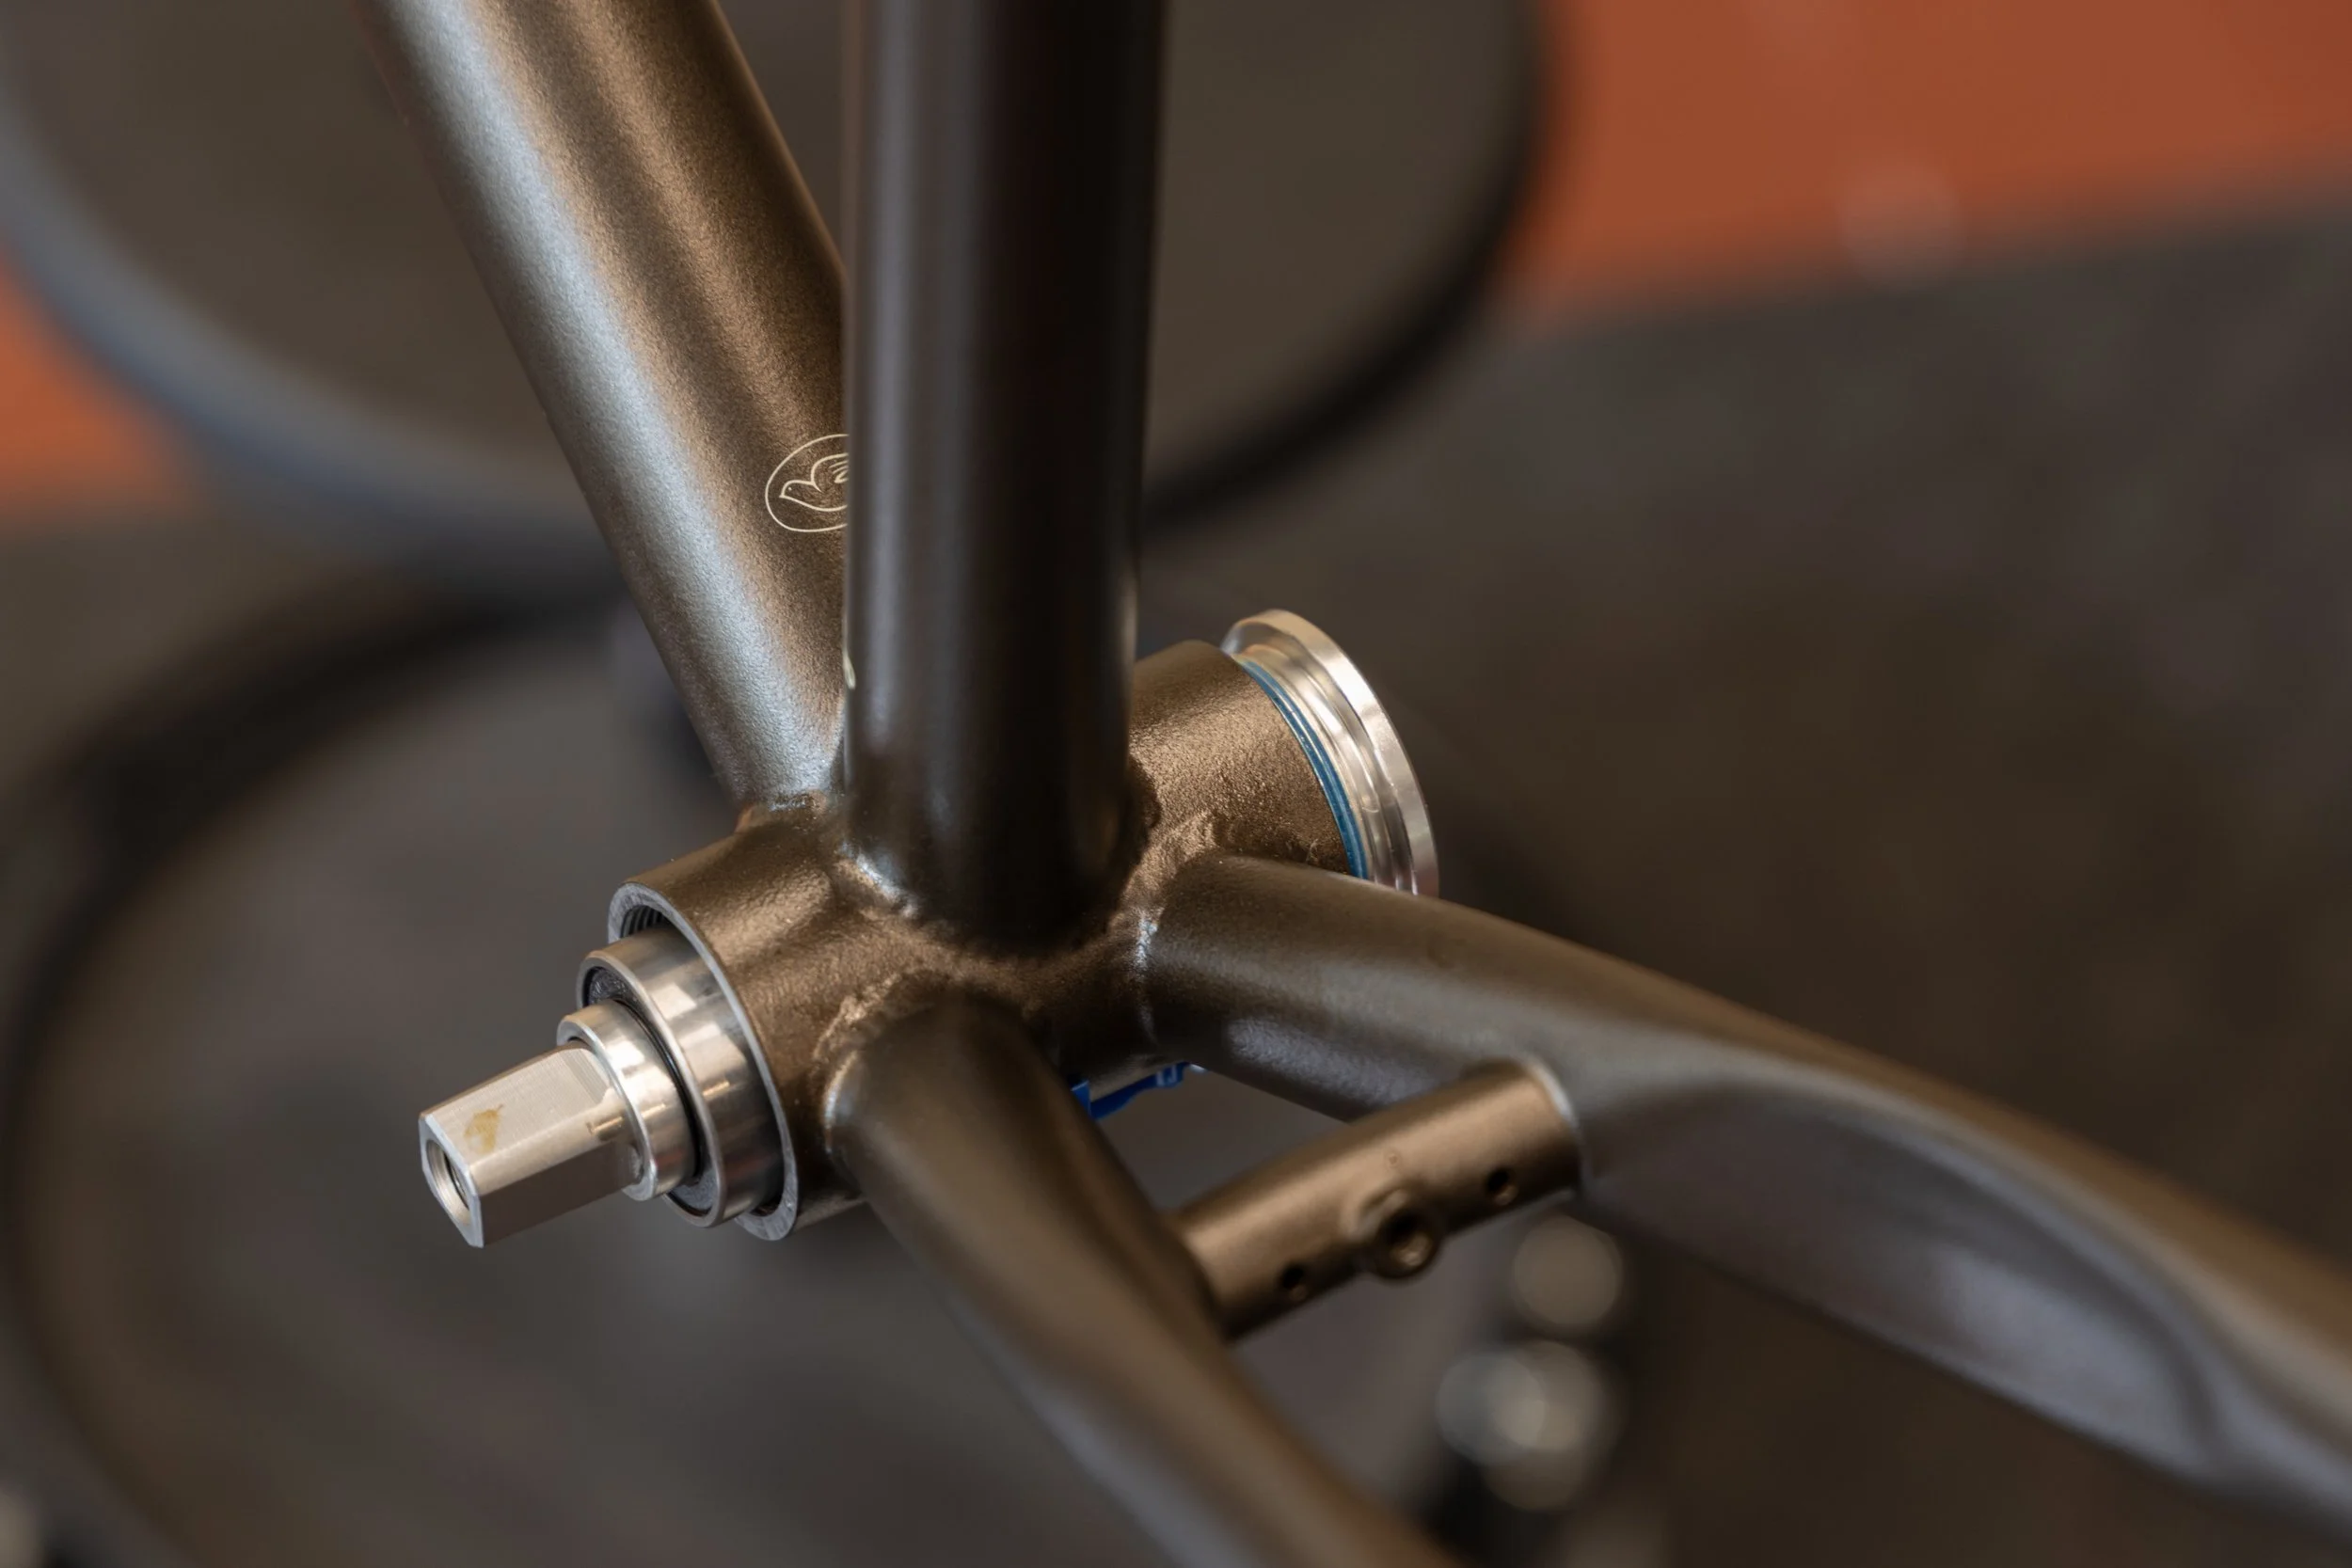
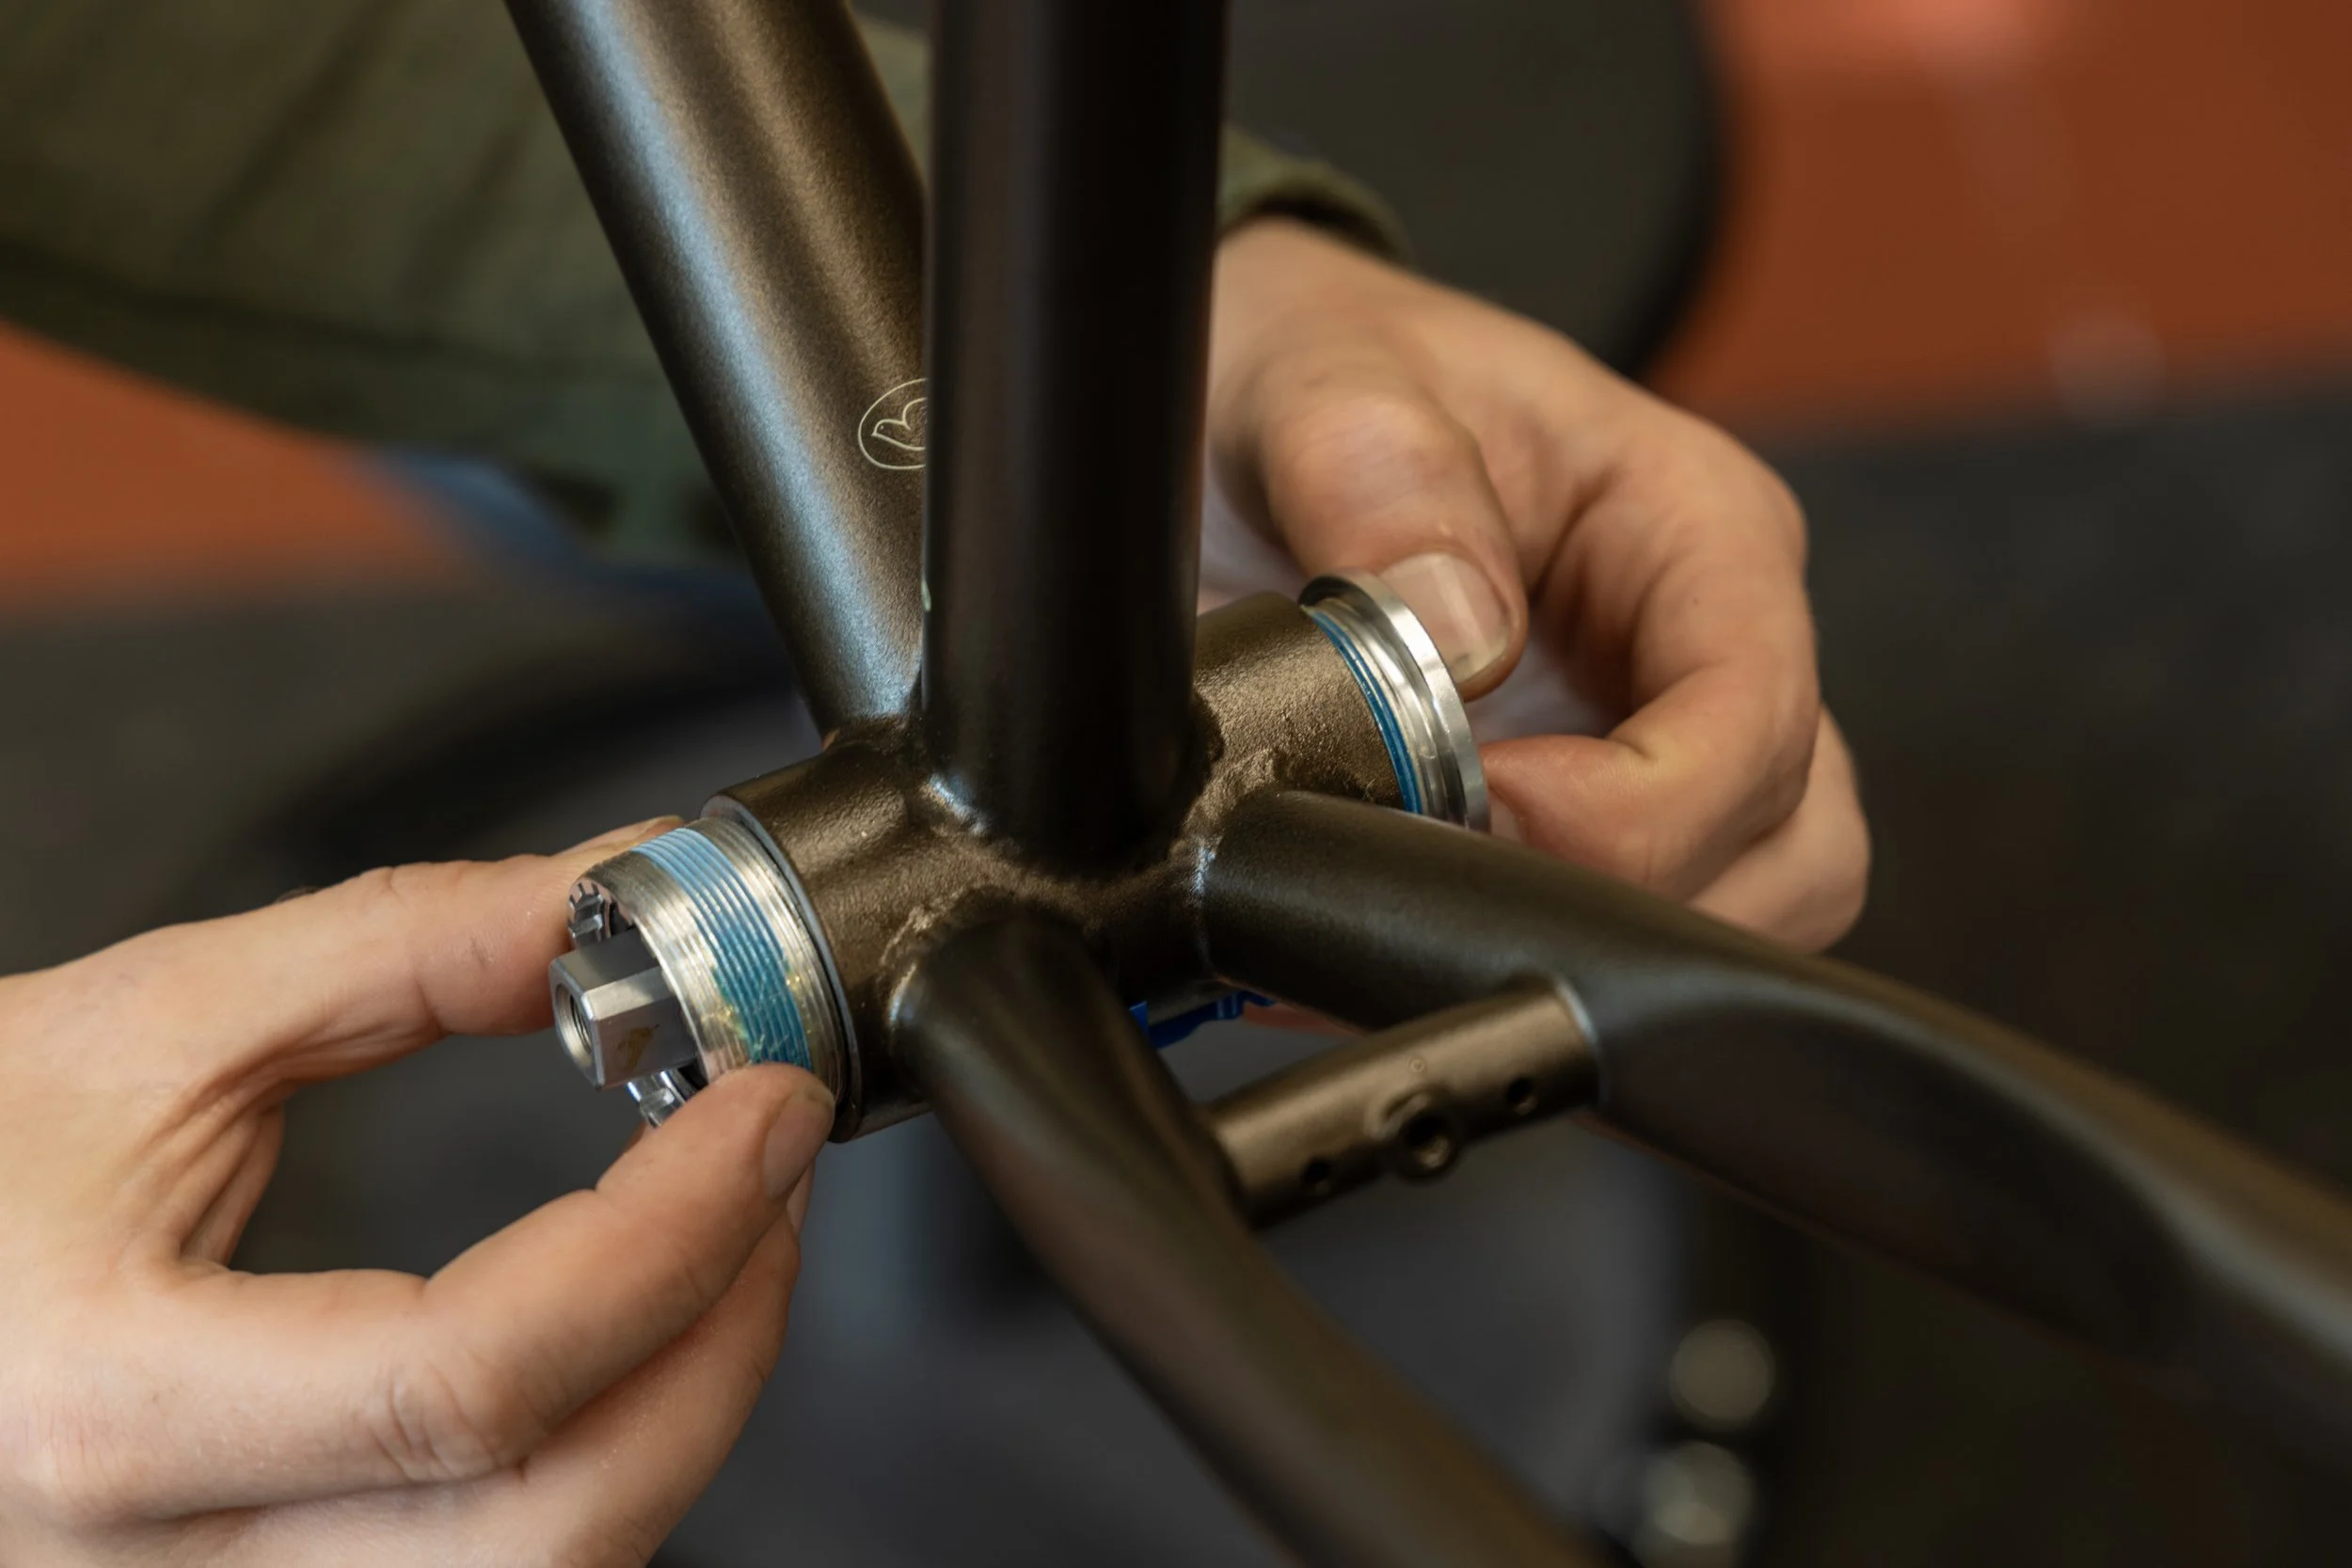
It is a delicate operation to install the BB unit with the cable in place. This is how we do it with the Genetic BB that allows removal of both cups:
Remove both cups from the BB. Carefully note which side is which!
Set the loop of cable neatly to sit above the BB unit
Insert the BB from either side, note correct orientation!
Push the loop of cable past the thick portion of the bb into the “well” of the bb unit. Using a 2mm allen key or other thin stick type object can help
Thread the right cup in a little bit, then the left cup a little bit. After both are going in straight with no force, install the bb normally, paying attention to the position of the cable to not destroy it.
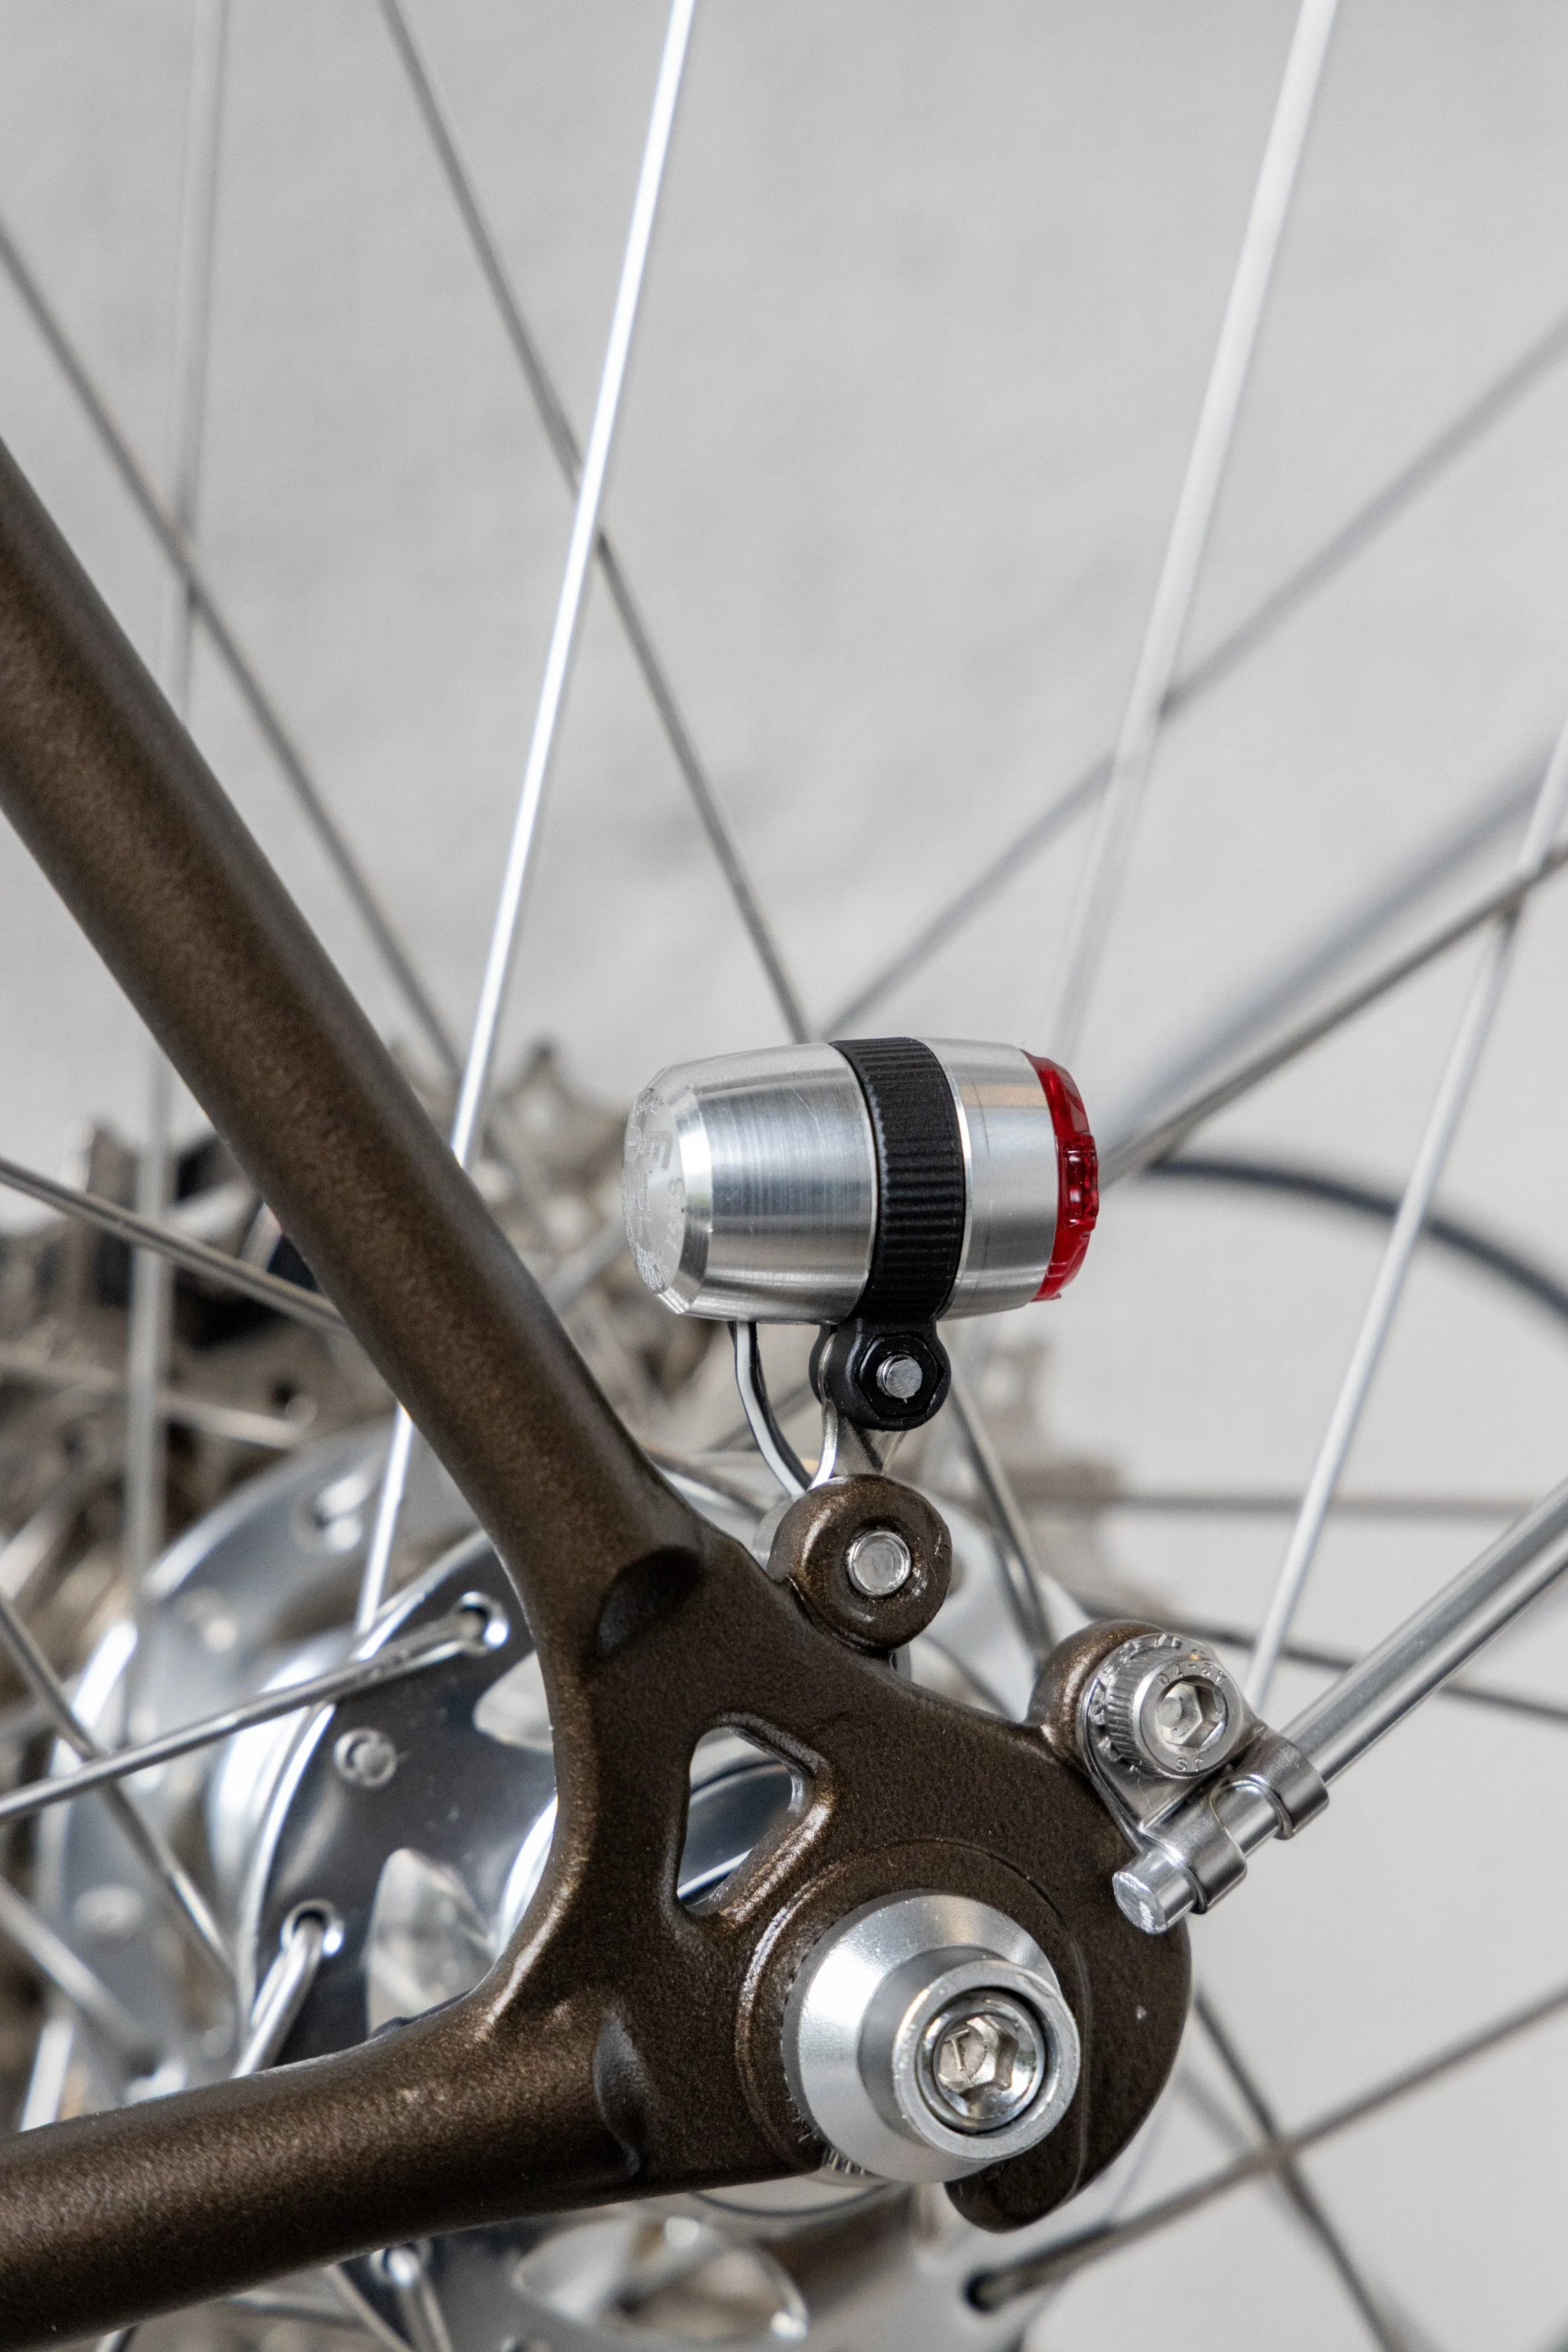
A fun DIY hack is to make a dropout light mount out of a piece of chain. A single piece of an outer link is just the right size. All you need to do is to enlarge the other hole by drilling with a 5 or 5,5mm bit, to make a standard M5 bolt pass through
Alternative:
If you want to get around the tight bb-shell and don’t mind having some exposed cable, you can make the exit at the BB shell (see next section on fender mounted lights) and route the cable externally along the left chainstay to the dropout mounted light. Electric tape, twine, cotton tape etc can be used for this.
A combination of flat 2-wire cable + external chainstay routing allows the use of almost any bottom bracket type. It’s not quite as nice as an internally routed coaxial cable, but works fine.
For the B+M dropout mounted light you will need to add spade connectors. On the flat cable it’s easy to do, just crimp them on, and add solder if you want to be really proper.
How to install spade connectors to a coaxial wire
Strip the cable for about 25-30mm (one inch). Wrap the outer strands into a clean single cable. Put a piece of thin heat shrink tubing on it, leaving about 5mm of exposed copper wire.
Strip the inner cable for about 5mm. Put a piece of heat shrink onto the Y-portion of these two cables to protect it from water. Crimp and/or solder the spade connectors in place. Add heat shrink onto these.
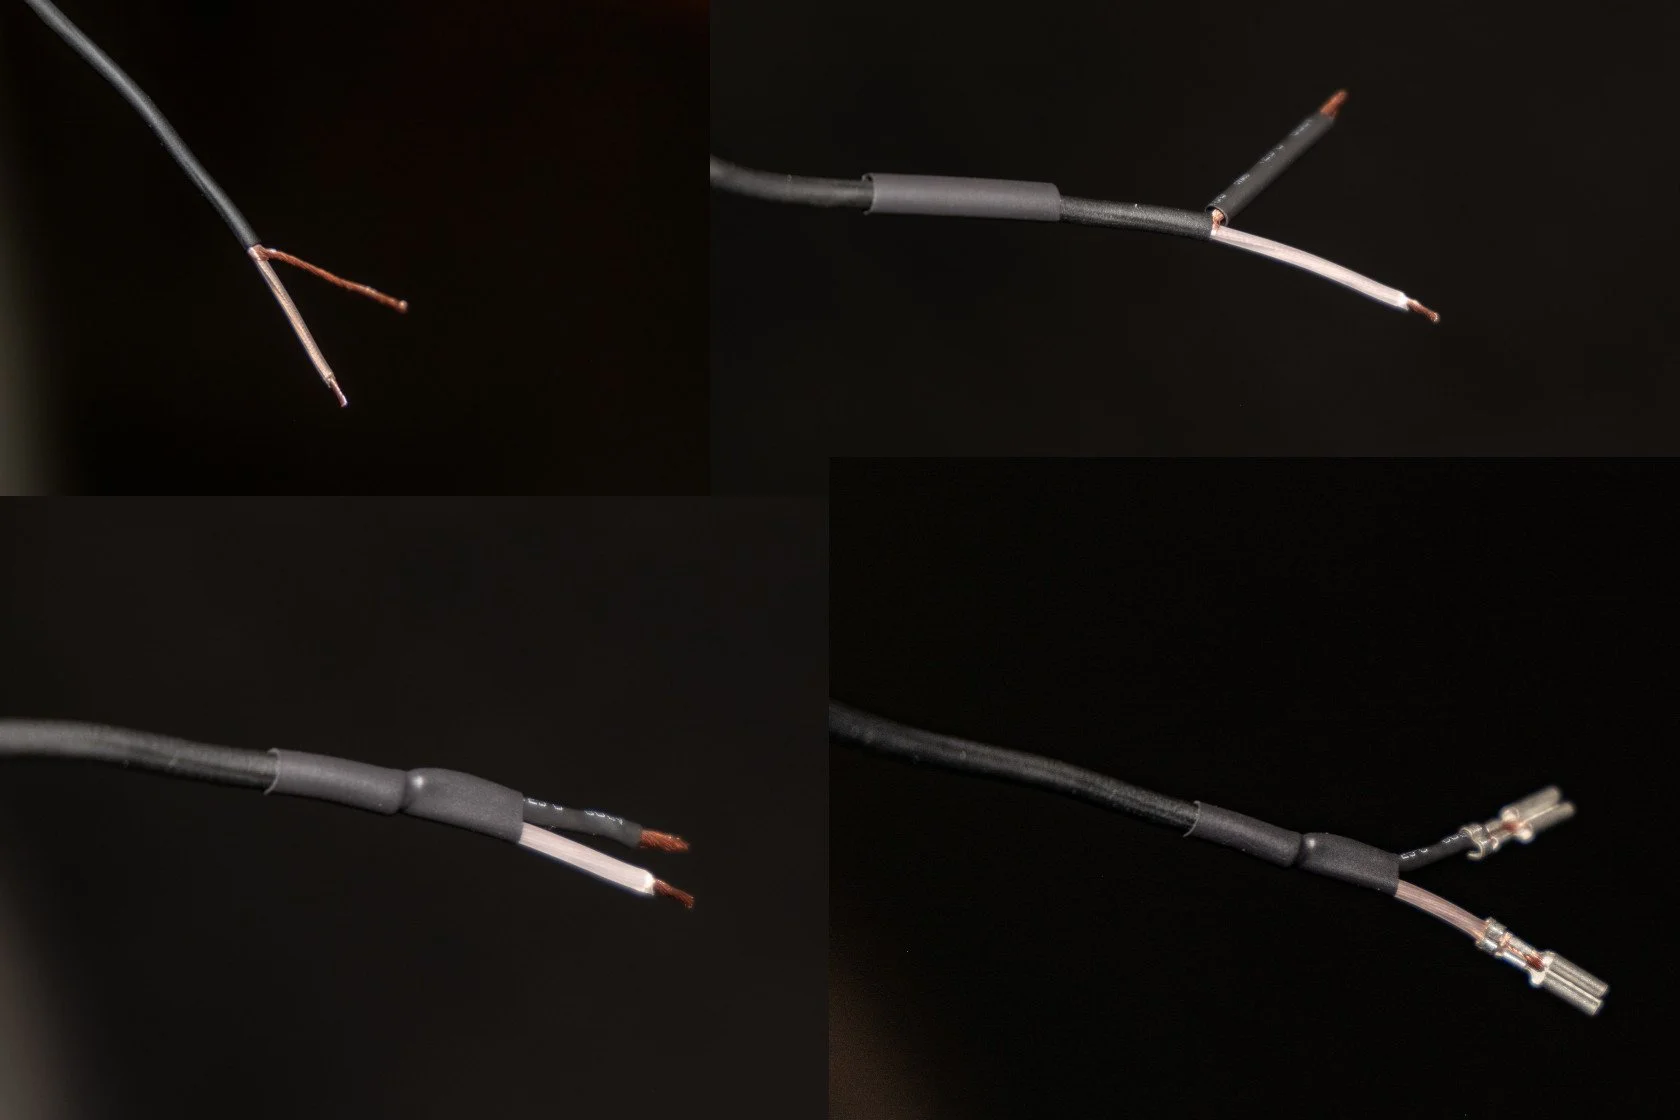
Sådär like the swedes would say
Using a fender mounted rear light
In the case of a fender mounted light, you route the cable through the downtube, past the BB and out from under the BB shell (not into the chainstay) and then inside the fender into the rear light. In most cases this is easy to do. Depending on the bottom bracket unit this might also need modification: square taper BBs with very long cups (which are rare) necessitate drilling a third hole (4-5mm diameter) under the bb shell for the cable. This is a very safe area for drilling, the BB shell is thick and strong and a small hole is not going to weaken it.
A rubber grommet can be used on the fender hole to protect the cable from sharp edges. We have these in stock.
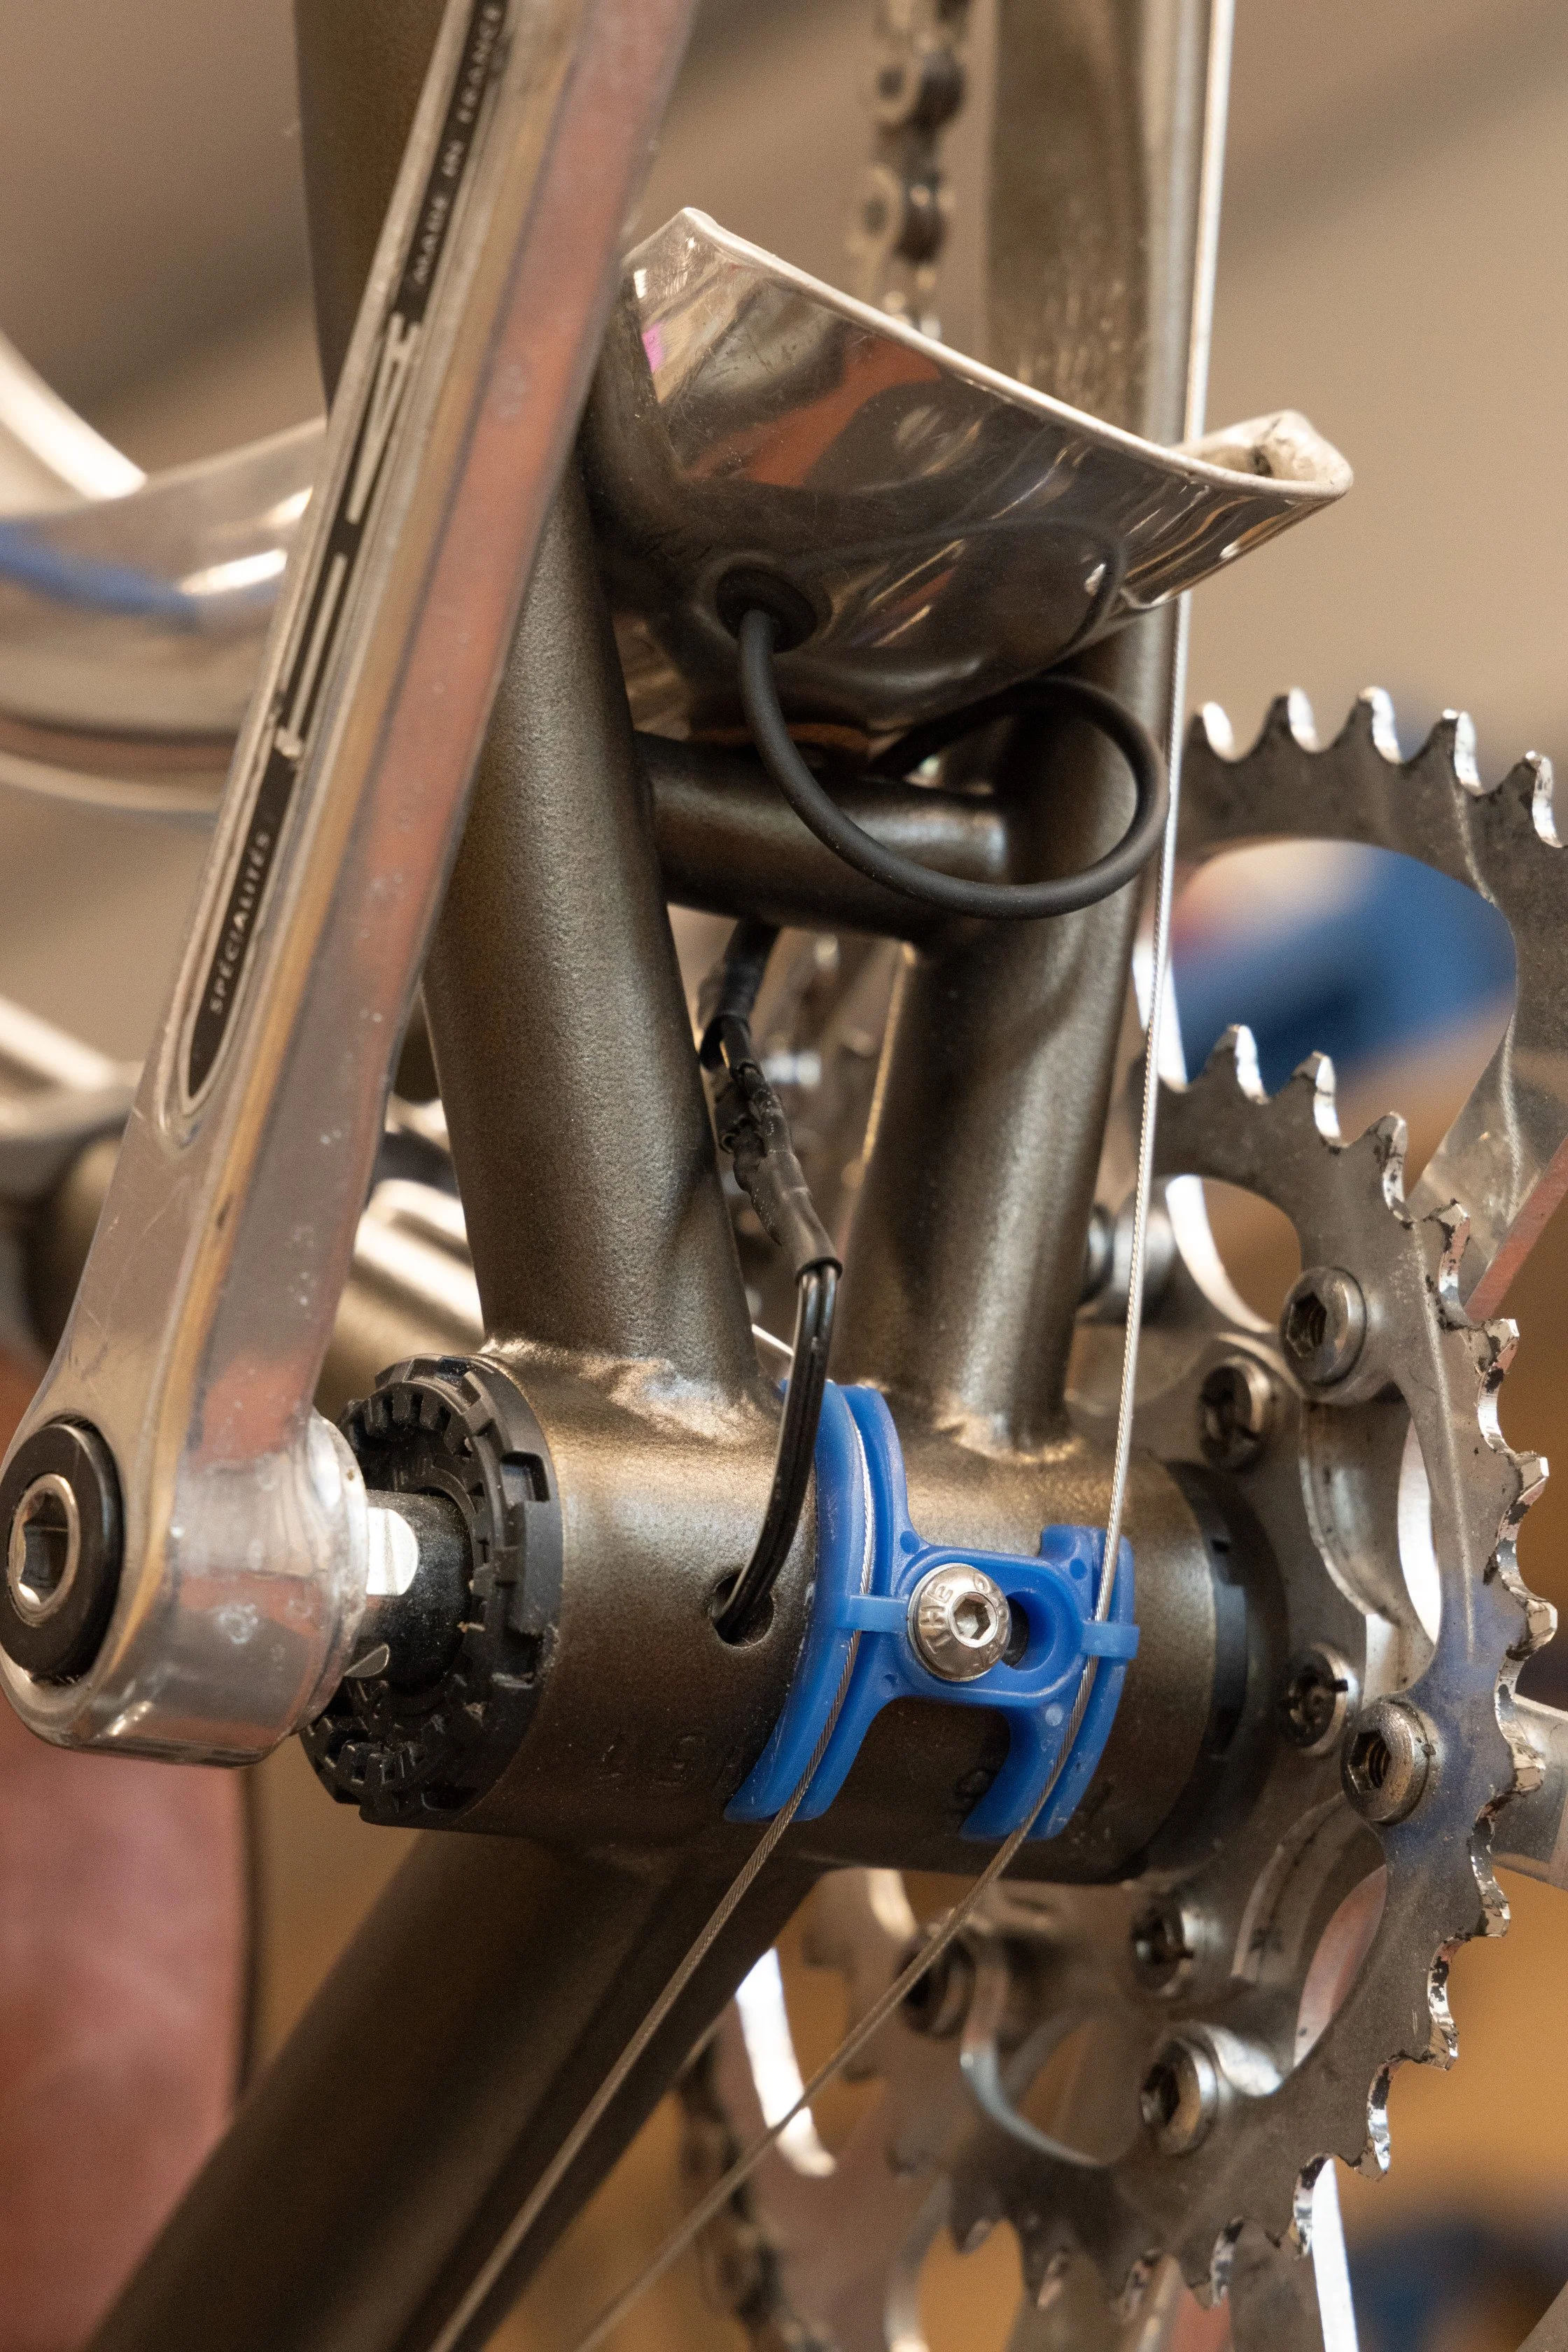
Connectors that allow disconnecting the fender from the rest of the bike. Rubber grommet to protect the cable from sharp edges
Routing cables on fenders
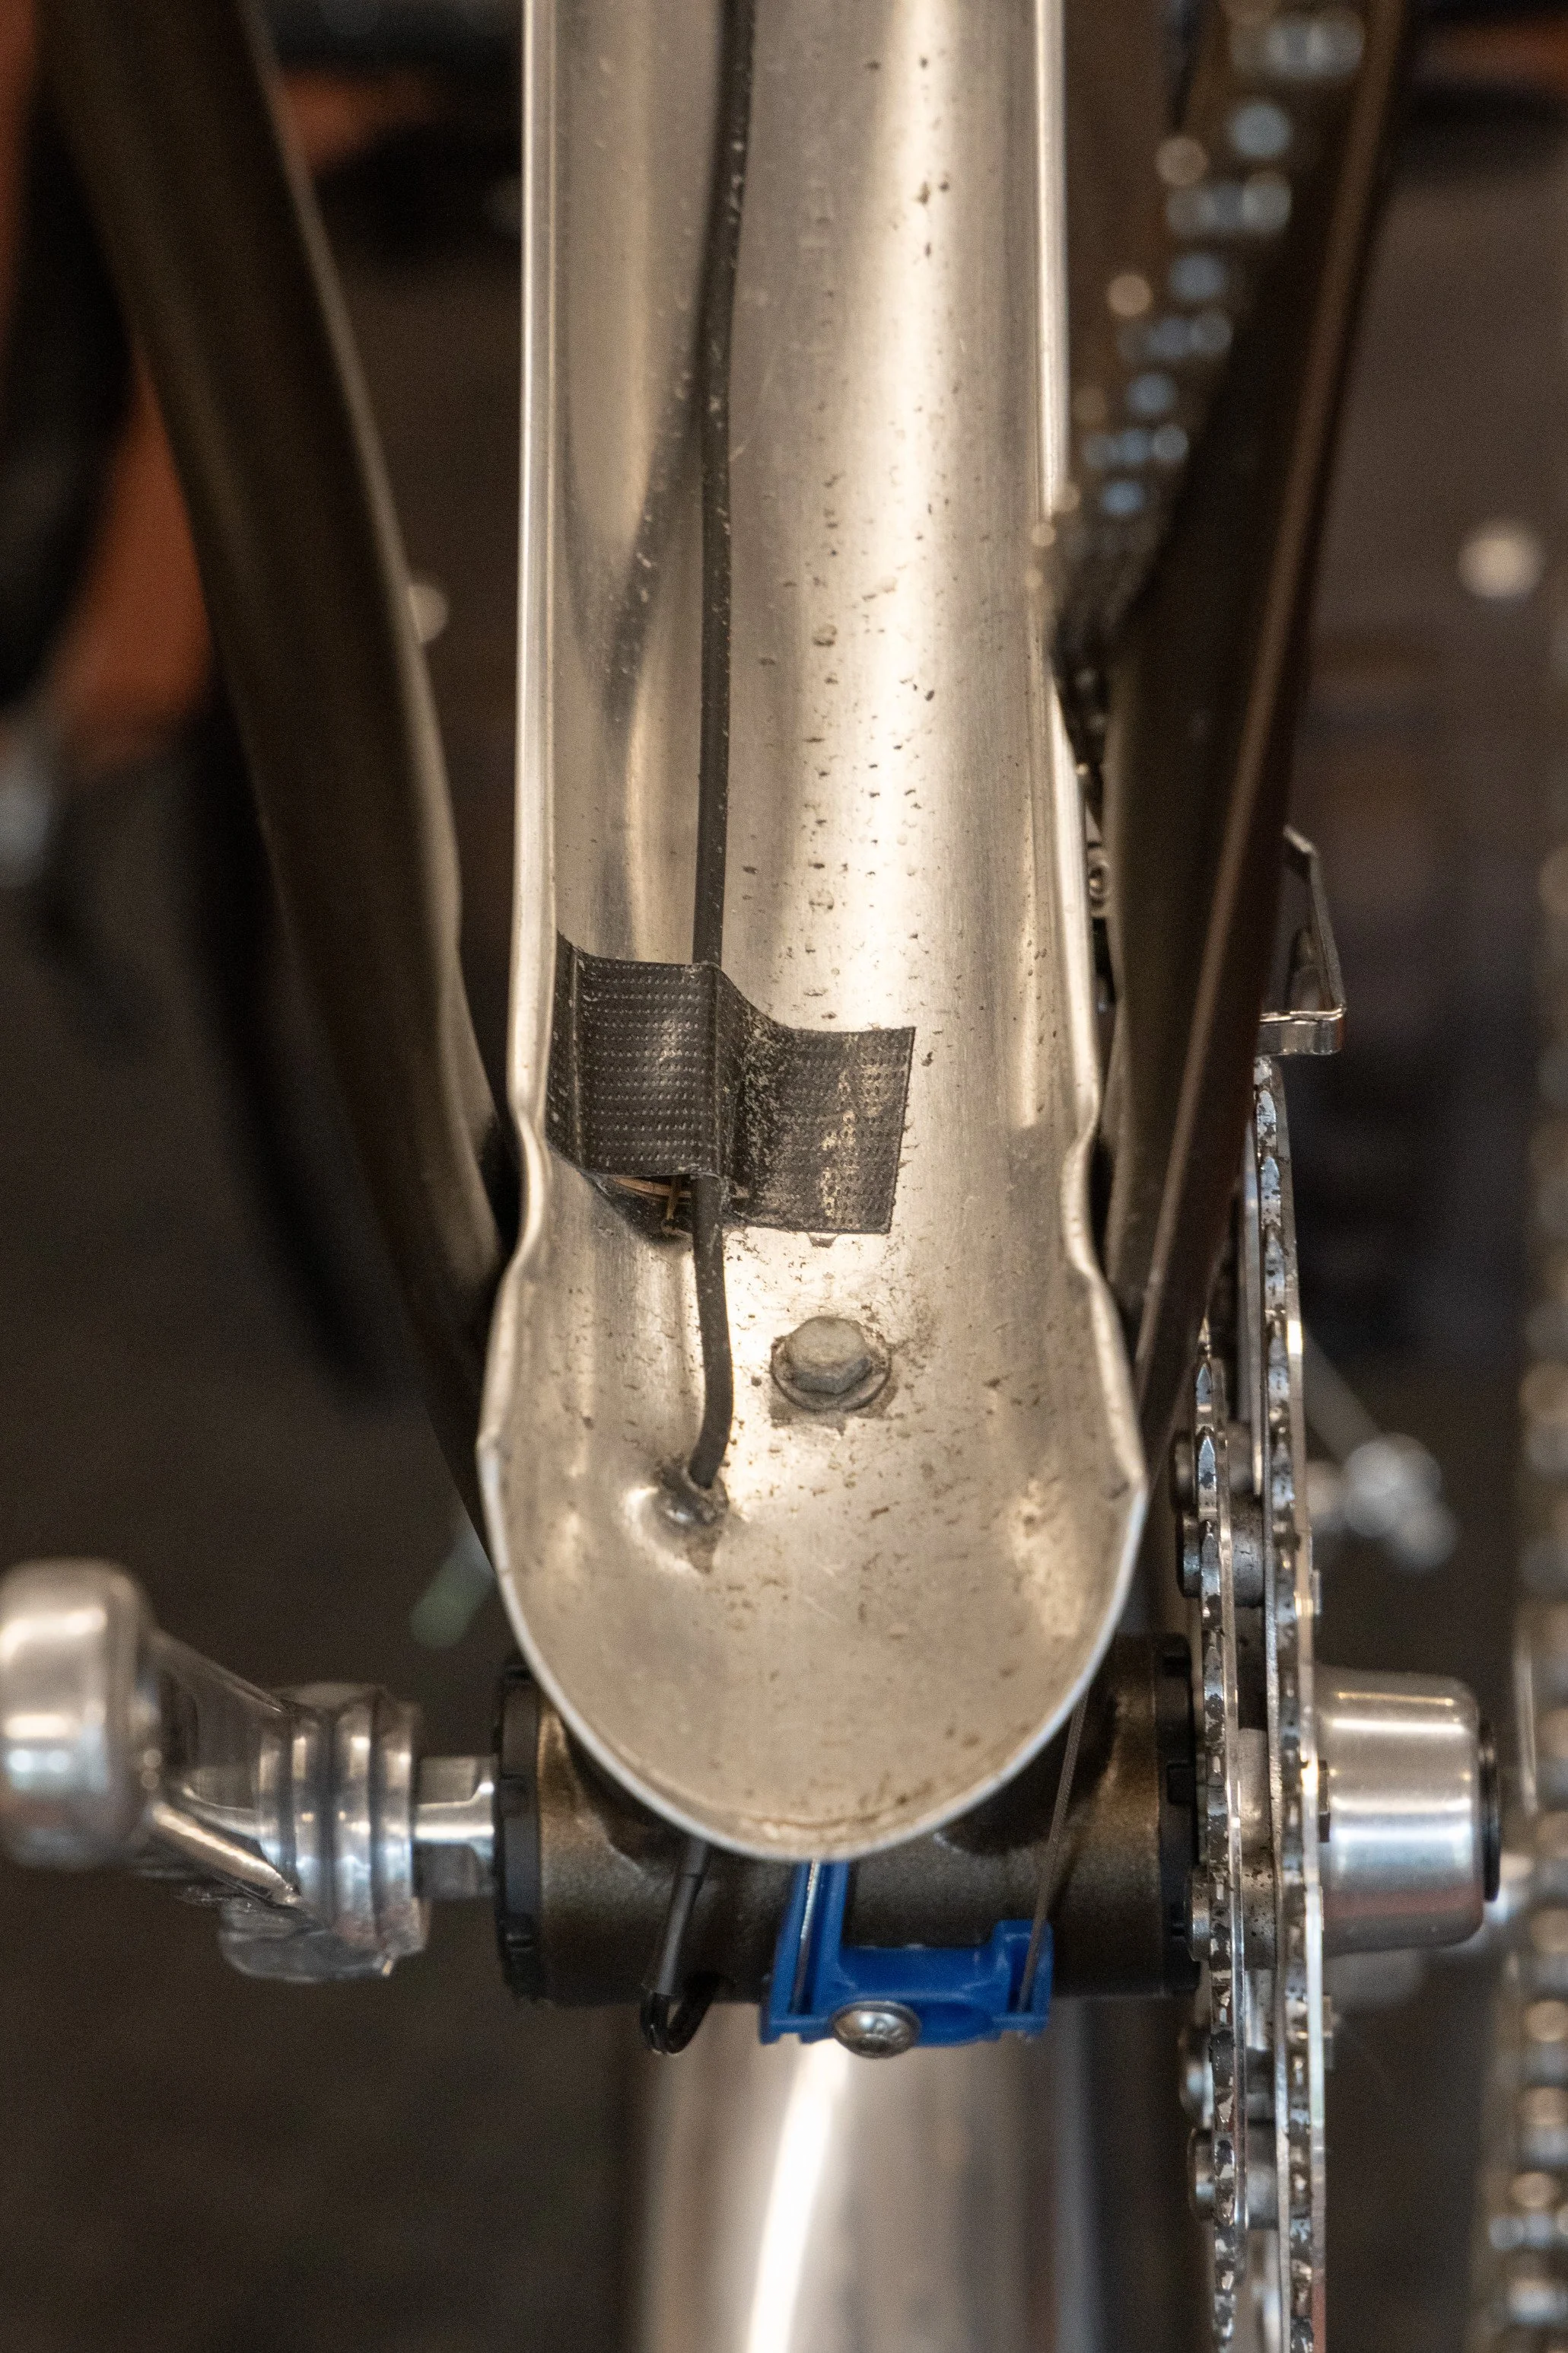
The classic way to install fender-mounted lights is to open the fender edges and install the cable inside the edge. But modern thick cables make this harder to do. Back in the olden days it was normal to use a single cable from dynamo to light only, and use the frame as the ‘ground’. It is an art form of its own to open the fender edges so we will not cover it here.
An easier, although more crude way is to tape the cable onto the fender. Use pieces of any strong tape (though aluminium tape is especially recommended, as it should resist moisture best), taping every 5-10cm or so. It’s better to use multiple shorter strips of tape, than one full-length one, that might dry and shrink and come off. Make sure the fender surface is absolutely clean before applying tape. If done right, this should last for tens of thousands of kilometers before the tape wears out.
Another solution we have heard mentioned is to use silicone or glue to put the cable in place. This should be even cleaner, but we have not yet tried it.
Using cable splitters/connectors for ease of disassembly
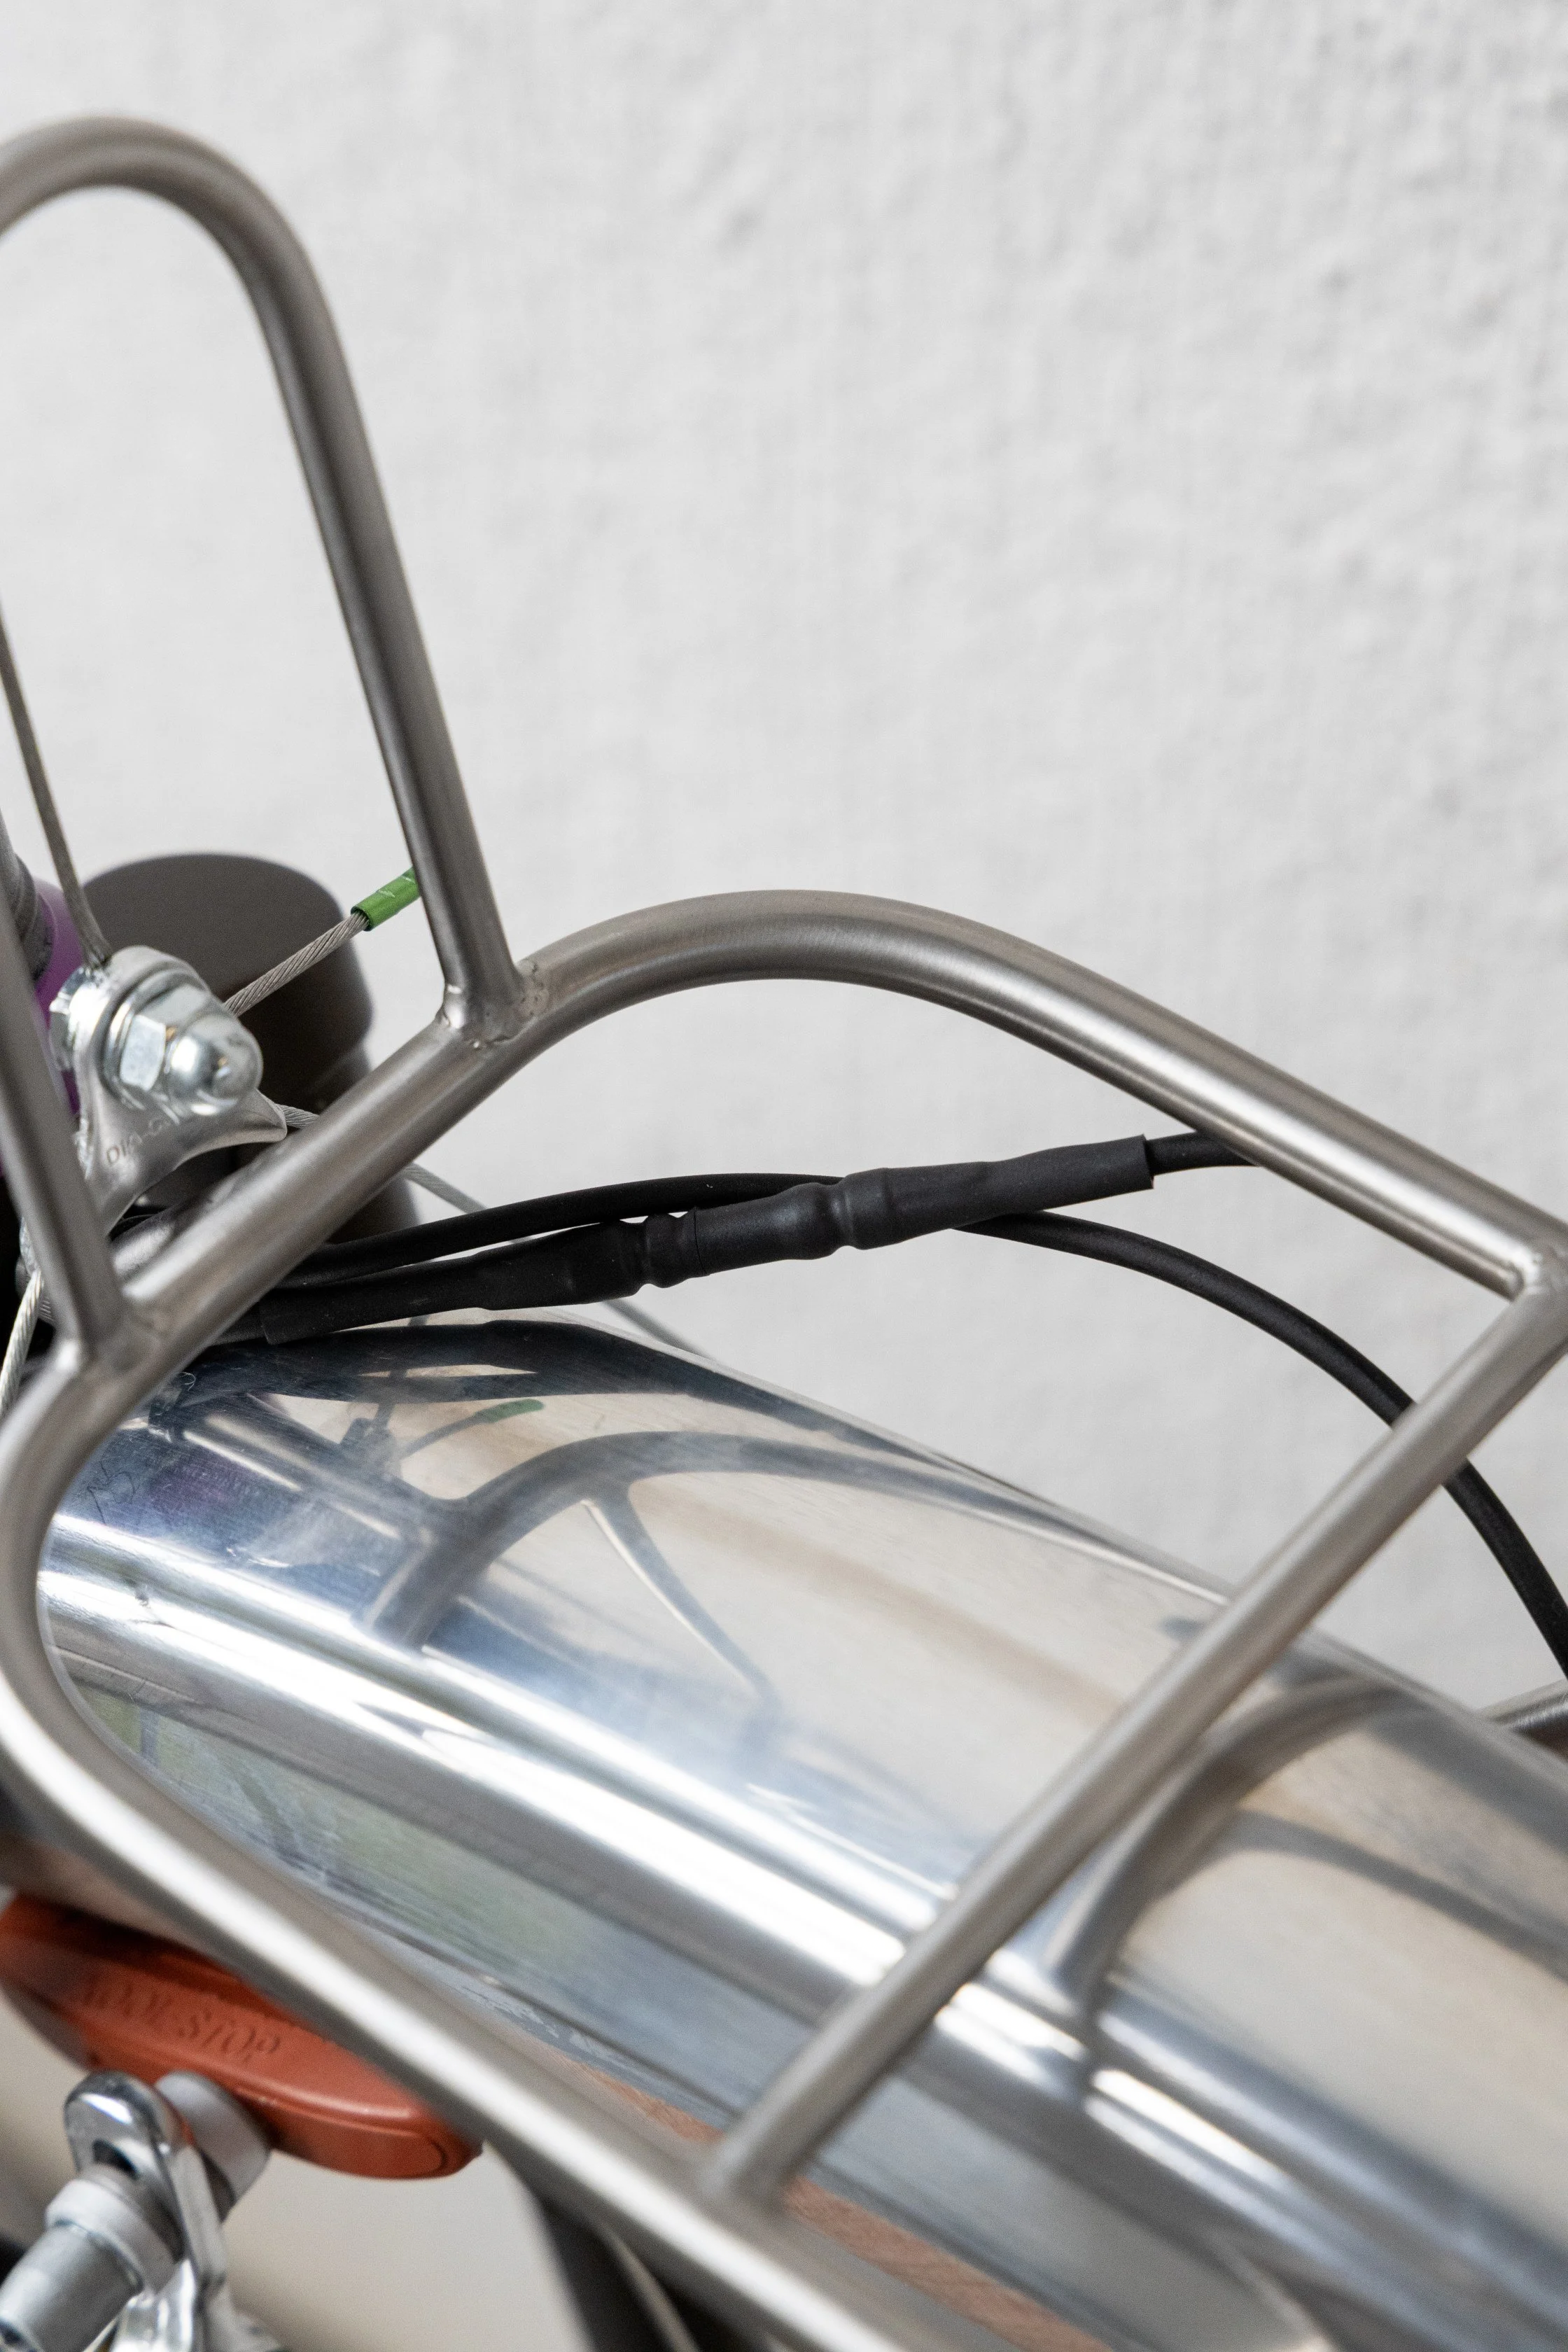
Having the cable route inside the fork and frame is nice and clean, but if you want to disassemble the bike you might notice that the cables won’t allow it! For this reason it’s best to add some connectors that can be split in strategic places.
We’d recommend putting a split both onto the front light cable, around the fork crown area, and another set onto the rear light cable, near the bottom bracket if you’re using a fender mounted rear light. The rear-dropout mounting B&M “mY” light that we sell already has its own connectors, so adding more is not necessary.
Adding a USB charger
With a hub dynamo, you can also charge your electrical devices. We sell the B+M USB-Werk for achieving this. The install is relatively simple especially if done in the first place when installing the cables. You just need to use the “Cable with junction box” and add the Coaxial adapter for the hub. The USB-WERK then cleanly can be added to the junction box.
For sake of completeness we can mention another way, that is to use piggyback connectors at the hub and install the lights and charger ‘side-by-side’. The two separate cables cannot be routed inside the fork in this case.
Conclusion
Now you can enjoy trouble free dynamo lighting year-round year after year! If you do get issues with lights not working correctly, usually the first suspect is corrosion or faulty cables in/near the connectors, so check those. Or try with a different hub and/or lamp whether those are OK.